Elevate Your Space: Designing Multi-Level Decks for Outdoor Entertainment

Elevate Your Space: Designing Multi-Level Decks for Outdoor Entertainment is a comprehensive guide to creating the perfect outdoor living space. Whether you’re looking to build a multi-level deck for entertaining guests or just want to create a relaxing outdoor retreat, this book has all the information you need. It covers everything from design considerations to construction techniques, and provides detailed instructions for building a variety of multi-level decks. With Elevate Your Space, you’ll be able to create a beautiful and functional outdoor living space that will be the envy of your neighbors.

Maximizing Your Outdoor Space: Benefits of Installing a Multi-Level Deck

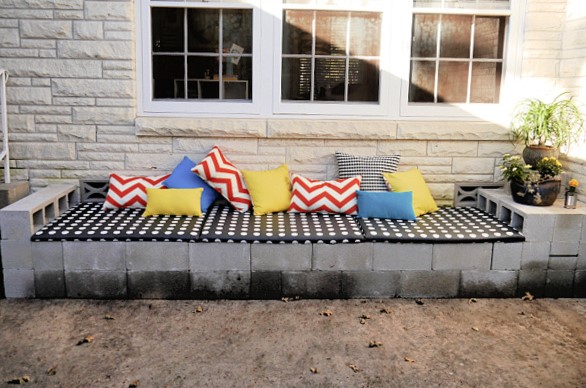
Outdoor living spaces are becoming increasingly popular as homeowners look for ways to maximize their outdoor space. One of the most effective ways to do this is to install a multi-level deck. A multi-level deck is a deck that is built on multiple levels, allowing for more usable space and a variety of design options. This type of deck can be used to create a variety of outdoor living spaces, from a cozy seating area to a large outdoor kitchen. In this article, we will discuss the benefits of installing a multi-level deck and how it can help you maximize your outdoor space.

One of the primary benefits of installing a multi-level deck is that it allows you to create multiple outdoor living spaces. By building the deck on multiple levels, you can create separate areas for different activities. For example, you can create a cozy seating area on one level and a large outdoor kitchen on another. This allows you to make the most of your outdoor space and create a variety of different outdoor living areas.

Another benefit of installing a multi-level deck is that it can help you maximize the use of your outdoor space. By building the deck on multiple levels, you can create more usable space than you would with a single-level deck. This allows you to create a larger outdoor living area and make the most of your outdoor space.

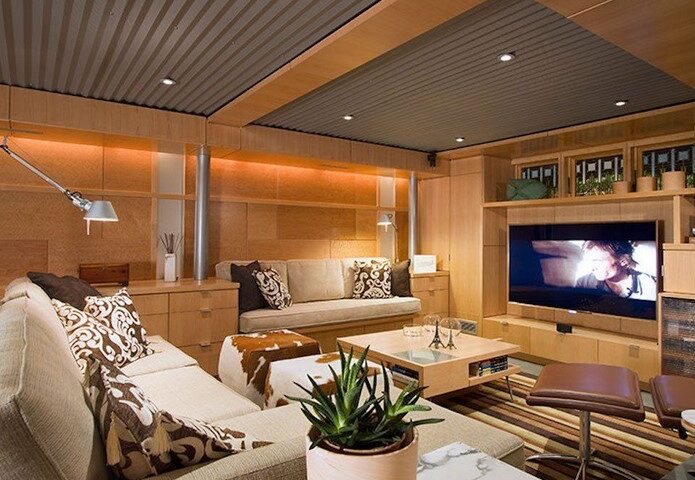
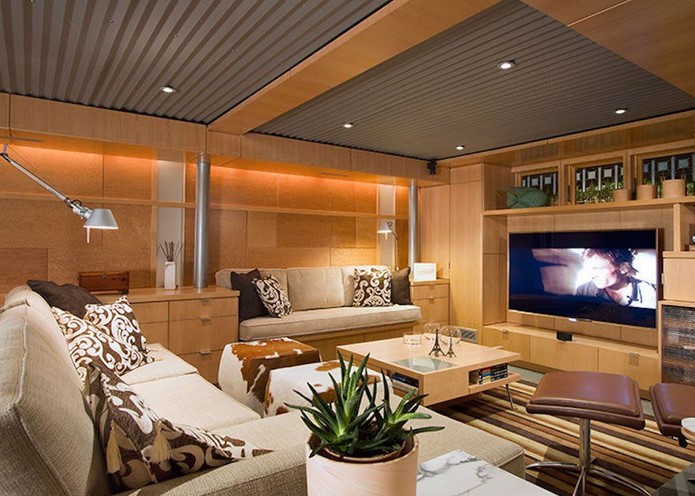
Finally, installing a multi-level deck can also help you create a unique and attractive outdoor living space. By building the deck on multiple levels, you can create a variety of different design options. This allows you to create a unique and attractive outdoor living space that is tailored to your specific needs and tastes.

In conclusion, installing a multi-level deck can be a great way to maximize your outdoor space. It allows you to create multiple outdoor living spaces, maximize the use of your outdoor space, and create a unique and attractive outdoor living space. If you are looking for ways to maximize your outdoor space, installing a multi-level deck is a great option.

Designing a Multi-Level Deck for Maximum Entertainment: Tips and Tricks

Designing a multi-level deck for maximum entertainment can be a daunting task. However, with the right tips and tricks, you can create a deck that is both aesthetically pleasing and highly functional. Here are some tips and tricks to help you design a multi-level deck that will be the envy of your neighborhood.

First, consider the size and shape of your deck. Multi-level decks are often larger than single-level decks, so you will need to plan accordingly. Consider the size of your yard and the amount of space you have available. You may also want to consider the shape of your deck, as this will affect the overall design.

Second, think about the purpose of your deck. Are you looking for a place to entertain guests or a place to relax and enjoy the outdoors? Knowing the purpose of your deck will help you determine the best design for your needs.

Third, consider the materials you will use for your deck. Wood is a popular choice for decks, but there are other materials available, such as composite and PVC. Each material has its own advantages and disadvantages, so be sure to research the pros and cons of each before making a decision.

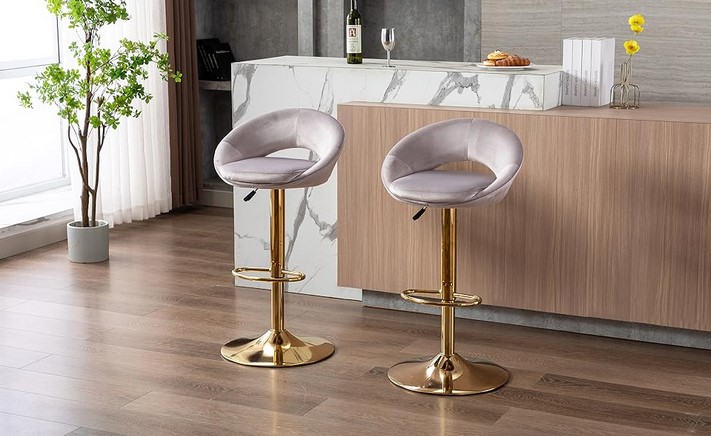
Fourth, think about the features you want to include on your deck. Do you want a built-in bar or grill? Do you want a hot tub or fire pit? Knowing what features you want to include will help you plan the layout of your deck.

Finally, consider the safety of your deck. Make sure that all railings and stairs are up to code and that the deck is properly secured to the house. You should also consider adding lighting to your deck to ensure that it is safe to use at night.

By following these tips and tricks, you can design a multi-level deck that is both aesthetically pleasing and highly functional. With the right design, your deck can be the perfect place to entertain guests or relax and enjoy the outdoors.Elevate Your Space: Designing Multi-Level Decks for Outdoor Entertainment is an invaluable resource for anyone looking to create a multi-level deck for their outdoor entertainment space. It provides detailed instructions on how to design and build a multi-level deck, as well as helpful tips and tricks for making the most of the space. With its comprehensive approach, Elevate Your Space is sure to help anyone create a beautiful and functional outdoor entertainment area.

Patio Perfection: Planning the Ideal Patio Layout for Your Outdoor Living

Space

Welcome to Patio Perfection! Here, you will find all the information you need to plan the ideal patio layout for your outdoor living space. Whether you are looking to create a cozy outdoor retreat or a luxurious entertaining area, we have the tips and tricks to help you create the perfect patio. From choosing the right furniture and accessories to creating a functional and stylish layout, we will guide you through the entire process. So, let’s get started and create the perfect patio for your outdoor living space!

How to Design the Perfect Patio Layout for Your Outdoor Living Space

Designing the perfect patio layout for an outdoor living space requires careful consideration of the available space, the desired activities, and the desired aesthetic. To begin, it is important to measure the available space and determine the size and shape of the patio. This will help to determine the size and shape of the furniture and other elements that will be included in the design.

Next, consider the activities that will take place on the patio. This will help to determine the type of furniture and other elements that should be included in the design. For example, if the patio will be used for entertaining, then seating and tables should be included. If the patio will be used for relaxing, then comfortable seating and a fire pit may be included.

Finally, consider the desired aesthetic. This will help to determine the type of materials that should be used in the design. For example, if a modern look is desired, then materials such as concrete, metal, and glass may be used. If a more traditional look is desired, then materials such as brick, stone, and wood may be used.

Once the size, shape, activities, and aesthetic have been determined, the next step is to create a plan. This plan should include the placement of furniture and other elements, as well as the type of materials that will be used. It is also important to consider the lighting and other features that will be included in the design.

By following these steps, it is possible to create the perfect patio layout for an outdoor living space. With careful consideration of the available space, desired activities, and desired aesthetic, it is possible to create a patio that is both functional and aesthetically pleasing.

Tips for Maximizing Your Patio Layout to Create the Ideal Outdoor Living Area

1. Consider the Size of Your Patio: Before you begin designing your patio layout, it is important to consider the size of your patio. This will help you determine the type of furniture and accessories that will fit comfortably in the space. Additionally, it will help you plan the layout of the patio to ensure that it is both aesthetically pleasing and functional.

2. Utilize Multi-Functional Furniture: To maximize the space on your patio, consider utilizing multi-functional furniture. This could include pieces such as an ottoman that doubles as a storage unit or a coffee table that can be used as a dining table. This type of furniture will help you make the most of the space on your patio.

3. Incorporate Seating Areas: To create an inviting outdoor living area, it is important to incorporate seating areas. This could include a seating area around a fire pit, a dining area, or a lounge area. This will provide a comfortable space for you and your guests to relax and enjoy the outdoors.

4. Utilize Vertical Space: To maximize the space on your patio, consider utilizing vertical space. This could include hanging planters, wall-mounted shelves, or even a vertical garden. This will help you make the most of the space on your patio while also adding a touch of greenery.

5. Incorporate Lighting: To create a cozy atmosphere on your patio, consider incorporating lighting. This could include string lights, lanterns, or even candles. This will help to create a warm and inviting atmosphere on your patio.

6. Add Color and Texture: To create an inviting outdoor living area, it is important to add color and texture. This could include colorful outdoor rugs, pillows, and throws. This will help to create a cozy and inviting atmosphere on your patio.

By following these tips, you can maximize the space on your patio and create the ideal outdoor living area. With the right furniture, accessories, and lighting, you can create a cozy and inviting atmosphere on your patio.Space

Patio Perfection is an invaluable resource for anyone looking to create the perfect outdoor living space. With its comprehensive guide to patio layout, design, and materials, it provides all the information needed to create a beautiful and functional patio that will be enjoyed for years to come. Whether you are looking to create a cozy outdoor retreat or a grand entertaining space, Patio Perfection has the tools and advice to help you create the perfect patio for your needs.

Welcoming Retreat: How to Build a Front Porch That Wows Your Guests

Welcome to Welcoming Retreat: How to Build a Front Porch That Wows Your Guests! Whether you’re a homeowner looking to spruce up your front porch or a contractor looking to build a porch from scratch, this guide will provide you with the information you need to create a welcoming and inviting outdoor space. We’ll cover everything from design ideas to materials and construction techniques, so you can create a porch that will be the envy of your neighborhood. With the right design and materials, you can create a porch that will be the perfect place to relax and entertain your guests. So let’s get started and create a porch that will wow your guests!

5 Tips for Creating a Welcoming Front Porch Retreat

1. Invest in Comfortable Seating: Investing in comfortable seating is essential for creating a welcoming front porch retreat. Choose seating that is both comfortable and stylish, such as a porch swing, rocking chairs, or a loveseat. Make sure the seating is large enough to accommodate multiple people.

2. Add Greenery: Adding greenery to your front porch is a great way to create a cozy and inviting atmosphere. Consider adding potted plants, hanging baskets, or window boxes to your porch. This will help to create a natural and inviting atmosphere.

3. Install Lighting: Installing lighting on your front porch is a great way to create a warm and inviting atmosphere. Consider installing string lights, lanterns, or solar lights to your porch. This will help to create a cozy and inviting atmosphere.

4. Add Color: Adding color to your front porch is a great way to create a welcoming atmosphere. Consider adding colorful pillows, rugs, or outdoor furniture to your porch. This will help to create a vibrant and inviting atmosphere.

5. Add Accessories: Adding accessories to your front porch is a great way to create a unique and inviting atmosphere. Consider adding a welcome mat, a wind chime, or a bird feeder to your porch. This will help to create a unique and inviting atmosphere.

How to Design a Front Porch That Invites Guests to Relax and Enjoy the Outdoors

Designing a front porch that invites guests to relax and enjoy the outdoors requires careful consideration of the space and its purpose. The porch should be designed to provide a comfortable and inviting atmosphere that encourages guests to linger and enjoy the outdoors.

When designing a porch, it is important to consider the size and shape of the space. A larger porch can accommodate more seating and provide more space for guests to move around. The shape of the porch should be taken into account as well, as this will affect the flow of the space and the overall aesthetic.

The furniture chosen for the porch should be comfortable and inviting. Seating should be arranged in a way that encourages conversation and relaxation. Consider adding a few pieces of outdoor furniture such as a bench, chairs, or a swing. If the porch is large enough, a table and chairs can be added for outdoor dining.

Lighting is an important element of porch design. Consider adding string lights, lanterns, or solar lights to create a warm and inviting atmosphere. If the porch is covered, consider adding ceiling fans to keep the air circulating.

Finally, consider adding plants and other decorative elements to the porch. Plants can add color and texture to the space, while decorative elements such as wind chimes or bird feeders can add a touch of whimsy.

By carefully considering the size, shape, furniture, lighting, and decorative elements of the porch, it is possible to create a space that invites guests to relax and enjoy the outdoors. With thoughtful design, a porch can become a welcoming and inviting outdoor space.The front porch of your home is the first impression your guests will have of your home, so it’s important to make sure it looks inviting and welcoming. With a few simple steps, you can create a front porch that will wow your guests and make them feel welcome. Start by choosing a style that fits your home and then add some furniture, plants, and decorations to make it look inviting. Finally, make sure to keep it clean and tidy to ensure that your guests have a pleasant experience. With a little bit of effort, you can create a front porch that will make your guests feel welcome and make your home look great.

Sail into Shade: Backyard Shade Sails for Cool and Comfortable Outdoor Spaces

Welcome to Sail into Shade! We are your go-to source for backyard shade sails that will help you create a cool and comfortable outdoor space. Our shade sails are designed to provide maximum sun protection while still allowing air to flow freely. We offer a variety of sizes, shapes, and colors to fit any outdoor space. Our sails are made from high-quality materials that are designed to last for years. With our help, you can create a beautiful and functional outdoor space that you and your family can enjoy for years to come.

How to Choose the Right Backyard Shade Sail for Your Outdoor Space

When it comes to creating a comfortable outdoor space, shade sails are an excellent option. Not only do they provide protection from the sun’s harmful UV rays, but they also add a stylish touch to any backyard. However, choosing the right shade sail for your outdoor space can be a daunting task. Here are some tips to help you make the right decision.

First, consider the size of your outdoor space. Shade sails come in a variety of sizes, so it’s important to measure the area you want to cover before making a purchase. This will help you determine the size of the sail you need.

Next, think about the shape of your outdoor space. Shade sails come in a variety of shapes, including square, rectangular, and triangular. Choose a shape that best fits the area you want to cover.

Finally, consider the material of the shade sail. Shade sails are typically made from polyester or canvas. Polyester is lightweight and durable, while canvas is heavier and more durable. Choose a material that best suits your needs.

By following these tips, you can easily choose the right backyard shade sail for your outdoor space. With the right sail, you can create a comfortable and stylish outdoor area that you and your family can enjoy for years to come.

The Benefits of Installing a Backyard Shade Sail for Your Home

Backyard shade sails are an increasingly popular way to provide shade and protection from the sun for outdoor living spaces. Shade sails are an attractive and cost-effective alternative to traditional patio covers, and they offer a number of benefits for homeowners.

The most obvious benefit of installing a backyard shade sail is the protection it provides from the sun’s harmful UV rays. Shade sails are designed to block up to 95% of the sun’s UV rays, making them an ideal choice for outdoor areas where people spend a lot of time. This protection can help reduce the risk of skin cancer and other sun-related health issues.

In addition to providing protection from the sun, shade sails also offer a number of aesthetic benefits. Shade sails come in a variety of colors and styles, allowing homeowners to customize their outdoor space to match their personal style. They can also be used to create interesting shapes and patterns in the backyard, adding visual interest to the area.

Shade sails are also a cost-effective option for providing shade. They are typically much less expensive than traditional patio covers, and they can be installed quickly and easily. This makes them a great choice for homeowners who want to add shade to their outdoor space without breaking the bank.

Finally, shade sails are a great way to add privacy to an outdoor space. The fabric of the sail blocks out the view from the outside, making it a great choice for homeowners who want to create a private oasis in their backyard.

Overall, installing a backyard shade sail is a great way to add shade, protection, and privacy to an outdoor space. The cost-effectiveness, ease of installation, and aesthetic benefits make them an attractive option for homeowners looking to upgrade their outdoor living space.Sail into Shade: Backyard Shade Sails for Cool and Comfortable Outdoor Spaces is an excellent resource for anyone looking to create a cool and comfortable outdoor space. With its comprehensive guide to shade sails, helpful tips, and detailed instructions, this book is sure to help you create the perfect backyard oasis. Whether you’re looking for a simple solution or a more complex design, Sail into Shade has the information you need to make your outdoor space a comfortable and inviting place to relax and enjoy the outdoors.

DIY Roof Revival: Tips and Tricks for a Successful Roof Replacement Project

DIY Roof Revival is a comprehensive guide to help homeowners successfully replace their roof. It provides tips and tricks to help you plan, budget, and execute a successful roof replacement project. From choosing the right materials to understanding the installation process, this guide will help you make the most of your roof replacement project. Whether you are a first-time DIYer or an experienced roofer, this guide will provide you with the information you need to ensure a successful roof replacement.

How to Prepare Your Home for a DIY Roof Replacement: Tips and Tricks for a Successful Project

Replacing a roof is a major undertaking, and it is important to ensure that the project is done correctly. Preparing your home for a DIY roof replacement is essential for a successful project. Here are some tips and tricks to help you get started.

1. Make sure you have the right tools and materials. Before beginning the project, make sure you have all the necessary tools and materials. This includes a ladder, roofing nails, roofing felt, roofing shingles, roofing cement, and a hammer.

2. Clear the area around the roof. Before beginning the project, make sure to clear the area around the roof. This includes removing any debris, such as leaves and branches, and trimming any overhanging branches.

3. Inspect the roof. Before beginning the project, inspect the roof for any damage or signs of wear and tear. If any damage is found, it should be repaired before the project begins.

4. Remove the old roofing material. Once the area is cleared and the roof is inspected, the old roofing material should be removed. This includes removing the shingles, felt, and nails.

5. Install the new roofing material. Once the old roofing material is removed, the new roofing material should be installed. This includes laying down the felt, nailing down the shingles, and applying the roofing cement.

6. Clean up the area. Once the project is complete, make sure to clean up the area. This includes removing any debris and sweeping up any nails or other materials that may have been left behind.

Following these tips and tricks will help ensure that your DIY roof replacement project is successful. With the right preparation and attention to detail, you can be sure that your new roof will last for years to come.

What to Look for When Choosing Materials for Your DIY Roof Replacement: Tips for Selecting the Right Products for Your Home

When it comes to replacing your roof, selecting the right materials is essential for ensuring the longevity and quality of your roof. DIY roof replacement can be a great way to save money, but it is important to make sure you are selecting the right materials for your home. Here are some tips for selecting the right products for your DIY roof replacement:

1. Consider the Climate: Different climates require different roofing materials. For example, in areas with high humidity, asphalt shingles may not be the best choice as they can be prone to mold and mildew. In areas with extreme temperatures, metal roofing may be a better option as it is more resistant to heat and cold.

2. Consider the Style: Different roofing materials can also have different aesthetic effects. Asphalt shingles are a popular choice for many homes, but metal roofing can give a more modern look. Consider the style of your home and the look you are trying to achieve when selecting materials.

3. Consider the Cost: Different roofing materials can have different costs. Asphalt shingles are generally the most affordable option, while metal roofing can be more expensive. Consider your budget when selecting materials for your DIY roof replacement.

4. Consider the Durability: Different roofing materials can have different levels of durability. Asphalt shingles are generally more durable than metal roofing, but metal roofing can last longer in extreme climates. Consider the climate and the expected lifespan of the roof when selecting materials.

5. Consider the Maintenance: Different roofing materials can require different levels of maintenance. Asphalt shingles require regular maintenance to prevent mold and mildew, while metal roofing requires less maintenance. Consider the amount of maintenance you are willing to do when selecting materials for your DIY roof replacement.

By following these tips, you can ensure that you are selecting the right materials for your DIY roof replacement. Make sure to consider the climate, style, cost, durability, and maintenance when selecting materials for your roof. With the right materials, you can ensure that your roof will last for years to come.DIY Roof Revival is an invaluable resource for anyone looking to replace their roof. It provides detailed instructions on how to properly prepare for a roof replacement project, as well as tips and tricks to ensure a successful outcome. With the help of this guide, homeowners can save time and money by taking on the project themselves. DIY Roof Revival is an essential tool for anyone looking to replace their roof and ensure a successful outcome.

Lavender Dreams: Discover the Tranquility of Lavender Paint Colors

Source : https://www.bergerpaints.com

Lavender Dreams is a collection of beautiful lavender paint colors that will bring a sense of tranquility and peace to any home. Whether you are looking to create a calming atmosphere in your bedroom, living room, or bathroom, Lavender Dreams has the perfect shade of lavender to suit your needs. From soft pastels to deep purples, this collection of lavender paint colors will help you create a space that is both inviting and relaxing. With its calming properties, lavender is the perfect choice for creating a peaceful and serene atmosphere in your home. So, if you are looking to add a touch of tranquility to your home, look no further than Lavender Dreams.

How to Create a Relaxing Space with Lavender Paint Colors

Creating a relaxing space with lavender paint colors can be a great way to create a calming atmosphere in any room. Lavender is a soft, muted color that can be used to create a tranquil and peaceful environment. It is also a versatile color that can be used in a variety of ways to create a unique and inviting atmosphere.

When selecting a lavender paint color, it is important to consider the size of the room and the amount of natural light it receives. For smaller rooms, a lighter shade of lavender can be used to create a more airy and open feel. For larger rooms, a darker shade of lavender can be used to create a more intimate and cozy atmosphere. Additionally, the type of lighting used in the room should be taken into consideration when selecting a lavender paint color. Natural light can help to bring out the subtle nuances of the color, while artificial light can make the color appear brighter and more vibrant.

Once the color has been selected, it is important to consider the other elements in the room. Furniture, artwork, and accessories should all be chosen to complement the lavender paint color. Neutral colors such as white, gray, and beige can be used to create a calming and soothing atmosphere. Additionally, adding a few accent pieces in shades of purple or pink can help to bring out the beauty of the lavender paint color.

Finally, it is important to consider the type of finish used on the walls. A matte finish can help to create a more subtle and calming atmosphere, while a glossy finish can help to bring out the vibrancy of the color. Additionally, adding a few layers of paint can help to create a more textured look.

By carefully selecting a lavender paint color and considering the other elements in the room, it is possible to create a relaxing and inviting space. With the right combination of colors, furniture, and accessories, a lavender-painted room can be a great way to create a tranquil and peaceful atmosphere.

The Benefits of Lavender Paint Colors for a Calming Bedroom Retreat

The use of lavender paint colors in a bedroom can create a calming and tranquil atmosphere, making it the perfect retreat for relaxation and rest. Lavender is a soft, muted hue that is associated with peace and tranquility, making it an ideal choice for a bedroom. The color has been shown to reduce stress and anxiety, and can even help to improve sleep quality.

Lavender paint colors can be used to create a soothing and calming atmosphere in the bedroom. The color is known to have a calming effect on the mind and body, and can help to reduce stress and anxiety. Lavender is also known to be a color that promotes relaxation and restfulness, making it the perfect choice for a bedroom.

The use of lavender paint colors can also help to create a sense of balance and harmony in the bedroom. The color is known to be calming and soothing, and can help to create a sense of peace and tranquility. Lavender is also known to be a color that promotes creativity and imagination, making it a great choice for a bedroom.

The use of lavender paint colors can also help to create a sense of warmth and comfort in the bedroom. The color is known to be calming and soothing, and can help to create a cozy and inviting atmosphere. Lavender is also known to be a color that promotes relaxation and restfulness, making it the perfect choice for a bedroom.

The use of lavender paint colors can also help to create a sense of serenity and peace in the bedroom. The color is known to be calming and soothing, and can help to create a peaceful and tranquil atmosphere. Lavender is also known to be a color that promotes relaxation and restfulness, making it the perfect choice for a bedroom.

In conclusion, the use of lavender paint colors in a bedroom can create a calming and tranquil atmosphere, making it the perfect retreat for relaxation and rest. The color is known to be calming and soothing, and can help to reduce stress and anxiety. Lavender is also known to be a color that promotes relaxation and restfulness, making it the perfect choice for a bedroom.Lavender Dreams: Discover the Tranquility of Lavender Paint Colors is a great resource for anyone looking to add a calming and peaceful atmosphere to their home. With its wide range of shades and hues, it is easy to find the perfect lavender paint color to fit any style. Whether you are looking for a subtle hint of lavender or a bold statement, this book provides the perfect inspiration for creating a tranquil and inviting space.

Creative Cinder Blocks: Innovative Ideas for Using Cinder Blocks in Your Space

Source : https://www.creatingreallyawesomefunthings.com

Cinder blocks are a versatile and affordable building material that can be used to create a variety of projects. From furniture to garden walls, cinder blocks can be used to create unique and creative designs. In this article, we will explore some of the innovative ideas for using cinder blocks in your space. From outdoor seating to planters, cinder blocks can be used to create a variety of projects that will add style and function to your outdoor space. We will also discuss the different types of cinder blocks available and how to choose the right one for your project. So, if you’re looking for a creative and affordable way to spruce up your outdoor space, cinder blocks are a great option.

10 Creative Ways to Use Cinder Blocks to Transform Your Home

Cinder blocks are a versatile and affordable building material that can be used to create a variety of structures and designs. From outdoor furniture to interior walls, cinder blocks can be used to transform any home. Here are 10 creative ways to use cinder blocks to transform your home:

1. Create a Fire Pit: Cinder blocks can be used to create a fire pit in your backyard. Stack the blocks in a circle and fill the center with gravel or sand. This is a great way to enjoy a cozy fire with friends and family.

2. Build a Garden Bed: Cinder blocks can be used to create a raised garden bed. Stack the blocks in a square or rectangle and fill the center with soil. This is a great way to grow vegetables and herbs in a small space.

3. Make a Planter: Cinder blocks can be used to make a planter for your favorite flowers or plants. Stack the blocks in a square or rectangle and fill the center with soil. This is a great way to add a pop of color to your outdoor space.

4. Construct a Bench: Cinder blocks can be used to construct a bench for your outdoor space. Stack the blocks in a square or rectangle and fill the center with soil. This is a great way to create a comfortable seating area.

5. Build a Wall: Cinder blocks can be used to build a wall in your home. Stack the blocks in a square or rectangle and fill the center with mortar. This is a great way to create a partition or add privacy to a room.

6. Create a Coffee Table: Cinder blocks can be used to create a unique coffee table. Stack the blocks in a square or rectangle and fill the center with glass or wood. This is a great way to add a modern touch to your living room.

7. Make a Bookshelf: Cinder blocks can be used to make a bookshelf. Stack the blocks in a square or rectangle and fill the center with wood or metal shelves. This is a great way to store books and other items in a stylish way.

8. Construct a Bar: Cinder blocks can be used to construct a bar in your home. Stack the blocks in a square or rectangle and fill the center with wood or metal shelves. This is a great way to entertain guests in style.

9. Build a Grill: Cinder blocks can be used to build a grill in your backyard. Stack the blocks in a square or rectangle and fill the center with charcoal or wood. This is a great way to enjoy a delicious barbecue with friends and family.

10. Make a Pathway: Cinder blocks can be used to make a pathway in your garden or yard. Stack the blocks in a square or rectangle and fill the center with gravel or sand. This is a great way to create a beautiful walkway in your outdoor space.

These are just a few of the creative ways to use cinder blocks to transform your home. With a little imagination and some hard work, you can create a unique and stylish space that is sure to impress.

How to Incorporate Cinder Blocks into Your Garden Design for a Unique Look

Cinder blocks are a versatile and affordable material that can be used to create unique and eye-catching garden designs. With a few simple steps, you can incorporate cinder blocks into your garden design to create a unique and attractive look.

First, decide where you want to place the cinder blocks in your garden. Consider the size and shape of the blocks and how they will fit into the overall design. You may want to use them as a border around a flower bed or as a raised bed for vegetables.

Once you have decided where to place the cinder blocks, you can begin to assemble them. Start by laying the blocks in the desired pattern. Make sure to use a level to ensure that the blocks are even and level. Secure the blocks together with mortar or concrete.

Once the blocks are in place, you can begin to add soil and plants. If you are using the blocks as a raised bed, you can fill the bed with soil and then add plants. If you are using the blocks as a border, you can fill the area between the blocks with soil and then add plants.

Finally, you can add decorative elements to the cinder blocks. You can paint the blocks in a variety of colors or add decorative accents such as stones or shells. You can also add lighting to the blocks to create a unique nighttime look.

By incorporating cinder blocks into your garden design, you can create a unique and attractive look that will be the envy of your neighbors. With a few simple steps, you can transform your garden into a beautiful and unique outdoor space.Creative Cinder Blocks offer a unique and innovative way to add a touch of style and personality to any space. With a variety of shapes, sizes, and colors, cinder blocks can be used to create a variety of interesting and eye-catching designs. Whether you’re looking to add a touch of rustic charm to your outdoor space or create a modern and stylish look indoors, cinder blocks can be used to create a unique and beautiful space. With a little creativity and imagination, cinder blocks can be used to create a space that is both functional and aesthetically pleasing.

Down-to-Earth Elegance: Creative and Cheap Basement Ceiling Ideas

Source : https://i.pinimg.com

Welcome to Down-to-Earth Elegance: Creative and Cheap Basement Ceiling Ideas! If you’re looking for a way to spruce up your basement without breaking the bank, you’ve come to the right place. Here, you’ll find a variety of creative and affordable basement ceiling ideas that will help you transform your space into something special. From rustic wood beams to modern drop ceilings, we’ve got you covered. So, let’s get started and explore some of the best basement ceiling ideas around!

Get Creative with Your Basement Ceiling: Inexpensive Ideas for a Down-to-Earth Elegant Look

Creating an elegant look in a basement can be a challenge, as the space is often limited and the ceiling is often low. However, with a few creative and inexpensive ideas, it is possible to transform a basement into a stylish and inviting space.

One of the most cost-effective ways to add a touch of elegance to a basement ceiling is to paint it a light color. White or light gray are popular choices, as they reflect light and make the space appear larger. If the ceiling is textured, consider using a textured paint to add visual interest. For a more dramatic look, consider painting the ceiling a darker color, such as navy blue or charcoal gray.

Another way to add a touch of elegance to a basement ceiling is to install a suspended ceiling. Suspended ceilings are available in a variety of materials, including wood, metal, and plastic. They can be painted to match the walls or left in their natural state for a more rustic look. Suspended ceilings are also a great way to hide any unsightly pipes or ductwork.

If you are looking for a more unique look, consider installing a tin ceiling. Tin ceilings are available in a variety of patterns and colors, and they can be painted to match the walls or left in their natural state. Tin ceilings are a great way to add a touch of vintage charm to a basement.

Finally, consider adding a few decorative touches to the ceiling. Hanging a chandelier or pendant light is a great way to add a touch of elegance to a basement. You can also hang a few wall sconces or install a few recessed lights to create a warm and inviting atmosphere.

By using a few creative and inexpensive ideas, it is possible to transform a basement into a stylish and inviting space. With a few simple changes, you can create an elegant look that will make your basement the envy of the neighborhood.

Transform Your Basement with These Budget-Friendly Ceiling Ideas for a Touch of Elegance

Transforming a basement into a comfortable and stylish living space can be a challenge, especially when working with a limited budget. Fortunately, there are a variety of budget-friendly ceiling ideas that can add a touch of elegance to any basement. From suspended ceilings to decorative moldings, these ideas can help you create a beautiful and inviting space without breaking the bank.

Suspended Ceilings

Suspended ceilings are a great way to add a modern touch to any basement. These ceilings are made up of lightweight panels that are suspended from the existing ceiling joists. They are easy to install and can be painted or wallpapered to match the rest of the room. Suspended ceilings are also great for hiding any unsightly pipes or ductwork that may be present in the basement.

Decorative Moldings

Decorative moldings are a great way to add a touch of elegance to any basement. These moldings can be used to frame the ceiling, creating a more finished look. They can also be used to create a border around the ceiling, adding a unique and stylish touch. Decorative moldings are available in a variety of materials, including wood, metal, and plastic, so you can find the perfect look for your basement.

Painted Ceilings

Painting the ceiling is another great way to add a touch of elegance to any basement. A light color can help to brighten up the space, while a darker color can create a more dramatic look. You can also use stencils or wall decals to create a unique pattern on the ceiling. Painting the ceiling is a relatively inexpensive way to add a touch of style to any basement.

Ceiling Tiles

Ceiling tiles are a great way to add texture and interest to any basement. These tiles come in a variety of materials, including wood, metal, and plastic, so you can find the perfect look for your space. Ceiling tiles are also easy to install and can be painted or wallpapered to match the rest of the room.

These budget-friendly ceiling ideas can help you transform your basement into a stylish and inviting space. From suspended ceilings to decorative moldings, these ideas can help you create a beautiful and inviting space without breaking the bank. With a little creativity and some careful planning, you can create a space that is both functional and stylish.Down-to-Earth Elegance: Creative and Cheap Basement Ceiling Ideas is a great resource for anyone looking to add a touch of elegance to their basement without breaking the bank. With a variety of creative and affordable ideas, you can easily transform your basement into a stylish and inviting space. Whether you choose to go with a classic look or something more modern, you can be sure to find something that fits your style and budget. With a little bit of creativity and some elbow grease, you can create a beautiful and unique basement ceiling that will be the envy of your friends and family.

Sip and Swivel: DIY Bar Stools for a Stylish and Comfortable Seating

Source : https://m.media-amazon.com

Sip and Swivel is a unique and stylish way to add seating to any room. With its easy-to-assemble design, you can create a comfortable and stylish bar stool in no time. The Sip and Swivel DIY Bar Stool is perfect for any home, office, or bar. It is made from high-quality materials and is designed to be both comfortable and stylish. With its adjustable height and swivel feature, you can customize the stool to fit your needs. Whether you’re looking for a place to sit and relax or a place to entertain guests, the Sip and Swivel DIY Bar Stool is the perfect choice.

How to Make Your Own DIY Bar Stools for a Stylish and Comfortable Seating Experience

Creating your own bar stools can be a great way to add a unique and stylish seating experience to your home. With a few simple materials and tools, you can create comfortable and attractive bar stools that will be the envy of your friends and family.

The first step in creating your own bar stools is to decide on the design. You can choose from a variety of styles, such as traditional, modern, or industrial. Once you have chosen a design, you will need to decide on the materials you will use. Wood is a popular choice for bar stools, as it is durable and can be stained or painted to match your décor. You can also use metal, plastic, or even upholstery for a more unique look.

Once you have chosen the materials, you will need to measure and cut the pieces to the desired size. If you are using wood, you will need to sand and finish the pieces before assembling them. If you are using metal or plastic, you will need to drill holes for the screws and bolts.

Once the pieces are cut and assembled, you will need to attach the legs to the seat. This can be done with screws or bolts, depending on the type of material you are using. Once the legs are attached, you can add a cushion or upholstery to the seat for added comfort.

Finally, you will need to attach the footrest to the legs. This can be done with screws or bolts, depending on the type of material you are using. Once the footrest is attached, you can add a cushion or upholstery to the footrest for added comfort.

Creating your own bar stools can be a fun and rewarding project. With a few simple materials and tools, you can create comfortable and attractive bar stools that will be the envy of your friends and family.

The Benefits of Sip and Swivel Bar Stools: Comfort and Style for Your Home Bar

Sip and swivel bar stools are a great addition to any home bar. They provide comfort and style, making them a popular choice for those who want to create a cozy and inviting atmosphere in their home.

The first benefit of sip and swivel bar stools is comfort. These stools are designed to provide a comfortable seating experience, with a curved back and padded seat. The curved back helps to support the spine and reduce strain on the lower back, while the padded seat ensures that you can sit comfortably for long periods of time. The swivel feature also allows you to easily move around the bar, making it easier to interact with guests or reach for items.

The second benefit of sip and swivel bar stools is style. These stools come in a variety of colors, materials, and designs, allowing you to find the perfect look for your home bar. Whether you prefer a classic look or something more modern, you can find a stool that will fit your style. The swivel feature also adds a unique touch to the design, making it a great conversation piece.

Finally, sip and swivel bar stools are a great way to add a touch of luxury to your home bar. These stools are often made from high-quality materials, such as leather or wood, and feature intricate details that make them stand out. This makes them a great choice for those who want to create a luxurious atmosphere in their home bar.

In conclusion, sip and swivel bar stools are a great way to add comfort and style to your home bar. They provide a comfortable seating experience, come in a variety of colors and materials, and feature intricate details that make them stand out. These stools are a great choice for those who want to create a cozy and inviting atmosphere in their home bar.Sip and Swivel DIY bar stools are a great way to add style and comfort to any home. They are easy to assemble and come in a variety of colors and styles to fit any decor. With their adjustable height and swivel feature, they are perfect for entertaining or just relaxing with friends. Whether you are looking for a modern or traditional look, Sip and Swivel has the perfect bar stool for you.

Bring the Beach Home: Tips and Tricks for Beach-Inspired Decorations

Source : https://www.thespruce.com

Bring the Beach Home: Tips and Tricks for Beach-Inspired Decorations is a guide to help you bring the beauty of the beach into your home. Whether you live near the beach or far away, you can create a beach-inspired atmosphere in your home with the right decorations. This guide will provide you with tips and tricks to help you create a beach-inspired look in your home. From choosing the right colors and textures to finding the perfect accessories, this guide will help you create a beach-inspired atmosphere in your home. So, if you’re looking to bring the beach into your home, this guide is for you!

How to Create a Beach-Inspired Home: Tips for Incorporating Coastal Decor

Creating a beach-inspired home can be a great way to bring a sense of relaxation and tranquility into your living space. Incorporating coastal decor into your home can be a fun and creative way to bring the beauty of the beach into your home. Here are some tips for incorporating coastal decor into your home:

1. Choose a Color Palette: When selecting colors for your beach-inspired home, opt for a palette of blues, greens, and whites. These colors will help to create a calming atmosphere and evoke the feeling of being at the beach.

2. Incorporate Natural Elements: Incorporating natural elements such as driftwood, shells, and sea glass can help to bring the beach into your home. These elements can be used to create unique pieces of art or to decorate shelves and tables.

3. Use Textiles: Textiles such as cotton, linen, and jute can help to create a beach-inspired atmosphere. Choose fabrics with a nautical theme or in colors that evoke the beach.

4. Add Accessories: Accessories such as starfish, coral, and other beach-inspired items can be used to add a touch of the beach to your home. These items can be used to decorate shelves, tables, and other areas of your home.

5. Incorporate Lighting: Lighting can be used to create a beach-inspired atmosphere. Choose lighting fixtures with a nautical theme or in colors that evoke the beach.

By following these tips, you can easily create a beach-inspired home that will bring a sense of relaxation and tranquility into your living space. Incorporating coastal decor into your home can be a fun and creative way to bring the beauty of the beach into your home.

Get the Look: Beach-Inspired Decorating Ideas for Every Room in Your Home

Beach-inspired decorating is a great way to bring a touch of the ocean into your home. Whether you live near the beach or just want to bring a bit of the beach into your home, beach-inspired decorating can be a great way to create a relaxing and inviting atmosphere. From coastal-inspired furniture to beach-inspired wall art, there are plenty of ways to bring a beach-inspired look into every room in your home.

For the living room, start by choosing furniture with a coastal feel. Look for pieces made of natural materials like wicker, rattan, or driftwood. Add a few beach-inspired accents like a jute rug, a woven basket, or a few seashells. Hang a few pieces of beach-inspired wall art, such as a painting of a beach scene or a framed photograph of a beach sunset. Finally, add a few beach-inspired accessories like a starfish-shaped candle holder or a set of coral-colored throw pillows.

In the bedroom, start by choosing bedding with a beach-inspired pattern or color. Look for bedding with a nautical theme, such as stripes or anchors. Add a few beach-inspired accents like a driftwood headboard or a set of seashell-shaped lamps. Hang a few pieces of beach-inspired wall art, such as a painting of a beach scene or a framed photograph of a beach sunset. Finally, add a few beach-inspired accessories like a starfish-shaped candle holder or a set of coral-colored throw pillows.

In the kitchen, start by choosing cabinets and countertops with a coastal feel. Look for cabinets made of natural materials like wicker, rattan, or driftwood. Add a few beach-inspired accents like a jute rug, a woven basket, or a few seashells. Hang a few pieces of beach-inspired wall art, such as a painting of a beach scene or a framed photograph of a beach sunset. Finally, add a few beach-inspired accessories like a starfish-shaped candle holder or a set of coral-colored dish towels.

In the bathroom, start by choosing fixtures with a coastal feel. Look for fixtures made of natural materials like wicker, rattan, or driftwood. Add a few beach-inspired accents like a jute rug, a woven basket, or a few seashells. Hang a few pieces of beach-inspired wall art, such as a painting of a beach scene or a framed photograph of a beach sunset. Finally, add a few beach-inspired accessories like a starfish-shaped soap dish or a set of coral-colored towels.

By incorporating beach-inspired decor into every room in your home, you can create a relaxing and inviting atmosphere that will make you feel like you’re on vacation all year round. With the right pieces and accents, you can easily create a beach-inspired look that will bring the beauty of the ocean into your home.Bring the Beach Home: Tips and Tricks for Beach-Inspired Decorations is a great resource for anyone looking to bring a bit of the beach into their home. With a few simple tips and tricks, you can easily create a beach-inspired atmosphere in any room. Whether you’re looking for a subtle hint of the beach or a full-on beach-themed room, this guide has something for everyone. With a little creativity and some beach-inspired decorations, you can easily create a beach-inspired atmosphere in your home.