Crafty Corner: DIY Room Crafts to Personalize Your Space

Source :https://i.pinimg.com/

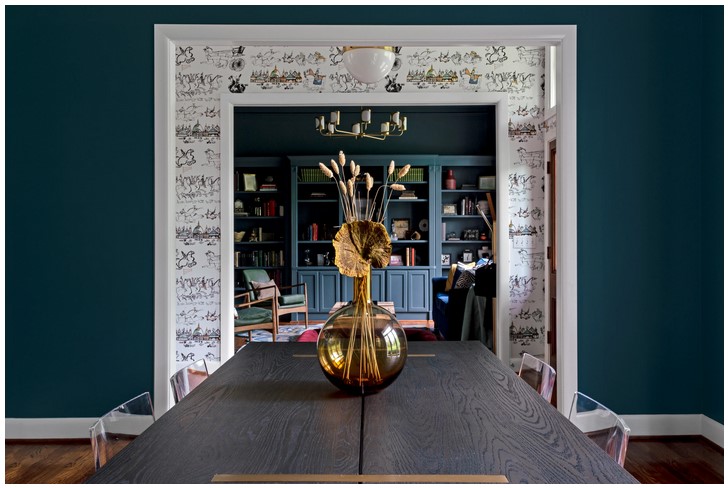
Welcome to Crafty Corner: diy room crafts to Personalize Your Space! Here, you will find a variety of creative and fun projects to help you customize your living space. Whether you’re looking for a way to spruce up your bedroom, add a personal touch to your living room, or just want to get crafty, we have something for everyone. From wall art to furniture makeovers, we have a wide selection of projects to choose from. With our easy-to-follow instructions and helpful tips, you’ll be able to create something unique and special that you can be proud of. So, let’s get started and make your space your own!

Get Creative with DIY Room Crafts: Tips and Tricks for Personalizing Your Space

Are you looking for ways to personalize your space and make it truly your own? diy room crafts are a great way to get creative and add a unique touch to your home. Here are some tips and tricks to help you get started.

1. Choose a Theme: Before you start crafting, decide on a theme for your room. This will help you narrow down your options and make it easier to choose the right materials and colors.

2. Get Inspiration: Look for inspiration online or in magazines. This will help you come up with ideas for your own projects.

3. Choose the Right Materials: Make sure you choose materials that are suitable for the project you’re working on. For example, if you’re making a wall hanging, choose a sturdy fabric that won’t tear easily.

4. Use Color: Color can be a great way to add personality to your room. Choose colors that match your theme and make sure they complement each other.

5. Get Creative: Don’t be afraid to get creative with your projects. You can use everyday items like old t-shirts or fabric scraps to make something unique.

6. Have Fun: Most importantly, have fun with your projects. diy room crafts are a great way to express yourself and make your space truly your own.

By following these tips and tricks, you can create unique and personalized diy room crafts that will make your space truly your own. So get creative and have fun!

Crafting on a Budget: How to Make the Most of Your Room with DIY Crafts

Crafting on a budget can be a great way to make the most of your room without breaking the bank. With a few simple DIY crafts, you can transform your space into a cozy and inviting place. Here are some tips to help you get started.

First, consider what you already have in your room. Look around and see what items you can repurpose or upcycle. For example, you can use old jars or cans to store small items, or you can use an old frame to create a unique wall art piece. You can also use fabric scraps to make a colorful pillow or a wall hanging.

Next, think about what materials you have on hand. You can use items like paper, cardboard, fabric, and yarn to create a variety of crafts. For example, you can make a paper garland to hang on the wall, or you can use fabric scraps to make a quilt. You can also use yarn to make a wall hanging or a rug.

Finally, don’t forget to get creative. You can use items like buttons, beads, and ribbons to add a unique touch to your crafts. You can also use items like paint, markers, and glue to create a one-of-a-kind piece.

Crafting on a budget can be a great way to make the most of your room. With a few simple DIY crafts, you can transform your space into a cozy and inviting place. So get creative and start crafting today!

Conclusion

Crafty Corner: diy room crafts to Personalize Your Space is a great resource for anyone looking to add a personal touch to their living space. With a wide variety of craft ideas, from wall art to furniture, there is something for everyone. Whether you are looking for a quick and easy project or something more complex, Crafty Corner has something for you. With easy-to-follow instructions and helpful tips, you can create something unique and special that will make your home truly yours.

Crafting Blooms: How to Make Easy Paper Roses Step by Step

Source : https://blogstudio.s3.amazonaws.com

Welcome to Crafting Blooms! Here, you will learn how to make easy paper roses step by step. Paper roses are a great way to add a touch of beauty and elegance to any occasion. Whether you are looking to make a bouquet for a special someone or just want to add a bit of color to your home decor, paper roses are a great way to do it. With just a few simple supplies and a bit of patience, you can create beautiful paper roses in no time. So, let’s get started!

Crafting Blooms: A Beginner’s Guide to Making Easy Paper Roses Step by Step

Welcome to Crafting Blooms: A Beginner’s Guide to Making Easy Paper Roses Step by Step. This guide will provide you with the necessary steps to create beautiful paper roses with ease.

First, you will need to gather the necessary materials. You will need a sheet of paper, scissors, a pencil, and a glue stick. You may also want to have a ruler and a pair of tweezers on hand.

Next, you will need to draw the petals of the rose. Start by drawing a circle on the paper. Then, draw five petals radiating out from the center of the circle. Make sure that the petals are evenly spaced and that the tips of the petals are slightly curved.

Once you have drawn the petals, you will need to cut them out. Use the scissors to carefully cut out the petals. Make sure that you cut along the lines that you drew.

Now, you will need to assemble the petals. Start by folding the petals in half. Then, use the glue stick to glue the petals together. Make sure that the petals are overlapping slightly.

Once the petals are glued together, you will need to shape them. Start by using the tweezers to pinch the petals together at the center. Then, use the pencil to curl the edges of the petals.

Finally, you will need to attach the stem. Start by drawing a stem on the paper. Then, use the glue stick to attach the stem to the center of the rose.

Congratulations! You have now created a beautiful paper rose. With a little practice, you will be able to make paper roses with ease. Enjoy your new crafting skill!

Crafting Blooms: Tips and Tricks for Crafting Beautiful Paper Roses with Ease

Crafting beautiful paper roses can be a fun and rewarding experience. With a few simple tips and tricks, you can create stunning paper roses with ease.

First, choose the right paper. Cardstock is the best choice for crafting paper roses, as it is thick and sturdy enough to hold its shape. You can also use other types of paper, such as tissue paper or crepe paper, but cardstock is the most durable option.

Next, decide on the size of your roses. You can make them as small or as large as you like, but keep in mind that the larger the rose, the more paper you will need.

Once you have chosen the paper and size of your roses, it’s time to start crafting. Begin by cutting out a circle from the paper. The size of the circle will depend on the size of the rose you want to make.

Next, cut the circle into a spiral shape. Start at the center of the circle and cut outward, making sure to keep the spiral even. Once you have cut the spiral, roll it up from the outside in. Secure the rose with a dab of glue or a piece of tape.

Finally, add some finishing touches to your paper roses. You can use markers or paint to add color, or you can add glitter or sequins for a sparkly effect. You can also use ribbons or other decorative items to make your roses even more beautiful.

With these tips and tricks, you can craft beautiful paper roses with ease. Have fun and get creative!

Conclusion

Crafting Blooms: How to Make Easy Paper Roses Step by Step is a great resource for anyone looking to make beautiful paper roses. With easy-to-follow instructions and helpful illustrations, this guide makes it easy to create stunning paper roses in no time. Whether you’re a beginner or an experienced crafter, this guide will help you make beautiful paper roses that will last for years to come.

Clever Clamps: Utilizing Bread Clips for Home Organization

Source : https://cdn.apartmenttherapy.info

Clever Clamps are a revolutionary new way to organize your home. They are simple, yet effective bread clips that can be used to hang items such as keys, jewelry, and other small items. They are easy to install and can be used in any room of the house. With Clever Clamps, you can easily organize your home and keep it clutter-free. They are perfect for those who want to keep their home neat and tidy without having to invest in expensive storage solutions. With Clever Clamps, you can easily create a neat and organized home without breaking the bank.

How to Use Bread Clips to Create an Organized Home: Tips and Tricks for Utilizing Clever Clamps

Organizing your home can be a daunting task, but with the right tools, it can be made much easier. bread clips are a great way to keep your home organized and tidy. These clever clamps can be used in a variety of ways to help you stay organized and make the most of your space. Here are some tips and tricks for utilizing bread clips to create an organized home.

First, bread clips are great for organizing cords and cables. Simply attach the clips to the cords and then attach them to the wall or furniture. This will keep your cords neat and tidy and prevent them from becoming tangled. You can also use bread clips to hang items such as keys, jewelry, and other small items. Simply attach the clips to the items and then hang them on a wall or door.

bread clips are also great for organizing papers and documents. Attach the clips to the papers and then hang them on a wall or door. This will keep your documents organized and easily accessible. You can also use bread clips to hang artwork or photos. Simply attach the clips to the artwork or photos and then hang them on a wall or door.

Finally, bread clips are great for organizing tools and supplies. Attach the clips to the tools and supplies and then hang them on a wall or door. This will keep your tools and supplies organized and easily accessible.

By utilizing bread clips, you can easily create an organized home. These clever clamps are a great way to keep your home neat and tidy and make the most of your space. With these tips and tricks, you can easily use bread clips to create an organized home.

Get Creative with Clever Clamps: Ideas for Home Organization Using Bread Clips

bread clips are a versatile and inexpensive tool for organizing your home. With a few simple supplies, you can create clever and creative solutions for organizing your home. Here are some ideas for using bread clips to help you get organized:

1. Hang a curtain rod and use bread clips to hang lightweight items such as scarves, hats, and jewelry. This is a great way to keep your accessories organized and easily accessible.

2. Create a makeshift bulletin board by attaching a piece of corkboard to a wall and using bread clips to attach notes, photos, and other items.

3. Use bread clips to hang lightweight items such as kitchen towels, pot holders, and oven mitts. This is a great way to keep your kitchen organized and clutter-free.

4. Create a makeshift jewelry organizer by attaching a piece of fabric to a wall and using bread clips to hang necklaces, bracelets, and earrings.

5. Use bread clips to hang lightweight items such as socks, underwear, and t-shirts. This is a great way to keep your closet organized and clutter-free.

6. Create a makeshift art gallery by attaching a piece of fabric to a wall and using bread clips to hang artwork.

7. Use bread clips to hang lightweight items such as cleaning supplies, tools, and other items in the garage. This is a great way to keep your garage organized and clutter-free.

By using bread clips in creative ways, you can easily organize your home and keep it clutter-free. With a few simple supplies, you can create clever and creative solutions for organizing your home.

Conclusion

The Clever Clamps system is an innovative and cost-effective way to organize your home. It is easy to use and can be adapted to fit any space. With its simple design and versatility, Clever Clamps can help you keep your home neat and tidy. Whether you need to organize your kitchen, bathroom, or any other room in your home, Clever Clamps can help you get the job done quickly and efficiently.

Paved in Style: Understanding Driveway Pavers Costs

Source :https://images.ctfassets.net

Paved in Style is a comprehensive guide to understanding the costs associated with driveway pavers. It provides an in-depth look at the different types of pavers available, the cost of installation, and the various factors that can affect the overall cost of a driveway paver project. It also offers tips and advice on how to choose the right paver for your project, as well as how to maintain and care for your driveway pavers. With this guide, you can make an informed decision about the best driveway paver option for your home.

How to Calculate the Cost of Installing Driveway Pavers

Installing driveway pavers is a great way to add value and beauty to your home. However, it is important to understand the cost of installing driveway pavers before you begin the project. This article will provide an overview of the cost of installing driveway pavers and how to calculate it.

The cost of installing driveway pavers will depend on several factors, including the size of the driveway, the type of pavers you choose, and the complexity of the installation. The size of the driveway will determine the amount of material needed and the amount of labor required. The type of pavers you choose will also affect the cost, as some materials are more expensive than others. Finally, the complexity of the installation will also affect the cost, as more complex installations will require more labor and materials.

To calculate the cost of installing driveway pavers, you will need to determine the size of the driveway, the type of pavers you choose, and the complexity of the installation. Once you have these figures, you can then calculate the cost of the project.

First, you will need to measure the length and width of the driveway. This will give you the total square footage of the driveway. Next, you will need to determine the type of pavers you want to use. Different types of pavers will have different costs, so it is important to research the different types of pavers available and choose the one that best fits your budget.

Once you have determined the size of the driveway and the type of pavers you want to use, you can then calculate the cost of the project. To do this, you will need to multiply the total square footage of the driveway by the cost of the pavers. This will give you the total cost of the pavers.

Next, you will need to calculate the cost of the installation. This will depend on the complexity of the installation and the amount of labor required. Generally, the more complex the installation, the more expensive it will be.

Finally, you will need to add the cost of the pavers and the cost of the installation to get the total cost of the project. This will give you an accurate estimate of the cost of installing driveway pavers.

By following these steps, you can easily calculate the cost of installing driveway pavers. It is important to remember that the cost of the project will depend on several factors, including the size of the driveway, the type of pavers you choose, and the complexity of the installation. Therefore, it is important to research the different types of pavers available and choose the one that best fits your budget.

Exploring the Benefits of Investing in Driveway Pavers: Is it Worth the Cost?

Investing in driveway pavers is a great way to add value to your home and create a beautiful outdoor space. While the cost of driveway pavers can be high, the benefits of investing in them can be well worth the expense. This article will explore the advantages of driveway pavers and why they may be worth the cost.

One of the main benefits of driveway pavers is their durability. Pavers are made from a variety of materials, including concrete, brick, and stone, and are designed to withstand extreme weather conditions and heavy traffic. This makes them an ideal choice for driveways, as they can last for many years with minimal maintenance. Additionally, pavers are resistant to cracking, fading, and staining, making them a great choice for areas that experience a lot of wear and tear.

Another advantage of driveway pavers is their aesthetic appeal. Pavers come in a variety of colors, shapes, and sizes, allowing you to create a unique look for your driveway. This can add a touch of elegance to your home and increase its curb appeal. Additionally, pavers can be arranged in a variety of patterns, allowing you to create a unique design that reflects your personal style.

Finally, driveway pavers are relatively easy to install and maintain. Unlike other types of driveways, pavers can be installed quickly and easily, and they require minimal maintenance. This makes them a great choice for homeowners who want to add value to their home without spending a lot of time and money on upkeep.

In conclusion, investing in driveway pavers can be a great way to add value to your home and create a beautiful outdoor space. While the cost of driveway pavers can be high, the benefits of investing in them can be well worth the expense. Pavers are durable, aesthetically pleasing, and easy to install and maintain, making them a great choice for homeowners who want to add value to their home without spending a lot of time and money on upkeep.

Conclusion

Paved in Style: Understanding Driveway Pavers Costs is an invaluable resource for anyone considering installing driveway pavers. It provides a comprehensive overview of the costs associated with driveway pavers, as well as the various types of pavers available and the benefits of each. With this information, homeowners can make an informed decision about the best type of driveway pavers for their needs and budget. Ultimately, Paved in Style: Understanding Driveway Pavers Costs is an essential guide for anyone looking to install driveway pavers.

Organized Entryway: Mudroom Shelves for Neat and Tidy Spaces

Source : https://cdn.mos.cms.futurecdn.net

Organized entryways are essential for creating a neat and tidy space. mudroom shelves are a great way to keep your entryway organized and clutter-free. They provide a place to store shoes, coats, hats, and other items that can easily become disorganized. With the right mudroom shelves, you can create an organized entryway that is both functional and stylish. This guide will provide you with tips and ideas for creating an organized entryway with mudroom shelves.

How to Maximize Your Mudroom Space with Shelving Solutions

Maximizing your mudroom space with shelving solutions is an excellent way to keep your home organized and clutter-free. Shelving solutions provide a great way to store items such as shoes, coats, hats, and other items that are often used in the mudroom. With the right shelving solutions, you can make the most of your mudroom space and create a functional and attractive area.

When selecting shelving solutions for your mudroom, it is important to consider the size and shape of the space. Measure the area and determine the amount of storage you need. Consider the items you plan to store and the type of shelving that will best accommodate them. For example, if you plan to store shoes, you may want to consider a shoe rack or cubbies. If you plan to store coats, you may want to consider a coat rack or wall-mounted hooks.

Once you have determined the type of shelving you need, you can begin to look for options that will fit your space. Consider the material of the shelving, as well as the style and color. You may want to choose a material that is easy to clean and maintain, such as metal or plastic. You may also want to consider a style that complements the overall look of your home.

When installing your shelving solutions, make sure to use the appropriate hardware and follow the manufacturer’s instructions. If you are installing wall-mounted shelving, make sure to use the appropriate anchors and screws. If you are installing a shoe rack or cubbies, make sure to use the appropriate screws and brackets.

By following these tips, you can maximize your mudroom space with shelving solutions that are both functional and attractive. With the right shelving solutions, you can create an organized and clutter-free mudroom that is both practical and stylish.

Creative Ideas for Organizing Your Mudroom with Shelves

Organizing your mudroom with shelves is a great way to keep your space neat and tidy. Shelves are a great way to store items such as shoes, coats, hats, and other items that you need to grab quickly when you’re heading out the door. Here are some creative ideas for organizing your mudroom with shelves:

1. Install a Shoe Rack: A shoe rack is a great way to keep your shoes organized and off the floor. You can find shoe racks in a variety of sizes and styles to fit your space.

2. Use Baskets: Baskets are a great way to store items such as hats, gloves, and scarves. You can hang baskets on the wall or place them on shelves.

3. Hang Hooks: Hooks are a great way to hang coats, bags, and other items. You can find hooks in a variety of sizes and styles to fit your space.

4. Add Shelves: Shelves are a great way to store items such as books, magazines, and other items that you need to grab quickly when you’re heading out the door.

5. Install a Bench: A bench is a great way to provide a place to sit while you’re putting on your shoes or taking off your coat. You can find benches in a variety of sizes and styles to fit your space.

Organizing your mudroom with shelves is a great way to keep your space neat and tidy. With these creative ideas, you can easily create a functional and organized mudroom.

Conclusion

Organized entryway mudroom shelves are a great way to keep your home neat and tidy. They provide a place to store items that would otherwise be scattered around the house, and they can be customized to fit any space. With the right design and materials, mudroom shelves can be a stylish and functional addition to any home.

Rustic Revival: Exploring Unique Rustic Furniture Ideas

Source :https://www.delightfull.eu

Welcome to Rustic Revival, your source for exploring unique rustic furniture ideas. Whether you’re looking for a rustic-style dining table, a cozy armchair, or a unique accent piece, you’ll find plenty of inspiration here. We’ll take you through the basics of rustic furniture, from the materials used to the design elements that make it so special. We’ll also provide tips on how to incorporate rustic furniture into your home, as well as ideas for creating a rustic-style space. So, let’s get started and explore the world of rustic furniture!

How to Incorporate Rustic Furniture into Your Home Decor: Tips and Ideas

Rustic furniture is a great way to add a touch of warmth and character to any home. Whether you’re looking to create a cozy cabin-like atmosphere or just want to add a bit of rustic charm to your home, incorporating rustic furniture into your decor can be a great way to achieve the look you’re after. Here are some tips and ideas for incorporating rustic furniture into your home decor.

Choose the Right Pieces: When selecting rustic furniture, it’s important to choose pieces that will fit in with the overall style of your home. Look for pieces that are made from natural materials such as wood, stone, or metal. These materials will help to create a rustic feel in your home.

Choose Neutral Colors: When selecting rustic furniture, it’s best to stick to neutral colors such as browns, tans, and whites. These colors will help to create a warm and inviting atmosphere in your home.

Mix and Match: Don’t be afraid to mix and match different pieces of rustic furniture. This will help to create a unique and interesting look in your home. Try pairing a rustic wood table with a modern leather chair or a rustic metal bed frame with a contemporary bedspread.

Add Accents: To add a bit of extra character to your rustic furniture, consider adding accents such as throw pillows, rugs, and wall art. These accents will help to tie the look together and create a cohesive look in your home.

Create a Focal Point: To really make your rustic furniture stand out, create a focal point in your room. This could be a large piece of furniture such as a bed frame or a fireplace. This will draw the eye and create a focal point in your room.

These are just a few tips and ideas for incorporating rustic furniture into your home decor. With a bit of creativity and planning, you can create a cozy and inviting atmosphere in your home with rustic furniture.

The Benefits of Rustic Revival: Why Rustic Furniture is Making a Comeback

In recent years, rustic furniture has seen a resurgence in popularity. This trend is part of a larger movement known as the Rustic Revival, which celebrates the beauty of natural materials and traditional craftsmanship. Rustic furniture is a great way to add a touch of warmth and character to any home. Here are some of the benefits of incorporating rustic furniture into your home décor.

First, rustic furniture is incredibly durable. Many pieces are made from solid wood, which is known for its strength and longevity. This makes rustic furniture an excellent choice for busy households, as it can withstand the wear and tear of everyday life. Additionally, rustic furniture is often handcrafted, meaning that it is built to last.

Second, rustic furniture is incredibly versatile. Pieces can be used in a variety of settings, from traditional to modern. This makes it easy to incorporate rustic furniture into any existing décor. Additionally, rustic furniture can be used to create a cozy, inviting atmosphere in any room.

Third, rustic furniture is often made from natural materials, such as wood, stone, and metal. This makes it an eco-friendly choice, as these materials are renewable and sustainable. Additionally, natural materials are often more affordable than synthetic materials, making rustic furniture a great option for those on a budget.

Finally, rustic furniture is incredibly beautiful. Pieces often feature intricate details and unique designs, making them stand out from other types of furniture. This makes rustic furniture a great way to add a touch of personality to any room.

The Rustic Revival is a great way to add a touch of warmth and character to any home. Rustic furniture is incredibly durable, versatile, eco-friendly, and beautiful, making it an excellent choice for any décor. Whether you’re looking for a statement piece or a subtle accent, rustic furniture is sure to make a lasting impression.

Conclusion

The Rustic Revival style of furniture is a great way to add a unique and timeless look to any home. With its natural materials, rustic furniture can be used to create a cozy and inviting atmosphere. Whether you are looking for a rustic dining table, a rustic coffee table, or a rustic armchair, there are plenty of options to choose from. With a little bit of creativity and imagination, you can create a beautiful and unique rustic furniture piece that will be the perfect addition to your home.

Budget-Friendly Cheers: Crafting a Cheap Outdoor Bar for Entertaining

Source : https://www.bhg.com

Welcome to Budget-Friendly Cheers: Crafting a cheap outdoor bar for Entertaining! If you’re looking for a way to entertain your friends and family without breaking the bank, then you’ve come to the right place. In this guide, we’ll show you how to create a budget-friendly outdoor bar that will be the perfect addition to your backyard or patio. We’ll provide step-by-step instructions on how to build the bar, as well as tips on how to save money while shopping for supplies. With a little bit of creativity and some elbow grease, you can create a stylish and affordable outdoor bar that will be the envy of your neighborhood. So let’s get started!

How to Create a Budget-Friendly Outdoor Bar for Entertaining: Tips and Tricks for Crafting a Cheap Bar Setup

Creating a budget-friendly outdoor bar for entertaining can be a great way to enjoy the outdoors while still keeping costs low. With a few simple tips and tricks, you can craft a cheap bar setup that will be the envy of your friends and family.

First, consider the location of your outdoor bar. If you have a patio or deck, this is the perfect spot to set up your bar. If you don’t have a patio or deck, you can still create a great outdoor bar by setting up a table and chairs in your backyard. Make sure to choose a spot that is close to your house so you can easily access the bar and its supplies.

Next, you’ll need to decide what type of bar you want to create. If you’re looking for a more traditional bar setup, you can purchase a bar cart or bar table. These are relatively inexpensive and can be found at most home goods stores. If you’re looking for something more unique, you can create your own bar by repurposing furniture or using items you already have. For example, you can use an old dresser as a bar cart or an old bookshelf as a bar table.

Once you’ve chosen the type of bar you want, it’s time to stock it with supplies. You’ll need glasses, mixers, and other barware. You can find these items at thrift stores or online for a fraction of the cost of buying them new. You’ll also need to purchase alcohol, but you can save money by buying in bulk or opting for cheaper brands.

Finally, you’ll need to decorate your bar. You can use items you already have, such as plants, candles, and string lights, or you can purchase decorations from a dollar store. You can also make your own decorations, such as a chalkboard menu or a sign with your bar’s name.

Creating a budget-friendly outdoor bar for entertaining doesn’t have to be expensive or difficult. With a few simple tips and tricks, you can craft a cheap bar setup that will be the envy of your friends and family.

DIY Ideas for a Cheap Outdoor Bar: Creative Ways to Make a Bar on a Budget for Entertaining Guests

Creating an outdoor bar can be a great way to entertain guests and enjoy the outdoors. However, it can be expensive to purchase all the necessary items. Fortunately, there are several creative ways to make a bar on a budget.

One of the most cost-effective ways to create an outdoor bar is to use repurposed items. For example, an old dresser can be used as a bar. Simply paint it and add a countertop. You can also use old pallets to create a bar. Simply stack the pallets and add a countertop.

Another great way to create an outdoor bar is to use a large planter. Fill the planter with soil and add a countertop. You can also use a large tree stump as a bar. Simply cut the top of the stump and add a countertop.

If you have a large outdoor space, you can create a tiki bar. This can be done by using bamboo poles and thatch. You can also use a large umbrella to create a tiki bar. Simply add a countertop and some bar stools.

Finally, you can create a bar using a large cooler. Simply add a countertop and some bar stools. You can also use a large cooler to store drinks and snacks.

Creating an outdoor bar on a budget is possible with a little creativity. By using repurposed items, planters, tree stumps, tiki bars, and coolers, you can create a great outdoor bar for entertaining guests.

Conclusion

Budget-Friendly Cheers: Crafting a cheap outdoor bar for Entertaining is a great way to create a fun and inviting outdoor space for entertaining. With a few simple materials and a little bit of creativity, you can create a stylish and affordable outdoor bar that will be the envy of your friends and family. Whether you’re looking for a place to host a summer barbecue or just a spot to relax and enjoy a few drinks, this budget-friendly outdoor bar is sure to be a hit.

Safety First: How to Make a Baby Gate That Blends Seamlessly

Source : https://thestairbarrier.com

Into Your Home

Safety First: how to make a baby gate That Blends Seamlessly Into Your Home is a guide to creating a baby gate that is both safe and aesthetically pleasing. This guide will provide step-by-step instructions on how to make a baby gate that is both functional and stylish. It will also provide tips on how to choose the right materials and design to ensure that the gate blends in with the rest of your home décor. With this guide, you can create a baby gate that is both safe and stylish, allowing you to keep your little one safe while still maintaining the look of your home.

DIY Baby Gate: How to Create a Stylish and Safe Baby Gate for Your Home

Creating a safe and stylish baby gate for your home is an important part of ensuring the safety of your little one. With a few simple materials and tools, you can easily make a custom baby gate that will look great and keep your child safe.

To begin, you will need to measure the opening you want to install the gate in. Measure the width and height of the opening and make sure to leave a few inches of extra space on either side. This will ensure that the gate fits properly and securely.

Next, you will need to purchase the materials for your gate. You will need a wooden frame, hinges, screws, and a latch. You can find these items at your local hardware store.

Once you have all of your materials, you can begin to assemble the gate. Start by cutting the wooden frame to the size of the opening. Then, attach the hinges to the frame and secure them with screws. Finally, attach the latch to the frame and secure it with screws.

Once the gate is assembled, you can paint or stain it to match the decor of your home. You can also add decorative touches such as a name plaque or a decorative pattern.

Finally, you will need to install the gate. Make sure to use the appropriate hardware and follow the instructions provided with the gate. Once the gate is installed, you can rest assured that your little one is safe and secure.

Creating a stylish and safe baby gate for your home is a simple and rewarding project. With a few basic materials and tools, you can easily make a custom gate that will look great and keep your child safe.

Baby Proofing 101: Essential Tips for Keeping Your Home Safe and Secure for Your Little One

As a parent, it is your responsibility to ensure that your home is safe and secure for your little one. Baby proofing your home is an essential part of parenting and can help to prevent accidents and injuries. Here are some essential tips for baby proofing your home:

1. Install safety gates at the top and bottom of stairs. This will help to prevent your child from accessing areas of the home that may be dangerous.

2. Cover all electrical outlets with safety covers. This will help to prevent your child from sticking their fingers or other objects into the outlets.

3. Secure furniture and appliances to the wall. This will help to prevent them from tipping over and causing injury.

4. Install window guards or safety netting to prevent your child from falling out of windows.

5. Place locks on cabinets and drawers that contain hazardous materials or sharp objects.

6. Install smoke and carbon monoxide detectors in your home. This will help to alert you to any potential dangers.

7. Place corner and edge guards on furniture with sharp edges. This will help to prevent your child from bumping into them and getting injured.

8. Install safety latches on doors and windows. This will help to prevent your child from accessing areas of the home that may be dangerous.

By following these tips, you can help to ensure that your home is safe and secure for your little one. Baby proofing your home is an essential part of parenting and can help to prevent accidents and injuries.

Conclusion

Into Your Home

Safety First: how to make a baby gate That Blends Seamlessly Into Your Home is a great resource for parents who want to keep their children safe while still maintaining the aesthetic of their home. With the right materials and tools, anyone can make a custom baby gate that will fit their home perfectly. Not only will this gate keep your children safe, but it will also add a unique touch to your home. With a little bit of effort, you can create a beautiful and functional baby gate that will keep your children safe and secure.

Tension Magic: Elevating Your Space with IKEA Tension Curtain Rods

Source : https://m.media-amazon.com

Tension Magic: Elevating Your Space with IKEA Tension Curtain Rods is a guide to help you create a beautiful and functional space with IKEA tension curtain rods. This guide will provide you with step-by-step instructions on how to install and use IKEA tension curtain rods to create a unique and stylish look in any room. With this guide, you will learn how to choose the right tension curtain rod for your space, how to install it correctly, and how to accessorize it with curtains and other decorative items. With the help of this guide, you can easily create a space that is both stylish and functional.

How to Transform Your Home with IKEA Tension Curtain Rods: Tips and Tricks for Elevating Your Space

Are you looking for an easy and affordable way to transform your home? IKEA tension curtain rods are a great option for elevating your space. With a few simple tips and tricks, you can create a stylish and modern look in any room.

First, consider the size of the room and the type of window you have. If you have a large window, you may want to opt for a longer tension rod. This will allow you to hang heavier curtains and create a more dramatic look. If you have a smaller window, a shorter rod will be sufficient.

Next, decide on the type of curtains you want to hang. If you’re looking for a more modern look, consider sheer curtains. These will allow natural light to filter through while still providing some privacy. If you’re looking for a more traditional look, heavier curtains are a great option.

Once you’ve chosen the curtains, it’s time to install the rod. IKEA tension curtain rods are easy to install and require no tools. Simply twist the rod until it is tight and secure. Make sure to measure the window before you install the rod to ensure a proper fit.

Finally, accessorize your curtains with tiebacks or decorative finials. These will add a touch of elegance to your curtains and complete the look.

With IKEA tension curtain rods, you can easily transform your home. With a few simple tips and tricks, you can create a stylish and modern look in any room.

The Magic of Tension Curtain Rods: How IKEA Can Help You Create a Cozy and Inviting Home

Creating a cozy and inviting home is a goal for many homeowners. Fortunately, there are a variety of ways to achieve this goal, and one of the most effective is to use tension curtain rods. Tension curtain rods are an easy and affordable way to add a touch of style and warmth to any room.

Tension curtain rods are a type of rod that is held in place by tension, rather than screws or nails. This makes them ideal for renters or those who don’t want to damage their walls. They are also easy to install and can be adjusted to fit any window size.

IKEA is a great place to find tension curtain rods. They offer a variety of styles and sizes to fit any budget. Their rods are made from durable materials and come in a variety of colors and finishes. They also offer a range of accessories, such as finials, tiebacks, and brackets, to complete the look.

Tension curtain rods are a great way to add a touch of style and warmth to any room. They are easy to install, affordable, and can be adjusted to fit any window size. IKEA is a great place to find tension curtain rods, and their selection of styles and sizes makes it easy to find the perfect rod for your home. With the help of IKEA, you can create a cozy and inviting home in no time.

Conclusion

The IKEA Tension Curtain Rods are a great way to elevate any space with a modern and stylish look. They are easy to install, affordable, and come in a variety of sizes and colors to fit any décor. With the ability to hang curtains, drapes, and other window treatments, these rods are a great way to add a touch of style to any room. Whether you are looking for a simple solution to hang curtains or a more decorative way to dress up a window, the IKEA Tension Curtain Rods are a great choice.

Countdown to Creativity: New Year’s Ideas for Home Improvements

Source : https://media.architecturaldigest.com

Countdown to Creativity: New Year’s Ideas for Home Improvements is a great resource for anyone looking to spruce up their home in the new year. Whether you’re looking for a quick and easy project or a more involved renovation, this guide has something for everyone. From simple DIY projects to more complex renovations, this guide provides step-by-step instructions and helpful tips to help you get the job done. With ideas for every budget and skill level, you’ll be sure to find something that fits your needs. So, let’s get started and make your home look its best in 2021!

5 New Year’s Home Improvement Ideas to Kickstart Your Countdown to Creativity

1. Refresh Your Paint: A fresh coat of paint can instantly transform any room in your home. Whether you’re looking to brighten up a living room, add a pop of color to a bedroom, or give your kitchen a modern update, a new paint job is a great way to start the new year.

2. Upgrade Your Lighting: Lighting can make a huge difference in the look and feel of a room. Consider replacing outdated fixtures with modern, energy-efficient options. You can also add a few accent lights to highlight artwork or architectural features.

3. Install New Flooring: If your floors are looking a bit worn, consider replacing them with new hardwood, tile, or laminate. Not only will this give your home a fresh look, but it can also increase its value.

4. Add a Deck or Patio: If you’re looking to add some outdoor living space, consider building a deck or patio. This is a great way to create a relaxing outdoor oasis and extend your living space.

5. Update Your Kitchen: A kitchen remodel can be a great way to start the new year. Consider replacing outdated appliances, adding new countertops, or installing new cabinets. This is a great way to give your kitchen a modern update and increase the value of your home.

How to Make the Most of Your Home Improvement Budget This New Year’s

As the New Year approaches, many of us are looking for ways to improve our homes. Whether you’re looking to make a few minor changes or undertake a major renovation, it’s important to make the most of your home improvement budget. Here are a few tips to help you get the most out of your home improvement budget this New Year’s.

First, make a plan. Before you start any project, it’s important to have a clear idea of what you want to accomplish. Make a list of the projects you want to complete and prioritize them. This will help you determine which projects are most important and which ones can wait.

Second, do your research. Once you have a plan in place, it’s time to do some research. Look into the cost of materials and labor for each project. This will help you determine how much you need to budget for each project.

Third, shop around. Don’t be afraid to shop around for the best deals. Compare prices at different stores and online to find the best deals. You may also be able to find discounts or coupons that can help you save money.

Fourth, consider DIY projects. If you’re handy, you may be able to save money by doing some of the work yourself. This can be a great way to save money and still get the results you want.

Finally, don’t forget about the little things. Even small changes can make a big difference in the look and feel of your home. Consider adding a few new pieces of furniture or artwork, or repainting a room. These small changes can make a big impact without breaking the bank.

By following these tips, you can make the most of your home improvement budget this New Year’s. With a little planning and research, you can make your home look and feel like new without breaking the bank.

Conclusion

Countdown to Creativity: New Year’s Ideas for Home Improvements is a great resource for anyone looking to spruce up their home in the new year. From simple DIY projects to more complex renovations, this guide provides a wealth of ideas to help you get started. Whether you’re looking to add a fresh coat of paint, upgrade your kitchen appliances, or completely remodel your bathroom, this guide has something for everyone. With its helpful tips and easy-to-follow instructions, Countdown to Creativity: New Year’s Ideas for Home Improvements is the perfect way to start the new year off right.