Paved in Style: Understanding Driveway Pavers Costs

Source :https://images.ctfassets.net

Paved in Style is a comprehensive guide to understanding the costs associated with driveway pavers. It provides an in-depth look at the different types of pavers available, the cost of installation, and the various factors that can affect the overall cost of a driveway paver project. It also offers tips and advice on how to choose the right paver for your project, as well as how to maintain and care for your driveway pavers. With this guide, you can make an informed decision about the best driveway paver option for your home.

How to Calculate the Cost of Installing Driveway Pavers

Installing driveway pavers is a great way to add value and beauty to your home. However, it is important to understand the cost of installing driveway pavers before you begin the project. This article will provide an overview of the cost of installing driveway pavers and how to calculate it.

The cost of installing driveway pavers will depend on several factors, including the size of the driveway, the type of pavers you choose, and the complexity of the installation. The size of the driveway will determine the amount of material needed and the amount of labor required. The type of pavers you choose will also affect the cost, as some materials are more expensive than others. Finally, the complexity of the installation will also affect the cost, as more complex installations will require more labor and materials.

To calculate the cost of installing driveway pavers, you will need to determine the size of the driveway, the type of pavers you choose, and the complexity of the installation. Once you have these figures, you can then calculate the cost of the project.

First, you will need to measure the length and width of the driveway. This will give you the total square footage of the driveway. Next, you will need to determine the type of pavers you want to use. Different types of pavers will have different costs, so it is important to research the different types of pavers available and choose the one that best fits your budget.

Once you have determined the size of the driveway and the type of pavers you want to use, you can then calculate the cost of the project. To do this, you will need to multiply the total square footage of the driveway by the cost of the pavers. This will give you the total cost of the pavers.

Next, you will need to calculate the cost of the installation. This will depend on the complexity of the installation and the amount of labor required. Generally, the more complex the installation, the more expensive it will be.

Finally, you will need to add the cost of the pavers and the cost of the installation to get the total cost of the project. This will give you an accurate estimate of the cost of installing driveway pavers.

By following these steps, you can easily calculate the cost of installing driveway pavers. It is important to remember that the cost of the project will depend on several factors, including the size of the driveway, the type of pavers you choose, and the complexity of the installation. Therefore, it is important to research the different types of pavers available and choose the one that best fits your budget.

Exploring the Benefits of Investing in Driveway Pavers: Is it Worth the Cost?

Investing in driveway pavers is a great way to add value to your home and create a beautiful outdoor space. While the cost of driveway pavers can be high, the benefits of investing in them can be well worth the expense. This article will explore the advantages of driveway pavers and why they may be worth the cost.

One of the main benefits of driveway pavers is their durability. Pavers are made from a variety of materials, including concrete, brick, and stone, and are designed to withstand extreme weather conditions and heavy traffic. This makes them an ideal choice for driveways, as they can last for many years with minimal maintenance. Additionally, pavers are resistant to cracking, fading, and staining, making them a great choice for areas that experience a lot of wear and tear.

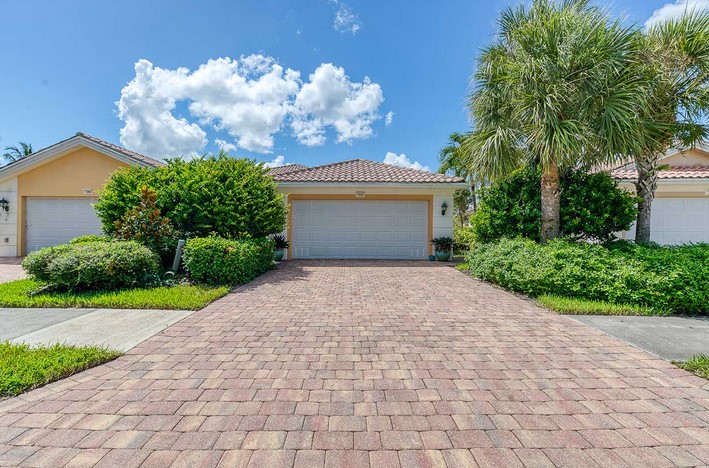
Another advantage of driveway pavers is their aesthetic appeal. Pavers come in a variety of colors, shapes, and sizes, allowing you to create a unique look for your driveway. This can add a touch of elegance to your home and increase its curb appeal. Additionally, pavers can be arranged in a variety of patterns, allowing you to create a unique design that reflects your personal style.

Finally, driveway pavers are relatively easy to install and maintain. Unlike other types of driveways, pavers can be installed quickly and easily, and they require minimal maintenance. This makes them a great choice for homeowners who want to add value to their home without spending a lot of time and money on upkeep.

In conclusion, investing in driveway pavers can be a great way to add value to your home and create a beautiful outdoor space. While the cost of driveway pavers can be high, the benefits of investing in them can be well worth the expense. Pavers are durable, aesthetically pleasing, and easy to install and maintain, making them a great choice for homeowners who want to add value to their home without spending a lot of time and money on upkeep.

Conclusion

Paved in Style: Understanding Driveway Pavers Costs is an invaluable resource for anyone considering installing driveway pavers. It provides a comprehensive overview of the costs associated with driveway pavers, as well as the various types of pavers available and the benefits of each. With this information, homeowners can make an informed decision about the best type of driveway pavers for their needs and budget. Ultimately, Paved in Style: Understanding Driveway Pavers Costs is an essential guide for anyone looking to install driveway pavers.

Chalkboard Charm: Crafting Your Own A-Frame Chalkboard Stand

Source :https://i.ytimg.com

Chalkboard Charm: Crafting Your Own A-Frame Chalkboard Stand is a comprehensive guide to creating a unique and stylish chalkboard stand for your home or business. This guide will provide you with step-by-step instructions on how to build an A-frame chalkboard stand from scratch. You will learn how to select the right materials, assemble the frame, and finish the chalkboard stand with a professional look. With this guide, you will be able to create a beautiful and functional chalkboard stand that will be the perfect addition to any room.

DIY A-Frame Chalkboard Stand: A Step-by-Step Guide to Crafting Your Own Chalkboard Display

Are you looking for a fun and creative way to display your artwork, messages, or announcements? If so, then crafting your own A-Frame Chalkboard Stand is the perfect project for you! This easy-to-follow guide will provide you with all the steps necessary to create your own unique chalkboard display.

Materials Needed:

-Two pieces of wood, each measuring 24” x 36”
-One piece of wood, measuring 24” x 24”
-Four pieces of wood, each measuring 24” x 2”
-One piece of wood, measuring 24” x 4”
-Wood glue
-Screws
-Chalkboard paint
-Paintbrush
-Sandpaper

Step 1: Begin by cutting the two pieces of wood measuring 24” x 36” into two pieces measuring 24” x 18”. These will form the sides of your A-Frame Chalkboard Stand.

Step 2: Cut the 24” x 24” piece of wood into two pieces measuring 12” x 24”. These will form the top and bottom of your A-Frame Chalkboard Stand.

Step 3: Cut the four pieces of wood measuring 24” x 2” into four pieces measuring 12” x 2”. These will form the braces of your A-Frame Chalkboard Stand.

Step 4: Cut the 24” x 4” piece of wood into two pieces measuring 12” x 4”. These will form the legs of your A-Frame Chalkboard Stand.

Step 5: Using wood glue, attach the two 12” x 18” pieces of wood to the two 12” x 24” pieces of wood to form the sides and top/bottom of your A-Frame Chalkboard Stand.

Step 6: Attach the four 12” x 2” pieces of wood to the sides and top/bottom of your A-Frame Chalkboard Stand to form the braces.

Step 7: Attach the two 12” x 4” pieces of wood to the sides of your A-Frame Chalkboard Stand to form the legs.

Step 8: Using screws, secure all the pieces of wood together.

Step 9: Sand down the entire A-Frame Chalkboard Stand to ensure a smooth surface.

Step 10: Paint the entire A-Frame Chalkboard Stand with chalkboard paint. Allow the paint to dry completely before proceeding to the next step.

Step 11: Hang your A-Frame Chalkboard Stand and start displaying your artwork, messages, or announcements!

Congratulations! You have now successfully crafted your own A-Frame Chalkboard Stand. Enjoy your new chalkboard display and have fun creating unique and creative messages!

How to Create a Chalkboard A-Frame Stand for Your Home or Business: Tips and Tricks for Making a Professional-Looking Chalkboard Stand

Creating a professional-looking chalkboard A-frame stand for your home or business is a great way to add a unique and eye-catching element to your space. Whether you’re looking to advertise specials or just want to add a bit of personality to your décor, a chalkboard A-frame stand is a great way to do it. Here are some tips and tricks for making a professional-looking chalkboard A-frame stand for your home or business.

First, you’ll need to decide on the size of your chalkboard A-frame stand. You’ll want to make sure it’s large enough to fit the message you want to display, but not so large that it takes up too much space. Once you’ve decided on the size, you’ll need to purchase the necessary materials. You’ll need two pieces of wood for the frame, a piece of chalkboard material, and some screws and hinges.

Next, you’ll need to assemble the frame. Start by cutting the wood to the desired size and then screwing the pieces together. Once the frame is assembled, you’ll need to attach the chalkboard material to the frame. You can use either screws or nails to do this. Make sure the chalkboard material is securely attached to the frame before moving on to the next step.

Once the chalkboard material is attached, you’ll need to attach the hinges to the frame. This will allow the chalkboard to open and close. Make sure the hinges are securely attached and that the chalkboard can open and close without any difficulty.

Finally, you’ll need to attach the legs to the frame. This will give the chalkboard stand stability and make it easier to move around. Once the legs are attached, you’re ready to start writing on your chalkboard A-frame stand.

Creating a professional-looking chalkboard A-frame stand for your home or business is a great way to add a unique and eye-catching element to your space. With these tips and tricks, you’ll be able to make a professional-looking chalkboard A-frame stand that will last for years to come.

Conclusion

Chalkboard Charm: Crafting Your Own A-Frame Chalkboard Stand is a great way to add a unique and creative touch to any space. With a few simple materials and a bit of creativity, you can create a beautiful and functional chalkboard stand that will be the perfect addition to any home or office. Whether you’re looking for a fun way to display messages or just want to add a bit of charm to your space, this project is sure to be a hit.

Organized Entryway: Mudroom Shelves for Neat and Tidy Spaces

Source : https://cdn.mos.cms.futurecdn.net

Organized entryways are essential for creating a neat and tidy space. mudroom shelves are a great way to keep your entryway organized and clutter-free. They provide a place to store shoes, coats, hats, and other items that can easily become disorganized. With the right mudroom shelves, you can create an organized entryway that is both functional and stylish. This guide will provide you with tips and ideas for creating an organized entryway with mudroom shelves.

How to Maximize Your Mudroom Space with Shelving Solutions

Maximizing your mudroom space with shelving solutions is an excellent way to keep your home organized and clutter-free. Shelving solutions provide a great way to store items such as shoes, coats, hats, and other items that are often used in the mudroom. With the right shelving solutions, you can make the most of your mudroom space and create a functional and attractive area.

When selecting shelving solutions for your mudroom, it is important to consider the size and shape of the space. Measure the area and determine the amount of storage you need. Consider the items you plan to store and the type of shelving that will best accommodate them. For example, if you plan to store shoes, you may want to consider a shoe rack or cubbies. If you plan to store coats, you may want to consider a coat rack or wall-mounted hooks.

Once you have determined the type of shelving you need, you can begin to look for options that will fit your space. Consider the material of the shelving, as well as the style and color. You may want to choose a material that is easy to clean and maintain, such as metal or plastic. You may also want to consider a style that complements the overall look of your home.

When installing your shelving solutions, make sure to use the appropriate hardware and follow the manufacturer’s instructions. If you are installing wall-mounted shelving, make sure to use the appropriate anchors and screws. If you are installing a shoe rack or cubbies, make sure to use the appropriate screws and brackets.

By following these tips, you can maximize your mudroom space with shelving solutions that are both functional and attractive. With the right shelving solutions, you can create an organized and clutter-free mudroom that is both practical and stylish.

Creative Ideas for Organizing Your Mudroom with Shelves

Organizing your mudroom with shelves is a great way to keep your space neat and tidy. Shelves are a great way to store items such as shoes, coats, hats, and other items that you need to grab quickly when you’re heading out the door. Here are some creative ideas for organizing your mudroom with shelves:

1. Install a Shoe Rack: A shoe rack is a great way to keep your shoes organized and off the floor. You can find shoe racks in a variety of sizes and styles to fit your space.

2. Use Baskets: Baskets are a great way to store items such as hats, gloves, and scarves. You can hang baskets on the wall or place them on shelves.

3. Hang Hooks: Hooks are a great way to hang coats, bags, and other items. You can find hooks in a variety of sizes and styles to fit your space.

4. Add Shelves: Shelves are a great way to store items such as books, magazines, and other items that you need to grab quickly when you’re heading out the door.

5. Install a Bench: A bench is a great way to provide a place to sit while you’re putting on your shoes or taking off your coat. You can find benches in a variety of sizes and styles to fit your space.

Organizing your mudroom with shelves is a great way to keep your space neat and tidy. With these creative ideas, you can easily create a functional and organized mudroom.

Conclusion

Organized entryway mudroom shelves are a great way to keep your home neat and tidy. They provide a place to store items that would otherwise be scattered around the house, and they can be customized to fit any space. With the right design and materials, mudroom shelves can be a stylish and functional addition to any home.

Rustic Revival: Exploring Unique Rustic Furniture Ideas

Source :https://www.delightfull.eu

Welcome to Rustic Revival, your source for exploring unique rustic furniture ideas. Whether you’re looking for a rustic-style dining table, a cozy armchair, or a unique accent piece, you’ll find plenty of inspiration here. We’ll take you through the basics of rustic furniture, from the materials used to the design elements that make it so special. We’ll also provide tips on how to incorporate rustic furniture into your home, as well as ideas for creating a rustic-style space. So, let’s get started and explore the world of rustic furniture!

How to Incorporate Rustic Furniture into Your Home Decor: Tips and Ideas

Rustic furniture is a great way to add a touch of warmth and character to any home. Whether you’re looking to create a cozy cabin-like atmosphere or just want to add a bit of rustic charm to your home, incorporating rustic furniture into your decor can be a great way to achieve the look you’re after. Here are some tips and ideas for incorporating rustic furniture into your home decor.

Choose the Right Pieces: When selecting rustic furniture, it’s important to choose pieces that will fit in with the overall style of your home. Look for pieces that are made from natural materials such as wood, stone, or metal. These materials will help to create a rustic feel in your home.

Choose Neutral Colors: When selecting rustic furniture, it’s best to stick to neutral colors such as browns, tans, and whites. These colors will help to create a warm and inviting atmosphere in your home.

Mix and Match: Don’t be afraid to mix and match different pieces of rustic furniture. This will help to create a unique and interesting look in your home. Try pairing a rustic wood table with a modern leather chair or a rustic metal bed frame with a contemporary bedspread.

Add Accents: To add a bit of extra character to your rustic furniture, consider adding accents such as throw pillows, rugs, and wall art. These accents will help to tie the look together and create a cohesive look in your home.

Create a Focal Point: To really make your rustic furniture stand out, create a focal point in your room. This could be a large piece of furniture such as a bed frame or a fireplace. This will draw the eye and create a focal point in your room.

These are just a few tips and ideas for incorporating rustic furniture into your home decor. With a bit of creativity and planning, you can create a cozy and inviting atmosphere in your home with rustic furniture.

The Benefits of Rustic Revival: Why Rustic Furniture is Making a Comeback

In recent years, rustic furniture has seen a resurgence in popularity. This trend is part of a larger movement known as the Rustic Revival, which celebrates the beauty of natural materials and traditional craftsmanship. Rustic furniture is a great way to add a touch of warmth and character to any home. Here are some of the benefits of incorporating rustic furniture into your home décor.

First, rustic furniture is incredibly durable. Many pieces are made from solid wood, which is known for its strength and longevity. This makes rustic furniture an excellent choice for busy households, as it can withstand the wear and tear of everyday life. Additionally, rustic furniture is often handcrafted, meaning that it is built to last.

Second, rustic furniture is incredibly versatile. Pieces can be used in a variety of settings, from traditional to modern. This makes it easy to incorporate rustic furniture into any existing décor. Additionally, rustic furniture can be used to create a cozy, inviting atmosphere in any room.

Third, rustic furniture is often made from natural materials, such as wood, stone, and metal. This makes it an eco-friendly choice, as these materials are renewable and sustainable. Additionally, natural materials are often more affordable than synthetic materials, making rustic furniture a great option for those on a budget.

Finally, rustic furniture is incredibly beautiful. Pieces often feature intricate details and unique designs, making them stand out from other types of furniture. This makes rustic furniture a great way to add a touch of personality to any room.

The Rustic Revival is a great way to add a touch of warmth and character to any home. Rustic furniture is incredibly durable, versatile, eco-friendly, and beautiful, making it an excellent choice for any décor. Whether you’re looking for a statement piece or a subtle accent, rustic furniture is sure to make a lasting impression.

Conclusion

The Rustic Revival style of furniture is a great way to add a unique and timeless look to any home. With its natural materials, rustic furniture can be used to create a cozy and inviting atmosphere. Whether you are looking for a rustic dining table, a rustic coffee table, or a rustic armchair, there are plenty of options to choose from. With a little bit of creativity and imagination, you can create a beautiful and unique rustic furniture piece that will be the perfect addition to your home.

Elegance in Detail: Unveiling Wainscoting Trim for Classic Style

Source : https://empire-s3-production.bobvila.com

Elegance in Detail: Unveiling wainscoting trim for Classic Style is a comprehensive guide to the timeless and classic style of wainscoting trim. Wainscoting is a decorative wall covering that has been used for centuries to add a touch of elegance and sophistication to any room. This guide will provide an overview of the different types of wainscoting trim, the materials used, and the installation process. It will also provide tips and tricks for creating a beautiful and timeless look in any room. With this guide, you will be able to create a classic and elegant look in your home that will last for years to come.

How to Achieve Elegance with Wainscoting Trim: A Guide to Classic Style

wainscoting trim is a classic way to add elegance and sophistication to any room. It is a timeless design element that can be used to create a beautiful and inviting atmosphere. Whether you are looking to add a touch of class to your living room, dining room, or bedroom, wainscoting trim is the perfect way to do it.

When it comes to wainscoting trim, there are a few key elements to consider. First, you will need to decide on the type of trim you want to use. There are several different types of trim available, including beadboard, paneling, and raised paneling. Each type of trim has its own unique look and feel, so it is important to choose the one that best suits your style and the overall look of the room.

Once you have chosen the type of trim you want to use, you will need to decide on the height of the trim. Generally, wainscoting trim is installed at a height of between 30 and 36 inches. This height is ideal for creating a classic look and feel.

The next step is to choose the material for the trim. There are several different materials available, including wood, vinyl, and metal. Each material has its own unique look and feel, so it is important to choose the one that best suits your style and the overall look of the room.

Finally, you will need to decide on the color of the trim. There are a variety of colors available, including white, black, and natural wood. Again, it is important to choose the color that best suits your style and the overall look of the room.

By following these steps, you can easily achieve a classic and elegant look with wainscoting trim. With the right materials and colors, you can create a timeless and inviting atmosphere in any room.

The Benefits of Wainscoting Trim: Adding a Touch of Elegance to Any Room

wainscoting trim is a classic and timeless way to add a touch of elegance to any room. This type of trim is a decorative wall covering that is typically made of wood, and it is used to cover the lower portion of a wall. It is a great way to add a touch of sophistication to any room, and it can be used in a variety of ways.

One of the main benefits of wainscoting trim is that it can be used to create a more formal look in a room. This type of trim is often used in formal dining rooms, living rooms, and entryways. It can also be used to create a more traditional look in a room, as it is often used in traditional-style homes. wainscoting trim can also be used to create a more modern look in a room, as it is often used in contemporary-style homes.

Another benefit of wainscoting trim is that it can be used to add texture and depth to a room. This type of trim can be used to create a more interesting look in a room, as it can be used to create a variety of patterns and designs. wainscoting trim can also be used to create a more inviting atmosphere in a room, as it can be used to create a cozy and inviting atmosphere.

wainscoting trim is also a great way to add a touch of color to a room. This type of trim can be used to create a more vibrant look in a room, as it can be used to create a variety of colors and patterns. wainscoting trim can also be used to create a more subtle look in a room, as it can be used to create a more subtle and muted look.

Finally, wainscoting trim is a great way to add a touch of elegance to any room. This type of trim is often used in formal dining rooms, living rooms, and entryways, and it can be used to create a more sophisticated look in a room. wainscoting trim can also be used to create a more inviting atmosphere in a room, as it can be used to create a cozy and inviting atmosphere.

Overall, wainscoting trim is a great way to add a touch of elegance to any room. This type of trim can be used to create a more formal look in a room, as well as a more traditional or modern look. It can also be used to add texture and depth to a room, as well as a touch of color. Finally, wainscoting trim can be used to create a more inviting atmosphere in a room, as it can be used to create a cozy and inviting atmosphere.

Conclusion

Elegance in Detail: Unveiling wainscoting trim for Classic Style is a great resource for anyone looking to add a touch of classic style to their home. wainscoting trim is a timeless and versatile design element that can be used to create a variety of looks. From traditional to modern, wainscoting trim can be used to create a unique and stylish look in any room. With the right materials and installation techniques, wainscoting trim can be used to create a beautiful and timeless look that will last for years to come.

Budget-Friendly Cheers: Crafting a Cheap Outdoor Bar for Entertaining

Source : https://www.bhg.com

Welcome to Budget-Friendly Cheers: Crafting a cheap outdoor bar for Entertaining! If you’re looking for a way to entertain your friends and family without breaking the bank, then you’ve come to the right place. In this guide, we’ll show you how to create a budget-friendly outdoor bar that will be the perfect addition to your backyard or patio. We’ll provide step-by-step instructions on how to build the bar, as well as tips on how to save money while shopping for supplies. With a little bit of creativity and some elbow grease, you can create a stylish and affordable outdoor bar that will be the envy of your neighborhood. So let’s get started!

How to Create a Budget-Friendly Outdoor Bar for Entertaining: Tips and Tricks for Crafting a Cheap Bar Setup

Creating a budget-friendly outdoor bar for entertaining can be a great way to enjoy the outdoors while still keeping costs low. With a few simple tips and tricks, you can craft a cheap bar setup that will be the envy of your friends and family.

First, consider the location of your outdoor bar. If you have a patio or deck, this is the perfect spot to set up your bar. If you don’t have a patio or deck, you can still create a great outdoor bar by setting up a table and chairs in your backyard. Make sure to choose a spot that is close to your house so you can easily access the bar and its supplies.

Next, you’ll need to decide what type of bar you want to create. If you’re looking for a more traditional bar setup, you can purchase a bar cart or bar table. These are relatively inexpensive and can be found at most home goods stores. If you’re looking for something more unique, you can create your own bar by repurposing furniture or using items you already have. For example, you can use an old dresser as a bar cart or an old bookshelf as a bar table.

Once you’ve chosen the type of bar you want, it’s time to stock it with supplies. You’ll need glasses, mixers, and other barware. You can find these items at thrift stores or online for a fraction of the cost of buying them new. You’ll also need to purchase alcohol, but you can save money by buying in bulk or opting for cheaper brands.

Finally, you’ll need to decorate your bar. You can use items you already have, such as plants, candles, and string lights, or you can purchase decorations from a dollar store. You can also make your own decorations, such as a chalkboard menu or a sign with your bar’s name.

Creating a budget-friendly outdoor bar for entertaining doesn’t have to be expensive or difficult. With a few simple tips and tricks, you can craft a cheap bar setup that will be the envy of your friends and family.

DIY Ideas for a Cheap Outdoor Bar: Creative Ways to Make a Bar on a Budget for Entertaining Guests

Creating an outdoor bar can be a great way to entertain guests and enjoy the outdoors. However, it can be expensive to purchase all the necessary items. Fortunately, there are several creative ways to make a bar on a budget.

One of the most cost-effective ways to create an outdoor bar is to use repurposed items. For example, an old dresser can be used as a bar. Simply paint it and add a countertop. You can also use old pallets to create a bar. Simply stack the pallets and add a countertop.

Another great way to create an outdoor bar is to use a large planter. Fill the planter with soil and add a countertop. You can also use a large tree stump as a bar. Simply cut the top of the stump and add a countertop.

If you have a large outdoor space, you can create a tiki bar. This can be done by using bamboo poles and thatch. You can also use a large umbrella to create a tiki bar. Simply add a countertop and some bar stools.

Finally, you can create a bar using a large cooler. Simply add a countertop and some bar stools. You can also use a large cooler to store drinks and snacks.

Creating an outdoor bar on a budget is possible with a little creativity. By using repurposed items, planters, tree stumps, tiki bars, and coolers, you can create a great outdoor bar for entertaining guests.

Conclusion

Budget-Friendly Cheers: Crafting a cheap outdoor bar for Entertaining is a great way to create a fun and inviting outdoor space for entertaining. With a few simple materials and a little bit of creativity, you can create a stylish and affordable outdoor bar that will be the envy of your friends and family. Whether you’re looking for a place to host a summer barbecue or just a spot to relax and enjoy a few drinks, this budget-friendly outdoor bar is sure to be a hit.

Safety First: How to Make a Baby Gate That Blends Seamlessly

Source : https://thestairbarrier.com

Into Your Home

Safety First: how to make a baby gate That Blends Seamlessly Into Your Home is a guide to creating a baby gate that is both safe and aesthetically pleasing. This guide will provide step-by-step instructions on how to make a baby gate that is both functional and stylish. It will also provide tips on how to choose the right materials and design to ensure that the gate blends in with the rest of your home décor. With this guide, you can create a baby gate that is both safe and stylish, allowing you to keep your little one safe while still maintaining the look of your home.

DIY Baby Gate: How to Create a Stylish and Safe Baby Gate for Your Home

Creating a safe and stylish baby gate for your home is an important part of ensuring the safety of your little one. With a few simple materials and tools, you can easily make a custom baby gate that will look great and keep your child safe.

To begin, you will need to measure the opening you want to install the gate in. Measure the width and height of the opening and make sure to leave a few inches of extra space on either side. This will ensure that the gate fits properly and securely.

Next, you will need to purchase the materials for your gate. You will need a wooden frame, hinges, screws, and a latch. You can find these items at your local hardware store.

Once you have all of your materials, you can begin to assemble the gate. Start by cutting the wooden frame to the size of the opening. Then, attach the hinges to the frame and secure them with screws. Finally, attach the latch to the frame and secure it with screws.

Once the gate is assembled, you can paint or stain it to match the decor of your home. You can also add decorative touches such as a name plaque or a decorative pattern.

Finally, you will need to install the gate. Make sure to use the appropriate hardware and follow the instructions provided with the gate. Once the gate is installed, you can rest assured that your little one is safe and secure.

Creating a stylish and safe baby gate for your home is a simple and rewarding project. With a few basic materials and tools, you can easily make a custom gate that will look great and keep your child safe.

Baby Proofing 101: Essential Tips for Keeping Your Home Safe and Secure for Your Little One

As a parent, it is your responsibility to ensure that your home is safe and secure for your little one. Baby proofing your home is an essential part of parenting and can help to prevent accidents and injuries. Here are some essential tips for baby proofing your home:

1. Install safety gates at the top and bottom of stairs. This will help to prevent your child from accessing areas of the home that may be dangerous.

2. Cover all electrical outlets with safety covers. This will help to prevent your child from sticking their fingers or other objects into the outlets.

3. Secure furniture and appliances to the wall. This will help to prevent them from tipping over and causing injury.

4. Install window guards or safety netting to prevent your child from falling out of windows.

5. Place locks on cabinets and drawers that contain hazardous materials or sharp objects.

6. Install smoke and carbon monoxide detectors in your home. This will help to alert you to any potential dangers.

7. Place corner and edge guards on furniture with sharp edges. This will help to prevent your child from bumping into them and getting injured.

8. Install safety latches on doors and windows. This will help to prevent your child from accessing areas of the home that may be dangerous.

By following these tips, you can help to ensure that your home is safe and secure for your little one. Baby proofing your home is an essential part of parenting and can help to prevent accidents and injuries.

Conclusion

Into Your Home

Safety First: how to make a baby gate That Blends Seamlessly Into Your Home is a great resource for parents who want to keep their children safe while still maintaining the aesthetic of their home. With the right materials and tools, anyone can make a custom baby gate that will fit their home perfectly. Not only will this gate keep your children safe, but it will also add a unique touch to your home. With a little bit of effort, you can create a beautiful and functional baby gate that will keep your children safe and secure.

Tension Magic: Elevating Your Space with IKEA Tension Curtain Rods

Source : https://m.media-amazon.com

Tension Magic: Elevating Your Space with IKEA Tension Curtain Rods is a guide to help you create a beautiful and functional space with IKEA tension curtain rods. This guide will provide you with step-by-step instructions on how to install and use IKEA tension curtain rods to create a unique and stylish look in any room. With this guide, you will learn how to choose the right tension curtain rod for your space, how to install it correctly, and how to accessorize it with curtains and other decorative items. With the help of this guide, you can easily create a space that is both stylish and functional.

How to Transform Your Home with IKEA Tension Curtain Rods: Tips and Tricks for Elevating Your Space

Are you looking for an easy and affordable way to transform your home? IKEA tension curtain rods are a great option for elevating your space. With a few simple tips and tricks, you can create a stylish and modern look in any room.

First, consider the size of the room and the type of window you have. If you have a large window, you may want to opt for a longer tension rod. This will allow you to hang heavier curtains and create a more dramatic look. If you have a smaller window, a shorter rod will be sufficient.

Next, decide on the type of curtains you want to hang. If you’re looking for a more modern look, consider sheer curtains. These will allow natural light to filter through while still providing some privacy. If you’re looking for a more traditional look, heavier curtains are a great option.

Once you’ve chosen the curtains, it’s time to install the rod. IKEA tension curtain rods are easy to install and require no tools. Simply twist the rod until it is tight and secure. Make sure to measure the window before you install the rod to ensure a proper fit.

Finally, accessorize your curtains with tiebacks or decorative finials. These will add a touch of elegance to your curtains and complete the look.

With IKEA tension curtain rods, you can easily transform your home. With a few simple tips and tricks, you can create a stylish and modern look in any room.

The Magic of Tension Curtain Rods: How IKEA Can Help You Create a Cozy and Inviting Home

Creating a cozy and inviting home is a goal for many homeowners. Fortunately, there are a variety of ways to achieve this goal, and one of the most effective is to use tension curtain rods. Tension curtain rods are an easy and affordable way to add a touch of style and warmth to any room.

Tension curtain rods are a type of rod that is held in place by tension, rather than screws or nails. This makes them ideal for renters or those who don’t want to damage their walls. They are also easy to install and can be adjusted to fit any window size.

IKEA is a great place to find tension curtain rods. They offer a variety of styles and sizes to fit any budget. Their rods are made from durable materials and come in a variety of colors and finishes. They also offer a range of accessories, such as finials, tiebacks, and brackets, to complete the look.

Tension curtain rods are a great way to add a touch of style and warmth to any room. They are easy to install, affordable, and can be adjusted to fit any window size. IKEA is a great place to find tension curtain rods, and their selection of styles and sizes makes it easy to find the perfect rod for your home. With the help of IKEA, you can create a cozy and inviting home in no time.

Conclusion

The IKEA Tension Curtain Rods are a great way to elevate any space with a modern and stylish look. They are easy to install, affordable, and come in a variety of sizes and colors to fit any décor. With the ability to hang curtains, drapes, and other window treatments, these rods are a great way to add a touch of style to any room. Whether you are looking for a simple solution to hang curtains or a more decorative way to dress up a window, the IKEA Tension Curtain Rods are a great choice.

Rustic Refuge: Maximizing Storage with Creative Rustic Solutions

Source : https://www.thespruce.com

Welcome to Rustic Refuge, your source for maximizing storage with creative rustic solutions. We specialize in creating unique and stylish storage solutions that are both functional and aesthetically pleasing. Our rustic designs are perfect for any home, office, or business. We offer a wide variety of products, from shelves and cabinets to wall-mounted storage and more. Our products are made from high-quality materials and are designed to last. We strive to provide our customers with the best possible storage solutions that are both stylish and practical. Thank you for choosing Rustic Refuge!

How to Maximize Storage Space with Rustic Solutions: Tips and Tricks for Creating a Cozy and Organized Home

Maximizing storage space in a home can be a challenge, but with the right rustic solutions, it is possible to create a cozy and organized home. Here are some tips and tricks to help you make the most of your space.

First, consider the size of the space you have to work with. Measure the area and determine how much storage you need. This will help you decide which rustic solutions are best for your home.

Second, look for furniture pieces that can double as storage. For example, a bench with drawers or a coffee table with shelves can provide extra storage space. You can also use baskets, crates, and other containers to store items.

Third, use wall space to your advantage. Hang shelves, hooks, and racks to store items. This will help you keep items off the floor and out of the way.

Fourth, use vertical storage solutions. Utilize the space between the ceiling and the top of your furniture to store items. This can be done with shelves, cabinets, or even hanging baskets.

Finally, use decorative items to add a rustic touch to your home. Hang vintage signs, baskets, and other items to give your home a cozy and organized look.

By following these tips and tricks, you can maximize storage space with rustic solutions and create a cozy and organized home. With a little creativity and planning, you can make the most of your space and enjoy a clutter-free home.

Get Creative with Rustic Storage Solutions: Ideas for Making the Most of Your Space in a Rustic Refuge

If you’re looking to create a rustic refuge in your home, storage solutions are key. With a few creative ideas, you can make the most of your space and create a cozy, inviting atmosphere. Here are some ideas for rustic storage solutions that will help you maximize your space.

1. Utilize Wall Space: Make use of wall space by installing shelves, hooks, and racks. This is a great way to store items like books, magazines, and other knick-knacks. You can also hang baskets or buckets to store items like blankets, towels, and other items.

2. Use Baskets and Crates: Baskets and crates are a great way to store items while adding a rustic touch to your space. You can use them to store items like books, magazines, and other items.

3. Install a Pegboard: A pegboard is a great way to store items like tools, kitchen utensils, and other items. It’s also a great way to add a rustic touch to your space.

4. Repurpose Furniture: Repurpose furniture like dressers, cabinets, and armoires to store items like clothing, linens, and other items. You can also use them to store books, magazines, and other items.

5. Hang a Ladder: Hang a ladder on the wall and use it to store items like blankets, towels, and other items. This is a great way to add a rustic touch to your space.

By utilizing these creative storage solutions, you can make the most of your space and create a cozy, inviting atmosphere in your rustic refuge.

Conclusion

Rustic Refuge is a great resource for anyone looking to maximize their storage space with creative rustic solutions. With a wide variety of products to choose from, Rustic Refuge offers a unique and stylish way to store items in any room of the home. From rustic shelves to rustic cabinets, Rustic Refuge has something for everyone. With its quality craftsmanship and attention to detail, Rustic Refuge is sure to provide a unique and stylish storage solution for any home.

Pallet Pursuits: Discovering Where and How to Get Pallets

Source : https://cdn.homedit.com

Pallet Pursuits is a comprehensive guide to discovering where and how to get pallets. Whether you are a DIY enthusiast, a small business owner, or a large corporation, this guide will provide you with the information you need to find the perfect pallets for your project. With detailed information on the different types of pallets, where to find them, and how to get them, Pallet Pursuits will help you get the most out of your pallet project.

Exploring the Different Sources of Pallets: Where to Find Free and Low-Cost Pallets

Pallets are a great way to save money on shipping and storage costs. They are also a great resource for DIY projects and craft ideas. But where can you find free or low-cost pallets? This article will explore the different sources of pallets and provide tips on how to find them.

One of the best places to find free or low-cost pallets is your local hardware store. Many hardware stores will have a selection of pallets that they are willing to give away for free or at a discounted price. You can also check with local businesses that may have pallets they are no longer using. These businesses may be willing to give away their pallets for free or at a discounted price.

Another great source of pallets is online. There are many websites that specialize in selling used pallets. These websites often offer pallets at a discounted price. You can also check online classifieds such as Craigslist or eBay for pallets that are being sold by individuals.

Finally, you can also check with your local recycling center. Many recycling centers will have a selection of pallets that they are willing to give away for free or at a discounted price.

No matter where you find your pallets, it is important to inspect them before using them. Make sure that the pallets are in good condition and free of any debris or damage. This will ensure that your project or craft is safe and secure.

By exploring the different sources of pallets, you can find free or low-cost pallets that can be used for a variety of projects and crafts. With a little bit of research, you can find the perfect pallets for your needs.

Uncovering the Benefits of Reusing Pallets: How to Make the Most of Your Pallet Pursuits

Reusing pallets is an increasingly popular way to save money and reduce waste. With a little creativity and effort, you can make the most of your pallet pursuits and reap the many benefits of reusing pallets.

One of the most obvious benefits of reusing pallets is the cost savings. Pallets are often available for free or at a very low cost, making them an economical choice for many projects. Additionally, reusing pallets can help reduce the amount of waste that goes into landfills. By reusing pallets, you can help reduce the amount of wood that is discarded and help preserve natural resources.

Another benefit of reusing pallets is the versatility they offer. Pallets can be used for a variety of projects, from furniture to garden beds. With a little creativity, you can transform a pallet into almost anything you can imagine. Additionally, pallets are often made from durable materials, making them a great choice for projects that require strength and durability.

Finally, reusing pallets can be a great way to add a unique touch to your home or garden. Pallets can be used to create one-of-a-kind furniture pieces or garden beds that will add a unique touch to any space.

Reusing pallets can be a great way to save money, reduce waste, and add a unique touch to your home or garden. With a little creativity and effort, you can make the most of your pallet pursuits and reap the many benefits of reusing pallets.

Conclusion

Pallet Pursuits is an invaluable resource for anyone looking to get their hands on free or low-cost pallets. With its comprehensive list of sources, detailed instructions on how to find and acquire pallets, and helpful tips on how to make the most of them, Pallet Pursuits is an invaluable resource for anyone looking to get creative with pallets. Whether you’re looking to build furniture, create a garden, or just find a way to repurpose something, Pallet Pursuits is the perfect place to start.