Countdown to Creativity: New Year’s Ideas for Home Improvements

Source : https://media.architecturaldigest.com

Countdown to Creativity: New Year’s Ideas for Home Improvements is a great resource for anyone looking to spruce up their home in the new year. Whether you’re looking for a quick and easy project or a more involved renovation, this guide has something for everyone. From simple DIY projects to more complex renovations, this guide provides step-by-step instructions and helpful tips to help you get the job done. With ideas for every budget and skill level, you’ll be sure to find something that fits your needs. So, let’s get started and make your home look its best in 2021!

5 New Year’s Home Improvement Ideas to Kickstart Your Countdown to Creativity

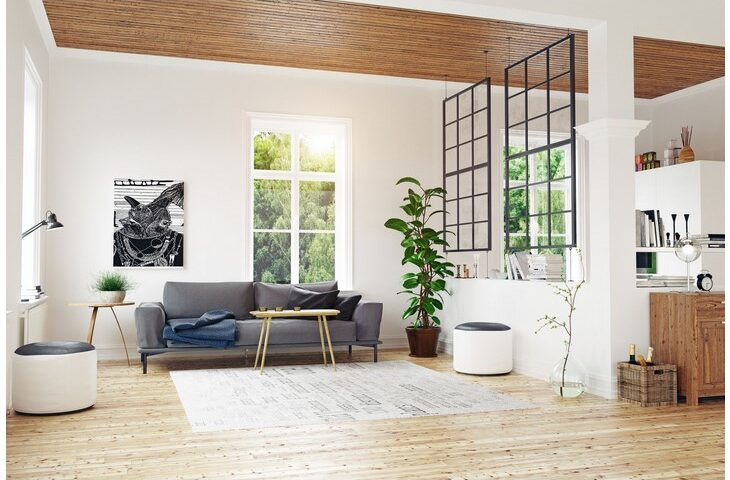
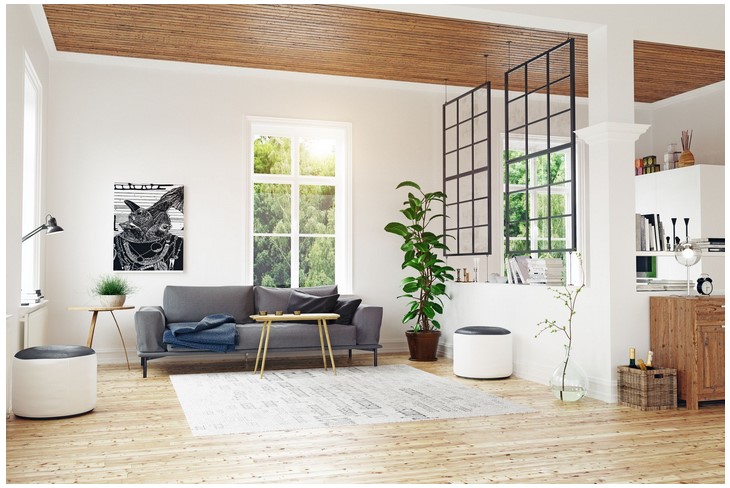
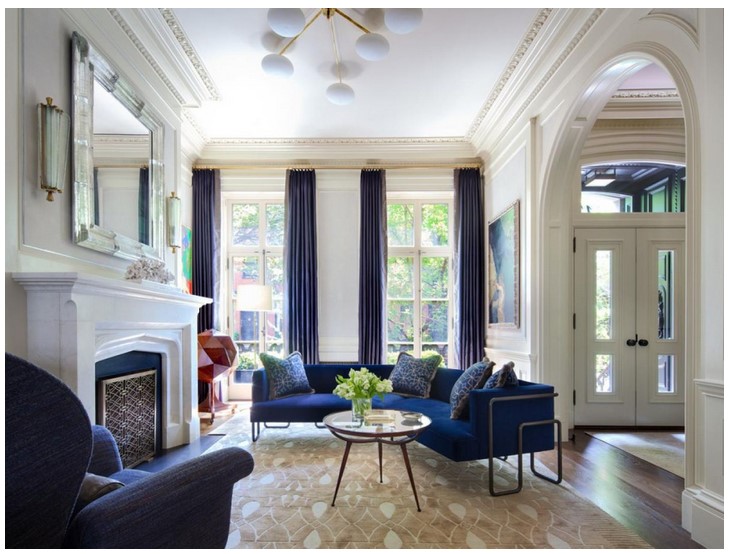
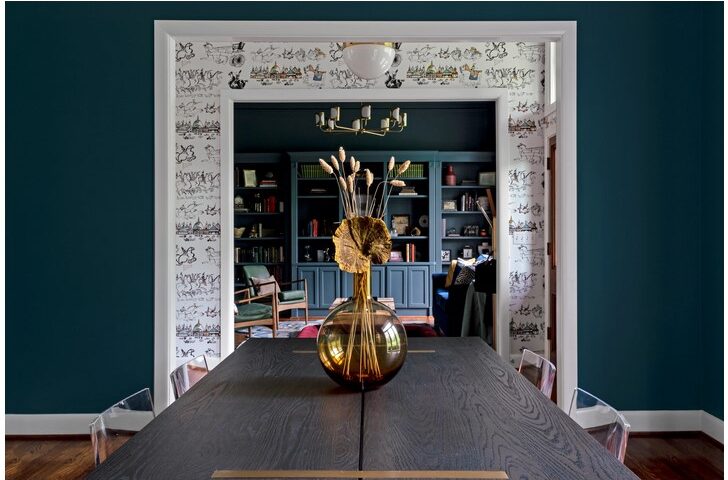
1. Refresh Your Paint: A fresh coat of paint can instantly transform any room in your home. Whether you’re looking to brighten up a living room, add a pop of color to a bedroom, or give your kitchen a modern update, a new paint job is a great way to start the new year.

2. Upgrade Your Lighting: Lighting can make a huge difference in the look and feel of a room. Consider replacing outdated fixtures with modern, energy-efficient options. You can also add a few accent lights to highlight artwork or architectural features.

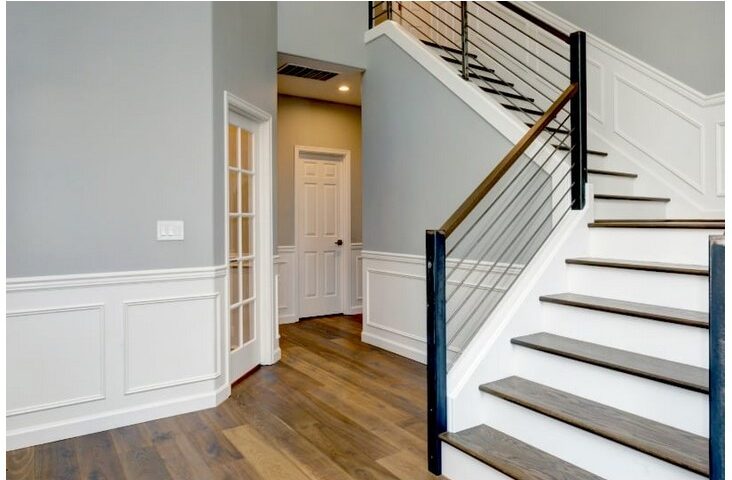
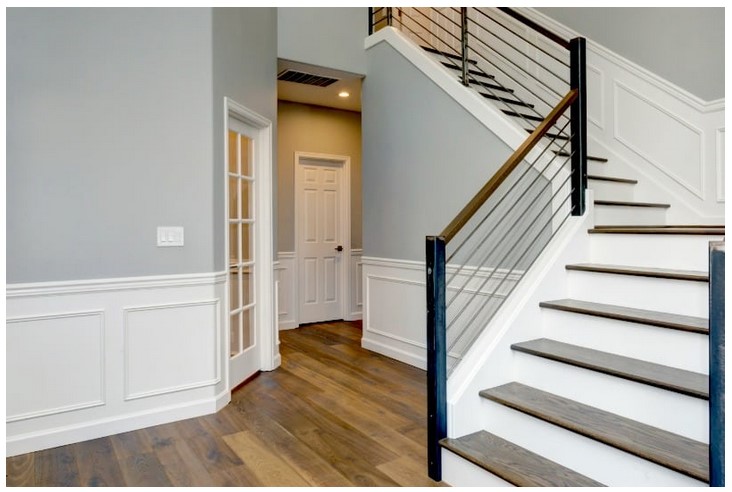
3. Install New Flooring: If your floors are looking a bit worn, consider replacing them with new hardwood, tile, or laminate. Not only will this give your home a fresh look, but it can also increase its value.

4. Add a Deck or Patio: If you’re looking to add some outdoor living space, consider building a deck or patio. This is a great way to create a relaxing outdoor oasis and extend your living space.

5. Update Your Kitchen: A kitchen remodel can be a great way to start the new year. Consider replacing outdated appliances, adding new countertops, or installing new cabinets. This is a great way to give your kitchen a modern update and increase the value of your home.

How to Make the Most of Your Home Improvement Budget This New Year’s

As the New Year approaches, many of us are looking for ways to improve our homes. Whether you’re looking to make a few minor changes or undertake a major renovation, it’s important to make the most of your home improvement budget. Here are a few tips to help you get the most out of your home improvement budget this New Year’s.

First, make a plan. Before you start any project, it’s important to have a clear idea of what you want to accomplish. Make a list of the projects you want to complete and prioritize them. This will help you determine which projects are most important and which ones can wait.

Second, do your research. Once you have a plan in place, it’s time to do some research. Look into the cost of materials and labor for each project. This will help you determine how much you need to budget for each project.

Third, shop around. Don’t be afraid to shop around for the best deals. Compare prices at different stores and online to find the best deals. You may also be able to find discounts or coupons that can help you save money.

Fourth, consider DIY projects. If you’re handy, you may be able to save money by doing some of the work yourself. This can be a great way to save money and still get the results you want.

Finally, don’t forget about the little things. Even small changes can make a big difference in the look and feel of your home. Consider adding a few new pieces of furniture or artwork, or repainting a room. These small changes can make a big impact without breaking the bank.

By following these tips, you can make the most of your home improvement budget this New Year’s. With a little planning and research, you can make your home look and feel like new without breaking the bank.

Conclusion

Countdown to Creativity: New Year’s Ideas for Home Improvements is a great resource for anyone looking to spruce up their home in the new year. From simple DIY projects to more complex renovations, this guide provides a wealth of ideas to help you get started. Whether you’re looking to add a fresh coat of paint, upgrade your kitchen appliances, or completely remodel your bathroom, this guide has something for everyone. With its helpful tips and easy-to-follow instructions, Countdown to Creativity: New Year’s Ideas for Home Improvements is the perfect way to start the new year off right.

Divide and Conquer: How to Make a Room Divider That Impresses

Source : google.com

Divide and Conquer: how to make a room divider That Impresses is a comprehensive guide to creating a stylish and functional room divider. Whether you’re looking to create a private space in a shared room, or just want to add a touch of style to your home, this guide will provide you with the tools and techniques you need to make a room divider that will impress. From selecting the right materials to creating a unique design, this guide will walk you through the entire process of creating a room divider that will be the envy of your friends and family. With a few simple steps, you can create a room divider that will be the perfect addition to your home.

DIY Room Divider Ideas: How to Create a Stylish and Functional Room Divider on a Budget

Creating a stylish and functional room divider on a budget can be a challenge. However, with a little creativity and some DIY know-how, it is possible to create a beautiful and practical room divider that will add style and functionality to any space. Here are some ideas for creating a stylish and functional room divider on a budget.

1. Use Curtains: Curtains are an inexpensive and easy way to create a room divider. Choose curtains in a color or pattern that complements the existing décor of the room. Hang the curtains from the ceiling or from a rod mounted on the wall.

2. Repurpose Furniture: Repurposing furniture is a great way to create a room divider on a budget. An old bookcase, dresser, or armoire can be used to create a stylish and functional room divider.

3. Hang a Tapestry: Tapestries are a great way to add color and texture to a room. Hang a tapestry from the ceiling or from a rod mounted on the wall to create a beautiful and functional room divider.

4. Use a Room Divider Screen: Room divider screens are a great way to create a stylish and functional room divider. Choose a screen in a color or pattern that complements the existing décor of the room.

5. Hang Beaded Curtains: Beaded curtains are a great way to add color and texture to a room. Hang beaded curtains from the ceiling or from a rod mounted on the wall to create a stylish and functional room divider.

Creating a stylish and functional room divider on a budget is possible with a little creativity and some DIY know-how. With these ideas, you can create a beautiful and practical room divider that will add style and functionality to any space.

Divide and Conquer: How to Maximize Space with a Room Divider That Enhances Your Home Decor

When it comes to maximizing space in your home, a room divider can be a great solution. Room dividers are a great way to create separate areas in a single room, while also adding a decorative touch to your home decor. Here are some tips on how to use a room divider to maximize space and enhance your home decor.

First, consider the size of the room divider. Room dividers come in a variety of sizes, so it’s important to choose one that fits the space you have available. If you have a large room, you may want to opt for a larger room divider to create more distinct areas. On the other hand, if you have a smaller space, a smaller room divider may be more appropriate.

Next, think about the material of the room divider. Room dividers come in a variety of materials, such as wood, metal, and fabric. Each material has its own unique look and feel, so it’s important to choose one that complements your home decor. For example, if you have a modern home, a metal room divider may be a great choice.

Finally, consider the design of the room divider. Room dividers come in a variety of designs, from traditional to modern. Choose a design that fits your home decor and adds a unique touch to the space. For example, if you have a contemporary home, a modern room divider may be a great choice.

By following these tips, you can maximize space with a room divider that enhances your home decor. Room dividers are a great way to create separate areas in a single room, while also adding a decorative touch to your home decor. With the right size, material, and design, you can create a room divider that is both functional and stylish.

Conclusion

Divide and Conquer: how to make a room divider That Impresses is a great guide for anyone looking to create a unique and stylish room divider. With the right materials and tools, anyone can create a beautiful and functional room divider that will add a touch of style to any room. With the help of this guide, you can easily create a room divider that will impress your friends and family.

Picture Perfect: Designing Photobooth Backdrops for Special Events

Source : https://cdn0.hitched.co.uk

Picture Perfect: Designing Photobooth Backdrops for Special Events is a comprehensive guide to creating stunning photobooth backdrops for any special event. Whether you’re a professional event planner or a DIY enthusiast, this book will provide you with the tools and techniques you need to create a unique and memorable photobooth experience. From selecting the right materials and colors to creating a backdrop that will stand out in photos, this book will help you create a photobooth backdrop that will be the talk of the event. With step-by-step instructions and helpful tips, you’ll be able to create a photobooth backdrop that will make your event one to remember.

How to Create a Unique Photobooth Backdrop for Your Special Event: Tips and Tricks for Designing a Picture Perfect Scene

Creating a unique photobooth backdrop for your special event can be a fun and creative way to make your event stand out. Whether you’re hosting a wedding, birthday party, or corporate event, a photobooth backdrop can be a great way to capture memories and create a fun atmosphere. Here are some tips and tricks for designing a picture perfect scene:

1. Choose a Theme: Selecting a theme for your photobooth backdrop is a great way to make it unique and memorable. Consider the type of event you’re hosting and the overall aesthetic you’d like to create. Popular themes include tropical, vintage, and modern.

2. Select a Color Palette: Once you’ve chosen a theme, select a color palette that will complement it. Consider colors that will make your backdrop stand out and create a cohesive look.

3. Incorporate Props: Props can be a great way to add a fun element to your photobooth backdrop. Consider props that will fit your theme, such as hats, sunglasses, and signs.

4. Use Lighting: Lighting can be a great way to make your photobooth backdrop stand out. Consider using string lights, spotlights, or even a disco ball to create a unique atmosphere.

5. Hang a Backdrop: Hang a backdrop behind your photobooth to create a more professional look. Consider using a fabric backdrop or a vinyl backdrop with a custom design.

By following these tips and tricks, you can create a unique photobooth backdrop for your special event that will be sure to make it memorable. With a little creativity and planning, you can create a picture perfect scene that your guests will love.

DIY Photobooth Backdrop Ideas for Your Next Special Event: Creative Ways to Make Your Photos Pop

Are you looking for a unique way to make your next special event stand out? A DIY photobooth backdrop is the perfect way to add a personal touch to your event and make your photos pop. With a few simple supplies and a bit of creativity, you can create a stunning backdrop that will be the talk of the party. Here are some creative ideas to get you started.

1. Create a Colorful Wall of Streamers. Streamers are an inexpensive and easy way to create a vibrant backdrop. Choose a few colors that match your event’s theme and hang them in a crisscross pattern on the wall. You can also add some fun props like balloons or pom-poms to make the backdrop even more eye-catching.

2. Hang a Fabric Backdrop. If you’re looking for a more sophisticated look, consider hanging a fabric backdrop. Choose a fabric that complements your event’s color scheme and hang it on the wall with some simple hooks. You can also add some string lights or paper lanterns to give the backdrop a festive feel.

3. Make a Paper Flower Wall. Paper flowers are a great way to add a touch of whimsy to your photobooth backdrop. Choose a few colors of paper and cut out flower shapes. Then, use tape or glue to attach the flowers to the wall in a pattern of your choice.

4. Hang a Garland of Photos. If you’re looking for a more personal touch, consider hanging a garland of photos. Choose photos that are meaningful to you and your guests and hang them on a string or ribbon. This is a great way to add a personal touch to your photobooth backdrop.

Creating a DIY photobooth backdrop is a great way to make your next special event stand out. With a few simple supplies and a bit of creativity, you can create a stunning backdrop that will be the talk of the party. Try one of these creative ideas to make your photos pop!

Conclusion

Picture Perfect: Designing Photobooth Backdrops for Special Events is an invaluable resource for anyone looking to create unique and memorable photobooth backdrops for their special events. It provides detailed instructions on how to create a variety of backdrops, from simple to complex, and offers helpful tips and tricks to make the process easier. With its comprehensive guide, anyone can create a stunning backdrop that will make their event truly unforgettable.

Clothespin Charm: Crafting Whimsical Clothespin Ornaments

Source : https://parade.com

Clothespin Charm is a fun and creative way to make unique and whimsical clothespin ornaments. With a few simple supplies, you can create beautiful and unique decorations for your home or to give as gifts. Whether you’re a beginner or an experienced crafter, Clothespin Charm has something for everyone. With easy-to-follow instructions and helpful tips, you’ll be able to make beautiful clothespin ornaments in no time. So grab your supplies and get ready to craft some charming clothespin ornaments!

Get Creative with Clothespin Charms: Tips and Tricks for Crafting Whimsical Ornaments

Clothespin charms are a fun and creative way to add a unique touch to any craft project. With a few simple supplies and a bit of imagination, you can create whimsical ornaments that will bring a smile to anyone’s face. Here are some tips and tricks to help you get started.

First, choose the type of clothespin you want to use. Wooden clothespins are the most common, but you can also find plastic and metal varieties. Consider the size and shape of the clothespin when selecting one, as this will determine the size and shape of the charm you create.

Next, decide what type of embellishments you want to use. You can use paint, glitter, beads, sequins, fabric, ribbon, and more to decorate your clothespin charm. Get creative and mix and match different materials to create a unique look.

Once you have your supplies, it’s time to start crafting. Begin by painting the clothespin with a base coat of paint. Once the paint is dry, you can start adding your embellishments. Glue on beads, sequins, and other decorations to create a one-of-a-kind design.

Finally, attach a loop of ribbon or string to the top of the clothespin to create a hanger. This will allow you to hang your charm from a tree, a window, or anywhere else you’d like to display it.

With these tips and tricks, you can create beautiful and unique clothespin charms that will add a special touch to any craft project. Get creative and have fun!

Crafting with Clothespins: How to Make Unique and Colorful Clothespin Ornaments for Your Home Decor

Clothespins are a versatile and affordable crafting material that can be used to create unique and colorful ornaments for your home decor. With a few simple supplies and a bit of creativity, you can make beautiful clothespin ornaments that will add a touch of personality to any room.

To begin, you will need a selection of clothespins, paint, paintbrushes, and other decorative materials such as glitter, sequins, and ribbons. Start by painting the clothespins in a variety of colors. You can use a single color for a more subtle look, or mix and match colors for a more vibrant effect. Once the paint is dry, you can add additional decorations such as glitter, sequins, and ribbons.

Once your clothespins are decorated, you can begin to assemble them into ornaments. Start by attaching two clothespins together with a piece of string or ribbon. You can then add additional clothespins to create a variety of shapes and sizes. For example, you can create a star shape by attaching five clothespins together in a star pattern. You can also create a wreath shape by attaching clothespins in a circular pattern.

Once your clothespin ornaments are assembled, you can hang them on your walls or in your windows. You can also use them to decorate your Christmas tree or to add a festive touch to your mantelpiece. clothespin ornaments are a great way to add a unique and colorful touch to your home decor.

With a few simple supplies and a bit of creativity, you can create beautiful and unique clothespin ornaments that will add a touch of personality to any room. So get creative and start crafting with clothespins today!

Conclusion

Clothespin Charm: Crafting Whimsical clothespin ornaments is a great way to get creative and make something unique and special. With a few simple supplies and a bit of imagination, you can create beautiful and whimsical clothespin ornaments that will bring a smile to anyone’s face. Whether you’re looking for a fun craft project to do with your kids or a unique gift for a special someone, clothespin charms are a great way to show your creativity and make something special.

Embrace Rustic Charm: Unleash Your Creativity with Rustic Craft Ideas

Source : https://blog.canadianloghomes.com

Welcome to Embrace Rustic Charm! Here, you will find a variety of rustic craft ideas to unleash your creativity. Whether you are looking for a unique way to decorate your home or a special gift for a loved one, you will find something to inspire you. From rustic furniture to handmade jewelry, you will find a variety of rustic craft ideas to explore. We hope you enjoy your journey as you explore the beauty of rustic charm.

Get Inspired by Rustic Charm: Creative Ideas for Crafting with Natural Materials

The rustic charm of natural materials can be a great source of inspiration for crafting projects. From wood to stone, natural materials can be used to create beautiful and unique pieces that will add a touch of rustic charm to any home. Here are some creative ideas for crafting with natural materials.

Wood: Wood is a versatile material that can be used to create a variety of items. From furniture to wall art, wood can be used to create beautiful pieces that will add a rustic touch to any room. You can use wood to make shelves, tables, chairs, and more. You can also use wood to create decorative items such as picture frames, clocks, and signs.

Stone: Stone is a great material for creating unique pieces. You can use stone to create sculptures, planters, and other decorative items. You can also use stone to create stepping stones, birdbaths, and other outdoor features.

Leaves and Twigs: Leaves and twigs can be used to create beautiful wreaths, garlands, and other decorations. You can also use them to make jewelry, ornaments, and other decorative items.

Moss: Moss is a great material for creating unique pieces. You can use moss to create wall art, terrariums, and other decorative items. You can also use moss to create a natural-looking ground cover for your garden.

These are just a few of the creative ideas for crafting with natural materials. With a little imagination and creativity, you can create beautiful pieces that will add a touch of rustic charm to any home.

Embrace the Beauty of Rustic Decor: Tips for Incorporating Rustic Elements into Your Home

Rustic decor is a popular style of interior design that celebrates the beauty of natural materials and the charm of a simpler time. It is a great way to bring a cozy, inviting atmosphere into your home. Here are some tips for incorporating rustic elements into your home decor.

1. Start with Natural Materials: Natural materials such as wood, stone, and metal are essential for creating a rustic look. Incorporate these materials into your furniture, flooring, and accents. Reclaimed wood is a great option for furniture, as it adds a unique character to the room.

2. Add Textures: Textures are an important part of rustic decor. Incorporate different textures into your decor with fabrics such as burlap, linen, and wool. You can also add texture with natural elements such as antlers, branches, and stones.

3. Incorporate Natural Colors: Natural colors are essential for creating a rustic look. Choose colors that are inspired by nature, such as earthy tones, muted greens, and blues. You can also add pops of color with bright accents.

4. Use Vintage Pieces: Vintage pieces are a great way to add character to your home. Look for vintage furniture, lighting, and accessories to add a unique touch to your decor.

5. Embrace Imperfections: Rustic decor is all about embracing imperfections. Don’t be afraid to mix and match different pieces and let the natural beauty of the materials shine through.

By following these tips, you can easily incorporate rustic elements into your home decor. With the right pieces, you can create a cozy, inviting atmosphere that celebrates the beauty of natural materials.

Conclusion

Embrace Rustic Charm: Unleash Your Creativity with rustic craft ideas is a great resource for anyone looking to add a touch of rustic charm to their home. With a variety of craft ideas, from furniture to decorations, this book provides a wealth of inspiration for anyone looking to create a rustic atmosphere in their home. Whether you’re looking for a unique piece of furniture or a simple decoration, this book has something for everyone. With its easy-to-follow instructions and helpful tips, Embrace Rustic Charm is sure to help you create a beautiful and inviting space.

Dive into Delight: Small Backyard Pool Ideas for Ultimate Relaxation

Source : https://blog.techo-bloc.com

Welcome to Dive into Delight, the ultimate guide to small backyard pool ideas for ultimate relaxation. Whether you’re looking to create a tranquil oasis in your own backyard or just want to cool off on a hot summer day, this guide will provide you with all the information you need to create the perfect pool for your needs. From choosing the right size and shape to selecting the best materials and features, we’ll help you create a backyard pool that will provide years of enjoyment. So, let’s dive in and explore the possibilities!

How to Create a Relaxing Oasis in Your Small Backyard with a Pool

Creating a relaxing oasis in your small backyard with a pool can be a great way to enjoy the outdoors and make the most of your outdoor space. With careful planning and the right materials, you can create a beautiful and tranquil area that you can enjoy for years to come.

The first step in creating a relaxing oasis in your small backyard is to choose the right pool. Above ground pools are a great option for small backyards, as they are easy to install and require minimal maintenance. If you have the space, an in-ground pool is also a great option, as it can be customized to fit your backyard and provide a more permanent solution.

Once you have chosen the right pool for your backyard, you can begin to plan the layout of your oasis. Consider adding a deck or patio around the pool to provide a comfortable area for lounging and entertaining. You can also add landscaping elements such as trees, shrubs, and flowers to create a more natural and inviting atmosphere.

When it comes to furnishing your oasis, choose pieces that are comfortable and durable. Look for furniture that is made from weather-resistant materials such as wicker or teak. You can also add cushions and pillows to make the area more inviting.

Finally, add some lighting to your oasis to create a more relaxing atmosphere. String lights, solar lights, and tiki torches are all great options for adding a soft glow to your backyard.

Creating a relaxing oasis in your small backyard with a pool is a great way to enjoy the outdoors and make the most of your outdoor space. With careful planning and the right materials, you can create a beautiful and tranquil area that you can enjoy for years to come.

Maximizing Your Small Backyard Space with a Pool: Tips and Tricks for Ultimate Relaxation

Creating a relaxing outdoor oasis in a small backyard can be a challenge, but with the right planning and design, you can make the most of your space and enjoy a luxurious pool area. Here are some tips and tricks for maximizing your small backyard space with a pool for ultimate relaxation.

1. Choose the Right Pool Size: When selecting a pool for a small backyard, it’s important to choose the right size. Consider the size of your yard and the amount of space you have available. A smaller pool will take up less space and still provide plenty of room for swimming and relaxation.

2. Utilize Vertical Space: To make the most of a small backyard, utilize vertical space. Consider adding a deck or patio above the pool to create a multi-level outdoor living area. This will provide additional seating and lounging space without taking up valuable ground space.

3. Add Seating and Lounging Areas: To create a relaxing atmosphere, add comfortable seating and lounging areas around the pool. Choose furniture that is lightweight and easy to move around, so you can rearrange the space as needed.

4. Incorporate Natural Elements: Incorporate natural elements into your pool area to create a tranquil atmosphere. Consider adding plants, trees, and shrubs to the area to provide shade and privacy.

5. Add Lighting: To create a relaxing atmosphere, add lighting to the pool area. Consider adding string lights, tiki torches, or landscape lighting to create a cozy ambiance.

By following these tips and tricks, you can maximize your small backyard space with a pool for ultimate relaxation. With the right planning and design, you can create a luxurious outdoor oasis that you can enjoy for years to come.

Conclusion

Dive into Delight: small backyard pool ideas for Ultimate Relaxation is a great resource for anyone looking to create a relaxing and enjoyable outdoor space. With a variety of pool designs, materials, and features, there is something for everyone. Whether you are looking for a simple plunge pool or a luxurious infinity pool, this guide provides all the information you need to make your backyard dreams come true. With the right planning and design, you can create a backyard oasis that will provide years of relaxation and enjoyment.

Industrial Chic: Mastering the Art of the Perfect Curtain Rod

Source : https://cdn.homedit.com

Industrial chic is a popular interior design style that combines modern and industrial elements to create a unique and stylish look. It is characterized by its use of raw materials, such as metal, wood, and concrete, as well as its focus on functionality and minimalism. One of the most important elements of industrial chic is the perfect curtain rod. With the right curtain rod, you can create a look that is both stylish and functional. In this guide, we will discuss the different types of curtain rods available, as well as tips for choosing the perfect one for your space. We will also provide some ideas for how to use curtain rods to create a unique and stylish industrial chic look.

How to Choose the Right Industrial Curtain Rod for Your Home

When it comes to choosing the right industrial curtain rod for your home, there are a few key factors to consider. First, you need to determine the size of the rod you need. Industrial curtain rods come in a variety of sizes, so you need to make sure you choose one that is the right size for your window. You should also consider the material of the rod. Industrial curtain rods are typically made of metal, such as steel or aluminum, but there are also some that are made of plastic or wood.

Next, you need to consider the type of mounting system you need. Industrial curtain rods can be mounted in a variety of ways, such as ceiling-mounted, wall-mounted, or floor-mounted. Depending on the type of window you have, you may need to choose a specific type of mounting system.

Finally, you need to consider the style of the rod. Industrial curtain rods come in a variety of styles, such as traditional, contemporary, and modern. You should choose a style that complements the overall look of your home.

By taking the time to consider these factors, you can ensure that you choose the right industrial curtain rod for your home. With the right rod, you can create a stylish and functional window treatment that will last for years to come.

Industrial Chic: A Guide to Creating the Perfect Industrial Curtain Rod Look

Industrial chic is a popular interior design style that combines modern and industrial elements to create a unique and stylish look. One of the most important elements of this style is the curtain rod. The right curtain rod can add a touch of industrial charm to any room, and it can be surprisingly easy to achieve. Here is a guide to creating the perfect industrial curtain rod look.

First, choose a curtain rod that is made of metal. Metal is the most common material used for industrial curtain rods, and it is the best choice for achieving the desired look. Look for rods that are made of steel, iron, or aluminum, as these materials are the most durable and will last for years.

Next, choose a finish for your curtain rod. Industrial curtain rods typically have a matte finish, but you can also choose from a variety of other finishes, such as brushed nickel, oil-rubbed bronze, or even copper. Choose a finish that complements the other elements in the room.

Finally, choose the right hardware for your curtain rod. Industrial curtain rods typically use industrial-style hardware, such as eyelets, clips, or rings. Choose hardware that is made of metal and has a matte finish to match the rod.

By following these steps, you can easily create the perfect industrial curtain rod look. With the right materials and hardware, you can create a stylish and unique look that will add a touch of industrial charm to any room.

Conclusion

Industrial chic is a great way to add a modern, stylish touch to any room. With the right curtain rod, you can create a unique and stylish look that will be sure to impress. Whether you choose a metal rod, a wooden rod, or a combination of both, you can create a look that is both stylish and functional. With the right accessories, you can create a look that is both modern and timeless. Industrial chic is a great way to add a touch of style to any room.

Green Carpet Magic: Grass Seed Spray for Your Lush Lawn

Source : google.com

Green Carpet Magic is an innovative grass seed spray that helps you create a lush, green lawn with minimal effort. It is a revolutionary product that is designed to make lawn care easier and more efficient. The spray contains a special blend of grass seed, fertilizer, and other nutrients that help promote healthy grass growth. It is easy to use and can be applied directly to your lawn with a hose or sprayer. With Green Carpet Magic, you can have a beautiful, green lawn in no time.

How to Use Grass Seed Spray to Create a Lush Lawn with Green Carpet Magic

Creating a lush, green lawn can be a challenge, especially if you’re starting from scratch. Fortunately, Green Carpet Magic grass seed spray can help you achieve the perfect lawn in no time. Here’s how to use it:

1. Prepare the area. Before you begin, make sure the area is free of weeds and debris. If necessary, use a rake to remove any stones or other objects that could interfere with the growth of the grass.

2. Apply the spray. Shake the can of Green Carpet Magic grass seed spray and hold it about 12 inches away from the area you’re treating. Spray in a sweeping motion, covering the entire area.

3. Water the area. After you’ve applied the spray, water the area thoroughly. This will help the grass seed to germinate and grow.

4. Monitor the area. Keep an eye on the area to make sure the grass is growing properly. If necessary, apply additional spray or water to ensure the grass is getting the nutrients it needs.

With Green Carpet Magic grass seed spray, you can create a lush, green lawn in no time. Follow these steps and you’ll be enjoying your beautiful new lawn in no time.

The Benefits of Green Carpet Magic’s Grass Seed Spray for a Healthy Lawn

Green Carpet Magic’s grass seed spray is an innovative product that provides a healthy and lush lawn with minimal effort. This spray is designed to help homeowners achieve a beautiful lawn without the need for extensive labor or expensive equipment.

The grass seed spray is a simple and effective way to get a healthy lawn. It is easy to use and requires minimal effort. The spray is applied directly to the soil and the grass seed is then spread evenly over the area. This ensures that the grass seed is evenly distributed and that the lawn is evenly covered. The spray also helps to keep the soil moist and helps to promote healthy root growth.

The grass seed spray also helps to reduce the amount of weeds in the lawn. The spray contains a special blend of herbicides that help to prevent the growth of weeds. This helps to keep the lawn looking neat and tidy. The spray also helps to reduce the amount of water needed to maintain the lawn. This helps to save money on water bills and helps to conserve water.

The grass seed spray also helps to promote healthy grass growth. The spray contains a special blend of nutrients that help to promote healthy grass growth. This helps to ensure that the lawn looks lush and green. The spray also helps to reduce the amount of time needed to mow the lawn. This helps to save time and energy.

Overall, Green Carpet Magic’s grass seed spray is an effective and easy way to get a healthy and lush lawn. It is easy to use and requires minimal effort. The spray helps to reduce the amount of weeds in the lawn, helps to conserve water, and helps to promote healthy grass growth. This makes it an ideal choice for homeowners who want to achieve a beautiful lawn without the need for extensive labor or expensive equipment.

Conclusion

Green Carpet Magic grass seed spray is an effective and easy-to-use product for creating a lush, green lawn. It is a great choice for those who want to quickly and easily get a beautiful lawn without having to spend a lot of time and money on traditional lawn care methods. The spray is easy to apply and provides a fast-acting solution for creating a lush, green lawn. With its fast-acting formula and easy application, Green Carpet Magic grass seed spray is an ideal choice for those looking to quickly and easily get a beautiful lawn.

Classic Charm: Elevating Your Space with DIY Wainscoting

Source : https://renovationinsider.com

Welcome to Classic Charm: Elevating Your Space with diy wainscoting! Wainscoting is a classic and timeless way to add a touch of elegance to any room. It can be used to create a beautiful accent wall, or to add a touch of texture and interest to a room. With diy wainscoting, you can easily and affordably create a classic look in your home. In this guide, we will provide you with all the information you need to get started with diy wainscoting. We will cover the basics of wainscoting, the different types of wainscoting, and the tools and materials you will need to complete your project. We will also provide step-by-step instructions for installing wainscoting in your home. So, let’s get started and create a classic look in your home with diy wainscoting!

How to Add Classic Charm to Your Home with DIY Wainscoting

Adding classic charm to your home with diy wainscoting is a great way to add a touch of elegance and sophistication to any room. Wainscoting is a type of wall paneling that is typically made of wood and is used to cover the lower portion of a wall. It is a great way to add texture and visual interest to a room, while also providing a protective layer against scuffs and scratches.

The first step in adding wainscoting to your home is to measure the wall and decide on the height of the wainscoting. Generally, wainscoting is installed between 30 and 36 inches from the floor. Once you have determined the height, you can begin to plan the layout of the panels. You can choose to install the panels horizontally or vertically, depending on the look you are trying to achieve.

Next, you will need to purchase the materials for the wainscoting. You will need to purchase wood panels, trim, and adhesive. You can choose to use pre-made panels or create your own custom panels. If you are creating your own panels, you will need to measure and cut the wood to the desired size.

Once you have the materials, you can begin to install the wainscoting. Start by attaching the panels to the wall using the adhesive. Make sure to use a level to ensure that the panels are even. Once the panels are in place, you can add the trim around the edges to give the wainscoting a finished look.

Finally, you can paint or stain the wainscoting to match the rest of the room. This is a great way to add a classic charm to your home. With a little bit of effort, you can create a beautiful and timeless look that will last for years to come.

DIY Wainscoting: A Guide to Installing and Maintaining Classic Charm in Your Home

Wainscoting is a classic and timeless way to add charm and character to any room in your home. Whether you’re looking to add a touch of elegance to your dining room or a touch of warmth to your living room, wainscoting is a great way to achieve the look you’re after. Installing wainscoting is a relatively simple process, but it does require some preparation and planning. This guide will provide you with the information you need to successfully install and maintain wainscoting in your home.

Before you begin, it’s important to determine the type of wainscoting you’d like to install. There are several different types of wainscoting, including raised panel, flat panel, and beadboard. Each type has its own unique look and feel, so it’s important to choose the one that best suits your style and the look you’re trying to achieve. Once you’ve chosen the type of wainscoting you’d like to install, you’ll need to measure the walls and purchase the necessary materials.

Once you have all of the materials you need, you’ll need to prepare the walls for installation. This includes removing any existing trim, filling in any holes or cracks, and sanding the walls to ensure a smooth surface. Once the walls are prepped, you’ll need to install the wainscoting. This involves measuring and cutting the panels to fit the walls, attaching the panels to the walls, and then adding trim to finish the look.

Once the wainscoting is installed, it’s important to maintain it properly. This includes regularly dusting and cleaning the panels to keep them looking their best. Additionally, it’s important to inspect the panels periodically to ensure that they are securely attached to the walls and that there are no signs of damage or wear.

By following these steps, you can easily install and maintain wainscoting in your home. With a little bit of preparation and planning, you can create a timeless and classic look that will add charm and character to any room in your home.

Conclusion

Classic Charm: Elevating Your Space with diy wainscoting is a great resource for anyone looking to add a touch of elegance to their home. With easy-to-follow instructions and helpful tips, this guide provides all the information needed to create a beautiful wainscoting feature in any room. Whether you’re a beginner or an experienced DIYer, this guide will help you create a timeless look that will last for years to come.