Geometric Wonders: Elevate Your Space with Striking Geometric Wall Art

Source : https://i.etsystatic.com

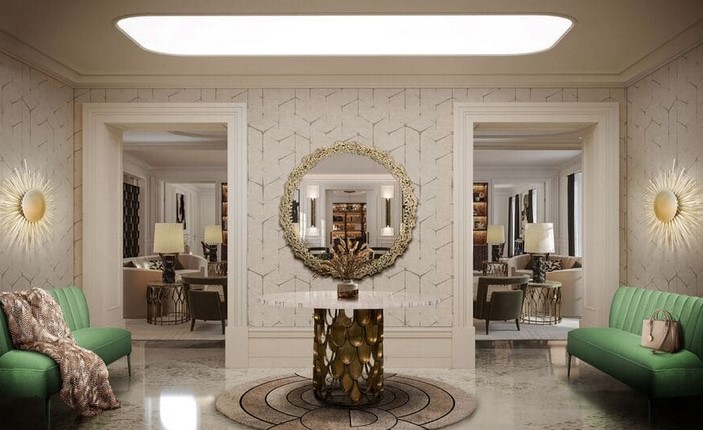
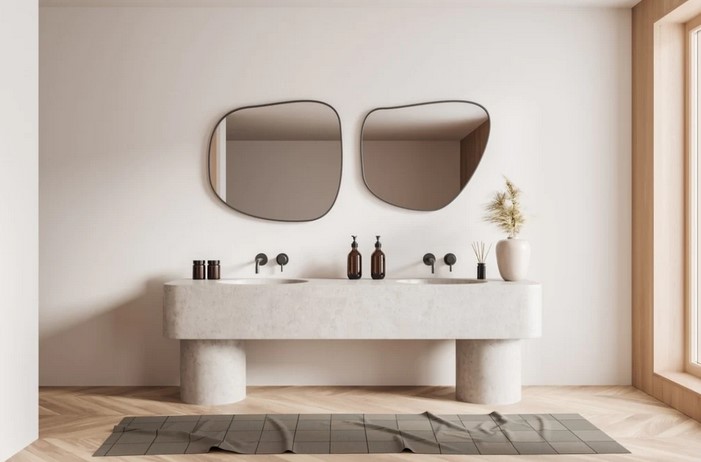
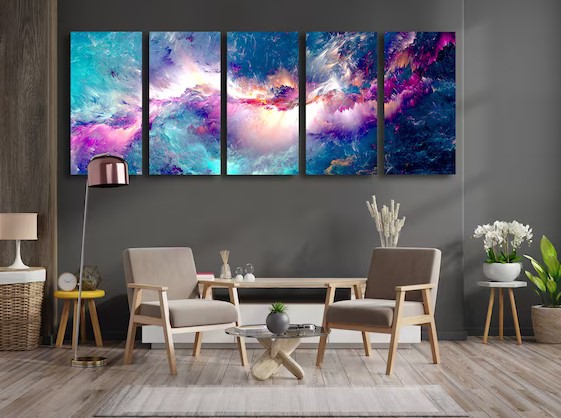
Geometric Wonders: Elevate Your Space with Striking Geometric Wall Art is a collection of stunning wall art pieces that will transform any room into a modern and stylish space. From abstract shapes to intricate patterns, these pieces will add a unique and eye-catching touch to any room. Whether you’re looking for a statement piece or something more subtle, this collection has something for everyone. With a variety of sizes, colors, and styles, you’re sure to find the perfect piece to fit your space. Let Geometric Wonders help you create a space that is truly one of a kind.

How to Incorporate Geometric Wall Art into Your Home Decor

Geometric wall art is a great way to add a modern and stylish touch to any home. This type of art is characterized by its use of shapes, lines, and patterns to create a visually appealing piece. Incorporating geometric wall art into your home decor can be a great way to add a unique and eye-catching element to any room. Here are some tips for incorporating geometric wall art into your home decor.

First, consider the size of the wall art. Geometric wall art comes in a variety of sizes, so it’s important to choose a piece that will fit the space you have available. If you have a large wall, you can opt for a larger piece of art that will make a bold statement. If you have a smaller wall, you can choose a smaller piece that will still make an impact.

Second, think about the colors and patterns you want to use. Geometric wall art often features bright colors and bold patterns, so it’s important to choose a piece that will complement the other elements in the room. Consider the colors and patterns of the furniture, rugs, and other decor in the room to ensure that the wall art will fit in with the overall aesthetic.

Third, consider the placement of the wall art. Geometric wall art can be hung in a variety of ways, so it’s important to choose a placement that will best showcase the piece. Consider the height of the wall and the amount of natural light in the room to determine the best placement for the wall art.

Finally, think about how you want to accessorize the wall art. Geometric wall art can be accessorized with other pieces of art, such as photographs or paintings, to create a cohesive look. You can also add other elements, such as plants or sculptures, to create a unique and interesting display.

By following these tips, you can easily incorporate geometric wall art into your home decor. This type of art is a great way to add a modern and stylish touch to any room. With the right placement and accessories, you can create a beautiful and eye-catching display that will be sure to impress.

Creative Ways to Use Geometric Wall Art to Transform Your Space

Geometric wall art is a great way to add a modern, stylish touch to any space. Whether you’re looking to make a bold statement or just add a subtle hint of style, geometric wall art can be used in a variety of creative ways to transform your space. Here are some ideas to get you started.

1. Create a Focal Point: Geometric wall art can be used to create a focal point in a room. Choose a large, eye-catching piece and hang it on a wall that is visible from multiple angles. This will draw the eye and create a conversation piece.

2. Add Color: Geometric wall art can be used to add a pop of color to a room. Choose a piece that features bright colors and hang it on a wall that is visible from multiple angles. This will add a splash of color to the room and make it more inviting.

3. Create a Gallery Wall: Geometric wall art can be used to create a gallery wall. Choose several pieces in different sizes and shapes and hang them in a pattern on a wall. This will create an interesting visual effect and add a unique touch to the room.

4. Create a Feature Wall: Geometric wall art can be used to create a feature wall. Choose a large piece and hang it on a wall that is visible from multiple angles. This will create a focal point and add a unique touch to the room.

5. Add Texture: Geometric wall art can be used to add texture to a room. Choose a piece that features interesting textures and hang it on a wall that is visible from multiple angles. This will add an interesting visual effect and make the room more inviting.

By using geometric wall art in creative ways, you can easily transform your space and add a modern, stylish touch. Whether you’re looking to make a bold statement or just add a subtle hint of style, geometric wall art can be used to create a unique look that will make your space stand out.Geometric Wonders: Elevate Your Space with Striking Geometric Wall Art is a great way to add a unique and modern touch to any room. With its bold shapes and vibrant colors, geometric wall art can be used to create a stunning focal point or to add a subtle hint of style. Whether you’re looking for a statement piece or something more subtle, geometric wall art is sure to make your space stand out.

Mirror, Mirror on the Wall: Explore the Art of Mirror Molding

Source : https://www.bestinteriordesigners.eu

Mirror, Mirror on the Wall: Explore the Art of Mirror Molding is a comprehensive guide to the art of mirror molding. This book provides an in-depth look at the history, techniques, and materials used in the craft of mirror molding. It also includes step-by-step instructions for creating a variety of mirror molds, from simple frames to intricate designs. With its detailed illustrations and helpful tips, this book is an invaluable resource for anyone interested in learning the art of mirror molding.

How to Create Unique Mirror Molding Designs for Your Home

Mirror molding is a great way to add a unique touch to any room in your home. It can be used to create a variety of designs, from traditional to modern, and can be used to frame mirrors, artwork, and other decorative elements. With a few simple tools and materials, you can create a custom mirror molding design that will add a unique touch to your home.

The first step in creating a unique mirror molding design is to decide on the shape and size of the molding. You can choose from a variety of shapes, such as squares, rectangles, circles, and ovals. You can also choose from a variety of sizes, such as small, medium, and large. Once you have chosen the shape and size of the molding, you can begin to plan the design.

When planning the design, consider the overall look of the room. If the room has a modern feel, you may want to choose a contemporary design with straight lines and sharp angles. If the room has a more traditional feel, you may want to choose a more ornate design with curves and intricate details.

Once you have chosen the design, you can begin to measure and cut the molding. You will need to measure the area where the molding will be installed and then cut the molding to fit. It is important to make sure that the molding is cut accurately so that it fits properly.

Once the molding is cut, you can begin to install it. You will need to use a level to make sure that the molding is installed correctly. You may also need to use a drill to make any necessary holes for screws or nails. Once the molding is installed, you can begin to paint or stain it to match the rest of the room.

Creating a unique mirror molding design is a great way to add a unique touch to any room in your home. With a few simple tools and materials, you can create a custom design that will add a unique touch to your home.

The History of Mirror Molding: From Ancient Times to Modern Day

Mirror molding is a type of decorative art that has been used for centuries to create ornamental designs on mirrors. The earliest known examples of mirror molding date back to ancient Egypt, where it was used to decorate the walls of tombs and temples. In the Middle Ages, mirror molding was used to adorn the walls of churches and cathedrals. During the Renaissance, mirror molding was used to create intricate designs on mirrors, often featuring religious or mythological scenes.

In the 18th century, mirror molding became popular in Europe, particularly in France. This period saw the development of more intricate designs, often featuring floral motifs and other decorative elements. During the 19th century, mirror molding was used to create elaborate frames for mirrors, often featuring intricate carvings and gilding.

In the 20th century, mirror molding continued to be used in decorative art, but it also began to be used in a more practical way. For example, it was used to create frames for bathroom mirrors, which allowed for easier cleaning and maintenance. It was also used to create frames for mirrors in other rooms, such as bedrooms and living rooms.

Today, mirror molding is still used in decorative art, but it is also used in a variety of other applications. For example, it is used to create frames for mirrors in cars, boats, and airplanes. It is also used to create frames for mirrors in medical and dental offices, as well as in homes. In addition, mirror molding is used to create frames for mirrors in commercial buildings, such as hotels and restaurants.

Overall, mirror molding has been used for centuries to create ornamental designs on mirrors. From its earliest use in ancient Egypt to its modern-day applications, mirror molding has been an important part of decorative art.Mirror, Mirror on the Wall: Explore the Art of Mirror Molding is an insightful and informative look into the history and craftsmanship of mirror molding. It provides a comprehensive overview of the various techniques used to create these beautiful works of art, as well as the materials and tools used to create them. The book also offers a glimpse into the lives of the artisans who have dedicated their lives to this craft. Through this book, readers can gain a greater appreciation for the art of mirror molding and the skill and dedication of the artisans who create these works of art.

Drop Cloth Delight: DIY Drop Cloth Curtains for Effortlessly Chic Windows

Source : https://i.pinimg.com

Drop Cloth Delight is a unique and stylish way to add a touch of elegance to any window. With DIY drop cloth curtains, you can easily create a chic and timeless look for your windows without spending a fortune. Drop Cloth Delight offers a wide selection of drop cloths in various colors and patterns, so you can find the perfect one to match your home décor. With easy-to-follow instructions, you can quickly and easily create beautiful drop cloth curtains that will add a touch of sophistication to any room. Whether you’re looking for a classic look or something more modern, Drop Cloth Delight has the perfect drop cloth curtains for you.

How to Create a Custom Look with DIY Drop Cloth Curtains

Creating custom curtains with drop cloths is a great way to add a unique touch to any room. Drop cloths are inexpensive and easy to work with, making them an ideal choice for DIY projects. With a few simple steps, you can create beautiful, custom curtains that will add a unique look to any space.

First, measure the window or doorway where the curtains will be hung. This will help you determine the size of the drop cloths you will need. Once you have the measurements, purchase the drop cloths and any other materials you may need, such as curtain rods, hooks, and rings.

Next, prepare the drop cloths for use. If the drop cloths are new, you may need to wash and dry them before using. If the drop cloths are used, you may need to clean them and iron them to remove any wrinkles.

Once the drop cloths are ready, you can begin to assemble the curtains. Start by cutting the drop cloths to the desired length. Then, hem the edges of the drop cloths to create a finished look. You can also add decorative trim or other embellishments to the curtains if desired.

Finally, hang the curtains. Use curtain rods, hooks, and rings to hang the curtains. Make sure the curtains are hung evenly and securely.

Creating custom curtains with drop cloths is a great way to add a unique touch to any room. With a few simple steps, you can create beautiful, custom curtains that will add a unique look to any space.

Transform Your Home with Easy and Affordable DIY Drop Cloth Curtains

Drop cloth curtains are an easy and affordable way to transform the look of any room in your home. Not only are they a great way to add a touch of style to your space, but they are also a great way to save money. Drop cloth curtains are a great DIY project that can be completed in a few hours and with minimal supplies.

Drop cloths are a great material to use for curtains because they are inexpensive, durable, and easy to work with. They come in a variety of sizes and colors, so you can find the perfect fit for your space. They are also easy to clean and maintain, making them a great choice for any room in your home.

To make drop cloth curtains, you will need a few basic supplies. You will need a drop cloth, curtain rods, curtain rings, and curtain clips. You will also need a sewing machine and thread, scissors, and a measuring tape.

To begin, measure the length and width of the window you are covering. Cut the drop cloth to the desired size, allowing for a few extra inches on each side for hemming. Hem the edges of the drop cloth with a sewing machine. Once the hemming is complete, attach the curtain rings to the top of the drop cloth. Then, attach the curtain rods to the wall and hang the drop cloth curtains. Finally, attach the curtain clips to the bottom of the drop cloth to keep the curtains in place.

Drop cloth curtains are an easy and affordable way to transform the look of any room in your home. With minimal supplies and a few hours of work, you can create beautiful curtains that will last for years to come.Drop Cloth Delight is a great way to add a touch of effortless chic to any window. With a few simple steps, you can create beautiful, custom-made drop cloth curtains that will add a unique and stylish look to any room. The curtains are easy to make, affordable, and can be customized to fit any window size. With Drop Cloth Delight, you can create a beautiful and unique look for your windows without breaking the bank.

Rolling Storage: Under Bed Storage Drawers on Wheels for Space Efficiency

Source : https://eu-images.contentstack.com

Rolling storage drawers on wheels are a great way to maximize space efficiency in any room. They are perfect for storing items that you don’t want to take up valuable floor space, such as extra bedding, clothing, toys, and more. These drawers are designed to fit easily under a bed, making them a great option for those who are short on space. They are also easy to move around, so you can quickly access whatever you need. With their sleek design and sturdy construction, these rolling storage drawers are a great way to keep your home organized and clutter-free.

Maximize Your Bedroom Storage with Rolling Under Bed Drawers

Maximizing bedroom storage can be a challenge, especially in smaller spaces. One way to maximize storage in a bedroom is to use rolling under bed drawers. These drawers are designed to fit underneath a bed frame and provide additional storage space for items such as clothing, linens, and other items.

Rolling under bed drawers are typically made of wood or plastic and come in a variety of sizes and styles. They are designed to fit snugly under the bed frame and can be easily moved when needed. The drawers are typically equipped with wheels, making them easy to move and access. The drawers can also be locked for added security.

Rolling under bed drawers are an ideal solution for those who need additional storage space in their bedroom. They provide a convenient way to store items that would otherwise take up valuable floor space. The drawers can also be used to store items that are not used on a regular basis, such as seasonal clothing or extra bedding.

Rolling under bed drawers are an affordable and efficient way to maximize bedroom storage. They are easy to install and can be moved when needed. They provide an ideal solution for those who need additional storage space in their bedroom.

How to Make the Most of Your Space with Rolling Under Bed Storage Drawers

Maximizing storage space in a bedroom can be a challenge, especially when dealing with limited square footage. One way to make the most of the space you have is to use rolling under bed storage drawers. These drawers are designed to fit underneath a bed frame and provide an easy way to store items such as clothing, linens, and other items that may otherwise take up valuable floor space.

When selecting rolling under bed storage drawers, it is important to consider the size of the drawers and the type of items you plan to store. For example, if you plan to store clothing, you may want to choose drawers with dividers to help keep items organized. Additionally, if you plan to store heavier items, such as books or shoes, you may want to select drawers with heavier-duty casters.

Once you have selected the right drawers for your needs, you can begin to organize your items. Start by sorting items into categories, such as clothing, linens, and books. Then, place items into the drawers accordingly. Be sure to leave some space between items to allow for easy access.

When organizing items in the drawers, it is also important to consider the weight of the items. Heavier items should be placed in the bottom drawers, while lighter items can be placed in the top drawers. Additionally, it is important to make sure that the drawers are not overloaded, as this can cause them to become unstable and difficult to move.

Finally, it is important to keep the drawers clean and organized. This will help to ensure that items are easy to find and access. Additionally, it will help to extend the life of the drawers and keep them looking their best.

By using rolling under bed storage drawers, you can make the most of the space in your bedroom. With the right selection and organization, these drawers can provide an easy and efficient way to store items and keep your bedroom looking neat and tidy.Rolling Storage Under Bed Storage Drawers on Wheels are an excellent way to maximize space efficiency in any home. They provide a convenient and easy way to store items that would otherwise take up valuable floor space. The drawers are easy to move and can be used to store a variety of items, from clothing to books and toys. The wheels make it easy to move the drawers around, allowing for easy access to items stored inside. With their space-saving design, Rolling Storage Under Bed Storage Drawers on Wheels are an ideal solution for any home.

Teen Dream: Designing Bedrooms for Teen Girls with Style and Comfort

Source : https://www.thespruce.com

Teen Dream: Designing Bedrooms for Teen Girls with Style and Comfort is a comprehensive guide to creating a beautiful and comfortable bedroom for teenage girls. It provides practical advice on how to create a space that is both stylish and functional, while also taking into account the needs of the individual teen. From choosing the right colors and furniture to creating a space that is both inviting and inspiring, this book offers a wealth of ideas and tips to help parents and teens create a bedroom that is both stylish and comfortable. With its easy-to-follow instructions and helpful illustrations, Teen Dream is the perfect resource for anyone looking to create a dream bedroom for their teenage daughter.

How to Create a Stylish and Comfortable Bedroom for Teen Girls

Creating a stylish and comfortable bedroom for teen girls can be a daunting task. However, with careful planning and thoughtful design, it is possible to create a space that is both stylish and comfortable. Here are some tips to help you create the perfect bedroom for your teen girl.

First, consider the size of the room. If the room is small, it is important to make the most of the space by using furniture that is both functional and stylish. Choose pieces that are multi-functional, such as a bed with storage drawers underneath or a desk that doubles as a vanity.

Second, choose a color palette that is both stylish and calming. Soft colors such as pastels or muted tones are ideal for creating a relaxing atmosphere. If your teen girl is more adventurous, consider bolder colors such as bright pinks or purples.

Third, add personal touches to the room. Hang artwork that reflects your teen’s personality, or add a few throw pillows or a rug to add a pop of color.

Fourth, make sure the room is well-lit. Natural light is ideal, but if that is not an option, consider adding a few lamps or overhead lighting to brighten up the space.

Finally, make sure the room is comfortable. Choose bedding that is soft and cozy, and add a few plush pillows and a cozy throw blanket.

By following these tips, you can create a stylish and comfortable bedroom for your teen girl. With careful planning and thoughtful design, you can create a space that is both stylish and comfortable.

Tips for Designing a Dream Bedroom for Teen Girls on a Budget

Designing a dream bedroom for a teen girl on a budget can be a challenging task. However, with a few simple tips, it is possible to create a stylish and comfortable space that she will love.

1. Start with a Plan: Before beginning the design process, it is important to create a plan. Consider the size of the room, the desired style, and the budget. This will help to ensure that the design process is efficient and cost-effective.

2. Choose a Color Scheme: Choosing a color scheme is an important step in creating a dream bedroom. Consider the teen’s favorite colors and use them as the basis for the design. This will help to create a cohesive look and feel.

3. Utilize Multi-Purpose Furniture: Multi-purpose furniture is a great way to maximize space and save money. Consider investing in a bed with storage drawers or a desk that can double as a vanity.

4. Incorporate DIY Projects: DIY projects are a great way to add personal touches to the room without breaking the bank. Consider painting a mural on the wall or creating a unique headboard.

5. Accessorize: Accessories are a great way to add personality to the room. Consider adding throw pillows, artwork, and other decorative items to complete the look.

By following these tips, it is possible to create a dream bedroom for a teen girl on a budget. With a little creativity and planning, it is possible to create a stylish and comfortable space that she will love.Teen Dream is an excellent resource for parents and teens alike who are looking to create a stylish and comfortable bedroom for their teen girl. With its helpful tips and advice, Teen Dream provides a comprehensive guide to designing a bedroom that is both stylish and comfortable. From choosing the right colors and furniture to creating a space that is both functional and aesthetically pleasing, Teen Dream offers a wealth of information that can help parents and teens create a bedroom that is both stylish and comfortable. With its helpful tips and advice, Teen Dream is an invaluable resource for parents and teens who are looking to create a beautiful and comfortable bedroom for their teen girl.

Reflecting Beauty: How to Frame a Bathroom Mirror with Style

Source : https://www.inyouths.com

Reflecting Beauty: How to Frame a Bathroom Mirror with Style is a comprehensive guide to adding a unique and stylish touch to your bathroom. This guide will provide you with the necessary information to choose the right frame for your bathroom mirror, as well as tips on how to install it. With the help of this guide, you will be able to create a beautiful and unique look for your bathroom that will be sure to impress your guests. Whether you are looking for a modern, classic, or rustic look, this guide will provide you with the information you need to make the perfect choice for your bathroom.

How to Choose the Perfect Frame for Your Bathroom Mirror: Tips for Reflecting Beauty

When it comes to choosing the perfect frame for your bathroom mirror, there are several factors to consider. From the size and shape of the frame to the material and color, selecting the right frame can help to enhance the beauty of your bathroom and create a more inviting atmosphere. Here are some tips to help you choose the perfect frame for your bathroom mirror.

1. Consider the size and shape of the frame. The size and shape of the frame should be in proportion to the size of the mirror. If the frame is too large, it will overpower the mirror and detract from its beauty. If the frame is too small, it will not provide enough support for the mirror.

2. Choose a frame material that complements the style of your bathroom. Popular materials for bathroom mirror frames include wood, metal, and plastic. Wood frames are a classic choice and can be stained or painted to match the décor of your bathroom. Metal frames are a great choice for a modern look, while plastic frames are a more affordable option.

3. Select a frame color that complements the color scheme of your bathroom. If you have a neutral color palette, you can choose a frame in a bold color to add a pop of color to the room. If you have a more vibrant color scheme, choose a frame in a neutral color to help balance the look.

4. Consider the overall design of the frame. Look for frames with interesting details, such as beveled edges or intricate patterns, to add visual interest to the mirror.

By following these tips, you can choose the perfect frame for your bathroom mirror that will reflect its beauty and enhance the look of your bathroom.

DIY Ideas for Framing Your Bathroom Mirror: Creative Ways to Enhance Your Space with Style

The bathroom is often one of the most overlooked spaces in the home when it comes to decorating. However, it is also one of the most important rooms in the house, as it is where we start and end our day. Framing your bathroom mirror is a great way to add a touch of style and personality to the room. Not only does it enhance the look of the space, but it also adds a layer of protection to the mirror. Here are some creative ideas for framing your bathroom mirror that will help you transform your bathroom into a stylish and inviting space.

1. Reclaimed Wood Frame: Reclaimed wood is a great way to add a rustic, natural touch to your bathroom. You can use old barn wood, pallet wood, or any other type of reclaimed wood to create a unique frame for your mirror.

2. Wainscoting Frame: Wainscoting is a classic look that adds a touch of elegance to any room. You can use wainscoting to frame your bathroom mirror for a timeless look.

3. Tile Frame: If you want to add a bit of color and texture to your bathroom, consider framing your mirror with tiles. You can use ceramic, glass, or stone tiles to create a unique frame that will add a touch of style to the room.

4. Fabric Frame: If you want to add a bit of softness to your bathroom, consider framing your mirror with fabric. You can use any type of fabric, from burlap to velvet, to create a unique frame that will add a touch of texture and color to the room.

5. Picture Frame: If you want to add a bit of personality to your bathroom, consider framing your mirror with a picture frame. You can use any type of frame, from vintage to modern, to create a unique look that will add a touch of style to the room.

These are just a few creative ideas for framing your bathroom mirror. With a bit of creativity and imagination, you can transform your bathroom into a stylish and inviting space.Reflecting Beauty: How to Frame a Bathroom Mirror with Style is an excellent guide for anyone looking to add a unique and stylish touch to their bathroom. With the help of this guide, you can easily create a beautiful and unique framed mirror that will add a touch of elegance and sophistication to your bathroom. With the right materials and tools, you can easily create a stunning framed mirror that will be the perfect addition to your bathroom. With the help of this guide, you can easily create a beautiful and unique framed mirror that will be the perfect addition to your bathroom.

Fire Up Your Evenings: Plans for a Cozy Fire Pit in Your Backyard

Source : https://i0.wp.com/texascustompatios.com

Welcome to Fire Up Your Evenings: Plans for a Cozy Fire Pit in Your Backyard! If you’re looking for a way to add a cozy and inviting atmosphere to your backyard, then a fire pit is the perfect solution. With a fire pit, you can enjoy the warmth and ambiance of a campfire without having to leave the comfort of your own home. In this guide, we’ll provide you with all the information you need to plan and build a fire pit in your backyard. We’ll cover everything from choosing the right materials and tools to building the fire pit and maintaining it. So, let’s get started and fire up your evenings!

How to Design the Perfect Fire Pit for Your Backyard: Tips and Tricks for Creating a Cozy Outdoor Space

Creating the perfect fire pit for your backyard can be a daunting task. However, with the right tips and tricks, you can create a cozy outdoor space that will be the envy of your neighbors. Here are some tips and tricks for designing the perfect fire pit for your backyard:

1. Choose the Right Location: When selecting the location for your fire pit, consider the size of your backyard and the amount of space you have available. Make sure to choose a spot that is away from any trees, shrubs, or other combustible materials. Additionally, you should also consider the prevailing wind direction and the direction of your neighbors’ homes.

2. Select the Right Materials: When selecting the materials for your fire pit, make sure to choose materials that are heat-resistant and durable. Popular materials for fire pits include brick, stone, and metal. Additionally, you should also consider the aesthetic of the materials and how they will fit into your backyard’s overall design.

3. Consider the Size: When selecting the size of your fire pit, consider the number of people who will be using it. If you plan on having large gatherings, you may want to opt for a larger fire pit. However, if you plan on using it for smaller gatherings, a smaller fire pit may be more suitable.

4. Add Safety Features: When designing your fire pit, make sure to include safety features such as a spark screen, a fire extinguisher, and a fire blanket. Additionally, you should also consider adding a fire pit ring to contain the fire and prevent it from spreading.

By following these tips and tricks, you can create the perfect fire pit for your backyard. With the right materials and safety features, you can create a cozy outdoor space that will be the envy of your neighbors.

DIY Fire Pit Plans: Step-by-Step Instructions for Building a Fire Pit in Your Backyard

Building a fire pit in your backyard is a great way to enjoy the outdoors and create a cozy atmosphere for family and friends. With the right materials and a few simple steps, you can have a beautiful fire pit in no time. This guide will provide step-by-step instructions for building a fire pit in your backyard.

Materials Needed:

• Gravel

• Fire-resistant bricks

• Mortar

• Fire-resistant sealant

• Shovel

• Level

• Tape measure

• Safety glasses

• Work gloves

Step 1: Choose a Location

Choose a location for your fire pit that is away from any structures, trees, or other flammable materials. Make sure the area is level and clear of debris.

Step 2: Prepare the Area

Using a shovel, dig a hole that is about 12 inches deep and 3 feet in diameter. Line the bottom of the hole with a layer of gravel. This will help with drainage and prevent the fire pit from sinking.

Step 3: Lay the Bricks

Lay the fire-resistant bricks around the perimeter of the hole. Make sure the bricks are level and secure them with mortar.

Step 4: Seal the Fire Pit

Once the bricks are in place, use a fire-resistant sealant to seal the fire pit. This will help protect the bricks from heat and moisture.

Step 5: Test the Fire Pit

Before using the fire pit, test it to make sure it is safe. Light a small fire and make sure the bricks do not crack or become damaged.

Step 6: Enjoy Your Fire Pit

Once the fire pit is tested and approved, you can enjoy it with family and friends. Make sure to follow all safety guidelines when using the fire pit.

By following these steps, you can easily build a fire pit in your backyard. With the right materials and a little bit of effort, you can create a cozy atmosphere for outdoor gatherings.Fire Up Your Evenings: Plans for a Cozy Fire Pit in Your Backyard is a great resource for anyone looking to add a cozy fire pit to their backyard. With detailed instructions and helpful tips, this guide provides everything you need to know to create a beautiful and functional fire pit. Whether you’re looking for a simple DIY project or a more complex design, this guide has something for everyone. With the right materials and a little bit of effort, you can create a stunning fire pit that will be the centerpiece of your backyard.

Countertop Comeback: Transforming Surfaces with a Countertop Resurfacing Kit

Source : https://www.amandaseghetti.com

Countertop Comeback is a revolutionary countertop resurfacing kit that can transform any surface into a beautiful, modern, and durable countertop. With this kit, you can easily and quickly transform your outdated countertops into a stunning new look. The kit includes everything you need to resurface your countertops, including a special adhesive, a variety of colors and textures, and a detailed instruction manual. With Countertop Comeback, you can easily and affordably give your kitchen or bathroom a fresh, modern look.

How to Transform Your Kitchen with a Countertop Resurfacing Kit

Countertop resurfacing kits are an easy and cost-effective way to transform the look of a kitchen. With a few simple steps, homeowners can give their kitchen a fresh, modern look without the expense and hassle of a full remodel.

The first step in using a countertop resurfacing kit is to prepare the surface. This includes cleaning the countertop thoroughly and removing any existing sealant or wax. Once the surface is clean and dry, it is important to sand the countertop to create a smooth, even surface. This will ensure that the new finish adheres properly and looks its best.

Next, the countertop should be wiped down with a damp cloth to remove any dust or debris. Once the surface is clean, the resurfacing kit can be applied. Depending on the type of kit, this may involve mixing a two-part epoxy or applying a single-part coating. The instructions included with the kit should be followed carefully to ensure the best results.

Once the resurfacing kit has been applied, it is important to allow it to cure properly. This may take several hours or even days, depending on the type of kit used. Once the finish has cured, it can be sealed with a clear sealant to protect it from stains and scratches.

With a few simple steps, homeowners can easily transform their kitchen with a countertop resurfacing kit. This cost-effective solution can give any kitchen a fresh, modern look without the expense and hassle of a full remodel.

The Benefits of Using a Countertop Resurfacing Kit to Refresh Your Home

Countertop resurfacing kits are an increasingly popular way to refresh the look of a home without the expense and hassle of a full remodel. These kits provide a cost-effective and efficient way to update the look of a kitchen or bathroom without the need for a full renovation.

The primary benefit of using a countertop resurfacing kit is the cost savings. These kits are significantly less expensive than replacing the countertops, and they can be completed in a fraction of the time. The kits come with all the necessary materials and instructions, making them easy to use even for those with limited DIY experience.

Another benefit of using a countertop resurfacing kit is the range of options available. These kits come in a variety of colors and finishes, allowing homeowners to customize the look of their countertops to match their existing décor. The kits also come with a variety of textures, allowing homeowners to choose a finish that best suits their needs.

The kits are also easy to maintain. The materials used in the kits are designed to be durable and long-lasting, and they can be easily cleaned with a damp cloth. This makes them ideal for busy households, as they require minimal upkeep.

Finally, countertop resurfacing kits are an environmentally friendly option. The materials used in the kits are non-toxic and biodegradable, making them a safe and sustainable choice.

In conclusion, countertop resurfacing kits are an ideal way to refresh the look of a home without the expense and hassle of a full remodel. These kits provide a cost-effective and efficient way to update the look of a kitchen or bathroom, and they come with a variety of colors, finishes, and textures to choose from. They are also easy to maintain and environmentally friendly.Countertop Comeback is an innovative and cost-effective way to transform the look of any countertop. With a Countertop Resurfacing Kit, homeowners can easily and quickly update their countertops with a fresh, modern look. The kit is easy to use and provides a durable finish that will last for years. With the Countertop Comeback kit, homeowners can enjoy a beautiful, updated countertop without the hassle and expense of a full remodel.

Backyard Oasis: Fresh Ideas for Creative Backyard Landscaping

Source : https://dlczb9lfz9r73.cloudfront.net

Backyard Oasis: Fresh Ideas for Creative Backyard Landscaping is a comprehensive guide to creating a beautiful and inviting outdoor space. Whether you’re looking to create a tranquil retreat, a vibrant gathering spot, or a functional outdoor kitchen, this book provides the inspiration and practical advice you need to make your backyard dreams a reality. With step-by-step instructions, detailed illustrations, and helpful tips, you’ll be able to transform your backyard into an oasis of your own. From selecting the right plants and materials to designing a layout that works for your lifestyle, this book will help you create a backyard oasis that you’ll be proud to show off.

How to Create a Backyard Oasis: Tips for Designing a Relaxing Outdoor Space

Creating a backyard oasis can be a great way to relax and enjoy the outdoors. With a few simple tips, you can design a beautiful and inviting outdoor space that will be the envy of your neighbors.

First, consider the size and shape of your backyard. This will help you determine the type of furniture and accessories you need to create a comfortable and inviting atmosphere. If you have a large backyard, you may want to consider adding a patio or deck to provide a comfortable seating area. If you have a smaller backyard, you may want to focus on creating a cozy seating area with a few chairs and a table.

Next, think about the type of plants and flowers you want to include in your backyard oasis. Choose plants that are easy to maintain and that will thrive in your climate. Consider adding a few trees or shrubs to provide shade and privacy. You can also add a few potted plants to add color and texture to your outdoor space.

Finally, consider the type of lighting you want to use in your backyard oasis. You can choose from a variety of options, such as string lights, solar lights, or landscape lighting. Make sure to choose lighting that is safe and energy-efficient.

By following these tips, you can create a beautiful and relaxing backyard oasis that will be the perfect place to relax and enjoy the outdoors. With a little bit of planning and creativity, you can create a backyard oasis that will be the envy of your neighbors.

Transform Your Backyard into a Private Oasis: Ideas for Incorporating Water Features, Plants, and More

Creating a private oasis in your backyard can be a great way to relax and enjoy the outdoors. With the right combination of water features, plants, and other elements, you can transform your backyard into a tranquil retreat. Here are some ideas for incorporating water features, plants, and more into your backyard oasis.

Water Features: Water features can be a great way to add a sense of tranquility to your backyard. Consider adding a pond, fountain, or waterfall to your backyard. These features can be used to create a calming atmosphere and provide a soothing sound. If you don’t have the space for a large water feature, you can also consider adding a small birdbath or a bubbling rock feature.

Plants: Incorporating plants into your backyard oasis can help to create a sense of privacy and add a touch of nature to your space. Consider adding trees, shrubs, and flowers to your backyard. You can also add potted plants to create a more intimate atmosphere.

Lighting: Adding lighting to your backyard can help to create a cozy atmosphere and make your space more inviting. Consider adding string lights, lanterns, or solar lights to your backyard. You can also add candles or tiki torches to create a more romantic atmosphere.

Furniture: Adding furniture to your backyard can help to create a comfortable and inviting space. Consider adding chairs, benches, or hammocks to your backyard. You can also add a fire pit or outdoor kitchen to make your backyard more functional.

These are just a few ideas for transforming your backyard into a private oasis. With the right combination of water features, plants, and other elements, you can create a tranquil retreat in your own backyard.Backyard Oasis: Fresh Ideas for Creative Backyard Landscaping is a great resource for anyone looking to create a beautiful and unique outdoor space. With a variety of ideas and tips, this book provides readers with the tools and inspiration they need to create a backyard oasis of their own. Whether you’re looking to create a relaxing retreat or a vibrant outdoor living space, this book has something for everyone. With its helpful advice and inspiring photos, Backyard Oasis is sure to help you create the backyard of your dreams.

Pallet Perfection: Where to Buy Wood Pallets for Your DIY Projects

Source : https://loveincorporated.blob.core.windows.net

Pallet Perfection is the perfect place to find wood pallets for your DIY projects. Whether you’re looking for a unique piece of furniture, a creative storage solution, or a unique accent piece, Pallet Perfection has the perfect pallet for you. With a wide selection of sizes, styles, and colors, you’re sure to find the perfect pallet for your project. Plus, Pallet Perfection offers competitive prices and fast shipping, so you can get your project started right away. So if you’re looking for the perfect pallet for your next DIY project, look no further than Pallet Perfection.

Where to Find the Best Wood Pallets for Your DIY Projects

Wood pallets are a popular choice for DIY projects due to their versatility and affordability. They can be used to create furniture, storage solutions, and even decorative pieces. Finding the best wood pallets for your project can be a challenge, but with a little research, you can find the perfect pallets for your needs.

The first step in finding the best wood pallets for your project is to determine the type of wood you need. Different types of wood have different properties, so it’s important to choose the right type for your project. Softwoods, such as pine and spruce, are often used for furniture and decorative pieces, while hardwoods, such as oak and maple, are better suited for storage solutions.

Once you’ve determined the type of wood you need, you can start looking for the best wood pallets for your project. The best place to start is your local hardware store or lumberyard. Many of these stores carry a variety of wood pallets in different sizes and styles. You can also check online for wood pallets, as there are many retailers that specialize in selling wood pallets.

When shopping for wood pallets, it’s important to inspect them carefully. Look for signs of damage, such as cracks, splinters, or warping. Make sure the pallets are free of nails and other metal objects, as these can be dangerous. Also, check to make sure the pallets are made from quality wood and are free of chemicals or other contaminants.

Finally, consider the cost of the wood pallets. While wood pallets are generally affordable, the cost can vary depending on the type of wood and the size of the pallets. If you’re on a budget, you may want to look for used wood pallets, which can be found at flea markets or online.

By doing a little research and shopping around, you can find the best wood pallets for your DIY project. With the right pallets, you can create beautiful and functional pieces that will last for years to come.

How to Choose the Right Wood Pallet for Your DIY Project: Tips and Tricks from Pallet Perfection Experts

When it comes to DIY projects, selecting the right wood pallet is essential for achieving the desired results. Pallet perfection experts have identified several tips and tricks to help you choose the right wood pallet for your project.

First, consider the size of the pallet. The size of the pallet should be determined by the size of the project. If the project is large, then a larger pallet should be chosen. If the project is small, then a smaller pallet should be chosen.

Second, consider the type of wood used in the pallet. Different types of wood have different properties and characteristics. For example, hardwoods are more durable and can withstand more wear and tear than softwoods. Therefore, it is important to select a pallet made from the right type of wood for the project.

Third, consider the condition of the pallet. Pallets that are in good condition are less likely to break or splinter, which can be dangerous. Therefore, it is important to inspect the pallet for any signs of damage or wear before purchasing it.

Fourth, consider the cost of the pallet. Pallets can vary in price depending on the type of wood used and the size of the pallet. Therefore, it is important to compare prices before making a purchase.

Finally, consider the availability of the pallet. If the pallet is not readily available, then it may be necessary to order it online or from a local supplier.

By following these tips and tricks from pallet perfection experts, you can ensure that you select the right wood pallet for your DIY project. With the right pallet, you can create a beautiful and functional piece of furniture or artwork that will last for years to come.Pallet Perfection is an excellent resource for anyone looking to buy wood pallets for their DIY projects. With a wide selection of pallets in various sizes and styles, Pallet Perfection offers a great way to find the perfect pallet for any project. The company also offers helpful advice and tips on how to use and care for pallets, making it a great resource for DIYers of all levels. With its competitive prices and excellent customer service, Pallet Perfection is the perfect place to buy wood pallets for your DIY projects.