Fiery Dreams: Building Do-It-Yourself Fire Pits for Cozy Gatherings

Fiery Dreams: Building Do-It-Yourself Fire Pits for Cozy Gatherings is a comprehensive guide to creating your own outdoor fire pit. Whether you’re looking to build a fire pit for a cozy gathering with friends and family or to add a unique touch to your outdoor space, this book provides all the information you need to get started. From choosing the right materials and tools to constructing the fire pit, this book covers all the steps necessary to create a beautiful and functional fire pit. With detailed instructions and helpful illustrations, this book is the perfect resource for anyone looking to build their own fire pit.

How to Create a DIY Fire Pit for Your Backyard: Tips and Tricks for Building a Cozy Gathering Spot

Creating a DIY fire pit in your backyard is a great way to create a cozy gathering spot for friends and family. With a few simple tips and tricks, you can easily build a fire pit that will provide hours of enjoyment.

First, you will need to decide on the size and shape of your fire pit. Consider the size of your backyard and the number of people you plan to entertain. You may want to opt for a larger fire pit if you plan to host larger gatherings. Once you have determined the size and shape of your fire pit, you will need to choose a location. Make sure the area is away from any structures or trees and is at least 10 feet away from any combustible materials.

Next, you will need to gather the necessary materials. You will need bricks or stones, sand, gravel, and a metal fire ring. You can purchase these items at your local home improvement store. Once you have all the materials, you can begin to build your fire pit.

Start by digging a hole that is slightly larger than the fire ring. Make sure the hole is at least 6 inches deep. Fill the hole with gravel and sand and then place the fire ring in the center. Next, begin to stack the bricks or stones around the fire ring. Make sure the stones are level and secure.

Once the fire pit is built, you will need to create a fire safety zone. This should be at least 10 feet away from the fire pit and should include a fire extinguisher and a bucket of water.

Finally, you can begin to enjoy your fire pit. Make sure to keep a close eye on the fire and never leave it unattended. With these tips and tricks, you can easily create a DIY fire pit that will provide hours of enjoyment for you and your guests.

Get Ready for Summer: Ideas for Decorating and Accessorizing Your DIY Fire Pit for Maximum Enjoyment

As the days get longer and the temperatures start to rise, it’s time to start thinking about how to make the most of your outdoor space. A DIY fire pit is a great way to create a cozy gathering spot for friends and family to enjoy the summer evenings. With a few simple decorations and accessories, you can turn your fire pit into a stylish and inviting outdoor oasis.

To start, choose a color palette for your fire pit area. This will help you create a cohesive look and make it easier to choose decorations and accessories. Consider using colors that complement your existing outdoor furniture and decor.

Next, add some seating. Choose comfortable chairs or benches that will fit around the fire pit. If you have a large fire pit, you may want to consider adding a few outdoor sofas or loveseats. This will create a more inviting atmosphere and provide plenty of seating for everyone.

Once you have the seating in place, it’s time to accessorize. Add some outdoor pillows and throws in coordinating colors to make the seating area more comfortable. You can also add a few outdoor rugs to define the space and add a touch of style.

Finally, don’t forget to add some lighting. String lights or lanterns will create a warm and inviting atmosphere and make it easier to see after the sun goes down. You can also add a few citronella candles to keep the bugs away.

With these simple tips, you can easily transform your DIY fire pit into a stylish and inviting outdoor oasis. Enjoy the summer evenings with friends and family in your cozy outdoor space.

Conclusion

Fiery Dreams: Building Do-It-Yourself Fire Pits for Cozy Gatherings is a great resource for anyone looking to create a cozy gathering spot in their backyard. With detailed instructions and helpful tips, this book provides all the information needed to build a fire pit that will be the perfect addition to any outdoor space. Whether you’re looking for a place to relax with friends or a spot to roast marshmallows with the family, Fiery Dreams will help you create the perfect gathering spot.
Relaxation Refined: Creating an In-Ground Jacuzzi Retreat

Welcome to Relaxation Refined: Creating an In-Ground Jacuzzi Retreat! This guide will provide you with all the information you need to create your own in-ground jacuzzi retreat. From selecting the right jacuzzi to designing the perfect outdoor space, this guide will help you create a luxurious and relaxing oasis in your own backyard. With the right planning and preparation, you can create a beautiful and inviting outdoor space that will be the envy of your friends and family. So, let’s get started and create your own in-ground jacuzzi retreat!

How to Design an In-Ground Jacuzzi Retreat for Maximum Relaxation

Creating an in-ground jacuzzi retreat is a great way to relax and unwind after a long day. With the right design, you can create a luxurious and tranquil space that will be the perfect place to escape and enjoy some much-needed rest and relaxation. Here are some tips for designing an in-ground jacuzzi retreat for maximum relaxation.

1. Choose the Right Location: When selecting the location for your in-ground jacuzzi retreat, it is important to consider the surrounding environment. Look for a spot that is private and secluded, away from any noise or distractions. If possible, choose a spot with a view of nature, such as a garden or a lake.

2. Incorporate Natural Elements: Incorporating natural elements into your in-ground jacuzzi retreat will help to create a tranquil and calming atmosphere. Consider adding plants, stones, and wood to the area to create a natural and inviting space.

3. Add Comfortable Seating: Make sure to include comfortable seating in your in-ground jacuzzi retreat. Choose chairs and loungers that are designed for outdoor use and are made from weather-resistant materials.

4. Install Mood Lighting: Installing mood lighting is a great way to create a relaxing atmosphere in your in-ground jacuzzi retreat. Consider adding soft lighting around the area, such as string lights or candles.

5. Add a Water Feature: Adding a water feature to your in-ground jacuzzi retreat will help to create a soothing and tranquil atmosphere. Consider installing a waterfall or fountain to create a calming sound.

By following these tips, you can create an in-ground jacuzzi retreat that is perfect for maximum relaxation. With the right design, you can create a luxurious and tranquil space that will be the perfect place to escape and enjoy some much-needed rest and relaxation.

The Benefits of Installing an In-Ground Jacuzzi for Stress Relief

The modern world is full of stress and anxiety, and it can be difficult to find ways to relax and unwind. Installing an in-ground jacuzzi can be a great way to reduce stress and improve overall wellbeing. In-ground jacuzzis provide a variety of benefits that can help to reduce stress and improve mental and physical health.

One of the main benefits of installing an in-ground jacuzzi is the ability to relax in the comfort of your own home. An in-ground jacuzzi can be installed in any outdoor space, allowing you to enjoy the therapeutic effects of warm water without having to leave your home. The warm water helps to relax the muscles and reduce tension, while the jets provide a massage-like effect that can help to reduce stress and improve circulation.

In-ground jacuzzis also provide a great way to socialize and spend time with family and friends. The warm water and jets provide a great environment for conversation and relaxation, and can be a great way to bond with loved ones.

In addition to providing stress relief, an in-ground jacuzzi can also provide a variety of health benefits. The warm water helps to improve circulation, which can help to reduce pain and inflammation. The jets can also help to improve flexibility and range of motion, which can help to reduce the risk of injury.

Finally, an in-ground jacuzzi can be a great way to improve the look of your outdoor space. The addition of a jacuzzi can add a touch of luxury to any backyard, and can be a great way to increase the value of your home.

Installing an in-ground jacuzzi can be a great way to reduce stress and improve overall wellbeing. The warm water and jets provide a great environment for relaxation and socializing, while also providing a variety of health benefits. In addition, an in-ground jacuzzi can be a great way to improve the look of your outdoor space and increase the value of your home.

Conclusion

Relaxation Refined: Creating an In-Ground Jacuzzi Retreat is a great way to create a luxurious and relaxing retreat in your own backyard. With the right planning and design, you can create a beautiful and inviting space that will be the perfect place to relax and unwind. From choosing the right materials and features to ensuring proper installation and maintenance, this guide provides all the information you need to create a stunning and inviting in-ground Jacuzzi retreat. With the right planning and design, you can create a beautiful and inviting space that will be the perfect place to relax and unwind.

Timeless Ticks: Exploring the Appeal of Mora Clocks

Timeless Ticks: Exploring the Appeal of mora clocks is a book that delves into the history and craftsmanship of mora clocks. mora clocks are a type of Swedish longcase clock that were popular in the 18th and 19th centuries. The book examines the history of mora clocks, their design, and the craftsmanship that went into making them. It also looks at the appeal of mora clocks and why they remain popular today. With beautiful photographs and detailed descriptions, Timeless Ticks: Exploring the Appeal of mora clocks is a must-read for anyone interested in the history and craftsmanship of mora clocks.

Uncovering the History of Mora Clocks: Exploring the Timeless Appeal of a Classic Timepiece

The Mora clock is a timeless classic that has been a staple of Swedish homes for centuries. Its simple yet elegant design has made it a favorite among collectors and enthusiasts alike. But what is the history behind this beloved timepiece? In this article, we will explore the history of mora clocks and uncover the reasons why they remain so popular today.

The Mora clock was first created in the late 17th century by the Swedish clockmaker Olof Söderberg. He was inspired by the traditional Swedish wall clocks of the time, which featured a single hand and a simple face. Söderberg wanted to create a clock that was both functional and aesthetically pleasing, and so he designed the Mora clock. The clock featured two hands, a painted face, and a pendulum, making it both attractive and accurate.

The Mora clock quickly became popular in Sweden and soon spread to other parts of Europe. By the 19th century, the clock had become a symbol of Swedish craftsmanship and was highly sought after by collectors. The clock was also popular in the United States, where it was often used as a decorative piece in homes.

Today, the Mora clock remains a popular choice for collectors and enthusiasts alike. Its simple yet elegant design has stood the test of time, and its accuracy and reliability make it a great choice for anyone looking for a timeless timepiece. The Mora clock is also a great way to add a touch of Swedish style to any home.

The Mora clock is a classic timepiece that has been a part of Swedish homes for centuries. Its timeless design and reliable accuracy make it a favorite among collectors and enthusiasts alike. With its simple yet elegant design, the Mora clock is sure to remain a timeless classic for years to come.

Crafting a Mora Clock: A Step-by-Step Guide to Making Your Own Timeless Timepiece

Introduction

The Mora clock is a timeless timepiece that has been crafted in Sweden since the 17th century. This traditional clock is characterized by its tall, slender shape and its simple yet elegant design. It is a popular choice for many homes and is a great way to add a touch of classic style to any room. Crafting your own Mora clock is a rewarding experience that will give you a unique and beautiful piece of furniture to enjoy for years to come. This step-by-step guide will walk you through the process of creating your own Mora clock.

Step 1: Gather Your Materials

Before you begin crafting your Mora clock, you will need to gather the necessary materials. You will need a piece of wood for the body of the clock, a clock movement, a clock face, clock hands, and a pendulum. You can find these materials at most craft stores or online.

Step 2: Cut the Wood

Once you have gathered your materials, you will need to cut the wood for the body of the clock. You will need to cut two pieces of wood to the same size and shape. The size and shape of the wood will depend on the size of the clock you are making.

Step 3: Assemble the Clock

Once you have cut the wood, you will need to assemble the clock. Start by attaching the clock movement to the back of one of the pieces of wood. Then, attach the clock face to the front of the wood. Next, attach the clock hands to the clock face. Finally, attach the pendulum to the clock movement.

Step 4: Finish the Clock

Once you have assembled the clock, you will need to finish it. You can do this by staining or painting the wood. You can also add decorative elements such as carvings or inlays.

Conclusion

Crafting your own Mora clock is a rewarding experience that will give you a unique and beautiful piece of furniture to enjoy for years to come. By following this step-by-step guide, you can create your own timeless timepiece that will be a treasured addition to any home.

Conclusion

In conclusion, Timeless Ticks: Exploring the Appeal of mora clocks is an insightful and informative look into the history and craftsmanship of mora clocks. It provides an in-depth look at the unique features of these clocks, as well as the reasons why they remain popular today. The book is a great resource for anyone interested in learning more about the history and craftsmanship of mora clocks.

Vivid Elegance: Transforming Spaces with Colored Glass Jars

Vivid Elegance is a unique home decor company that specializes in transforming spaces with colored glass jars. Their products are handcrafted with the highest quality materials and are designed to bring a touch of elegance and beauty to any room. From decorative vases to candle holders, Vivid Elegance has something for everyone. With their unique designs and vibrant colors, these glass jars are sure to add a touch of sophistication to any home. Whether you’re looking for a statement piece or something to add a subtle touch of color, Vivid Elegance has something for you.

How to Use Colored Glass Jars to Create a Vibrant and Elegant Home Decor

colored glass jars are a great way to add a vibrant and elegant touch to any home decor. Whether you’re looking to add a pop of color to a room or create a unique centerpiece, colored glass jars can be used in a variety of ways to create a beautiful and eye-catching display. Here are some tips on how to use colored glass jars to create a vibrant and elegant home decor.

First, consider the size and shape of the jars you’d like to use. colored glass jars come in a variety of sizes and shapes, so you can choose the ones that best fit your space and design. For a more subtle look, opt for smaller jars in muted colors. For a bolder look, choose larger jars in bright colors.

Next, decide how you’d like to display the jars. You can use them as a centerpiece on a table or shelf, or you can hang them from the ceiling or wall. If you’re hanging them, make sure to use the appropriate hardware and secure them properly.

Once you’ve chosen the jars and decided how to display them, it’s time to fill them. You can fill them with anything from flowers to candles to trinkets. If you’re using them as a centerpiece, consider adding a few small items to the jars to create a more interesting display.

Finally, consider adding a few finishing touches. You can wrap the jars in twine or ribbon, or add a few decorative accents such as beads or charms. You can also add a few drops of essential oils to the jars to create a pleasant scent.

By following these tips, you can easily create a vibrant and elegant home decor with colored glass jars. With a little creativity and imagination, you can create a unique and beautiful display that will be sure to impress your guests.

Crafting a Unique and Stylish Look with Colored Glass Jars and Vivid Elegance

Creating a unique and stylish look in your home can be achieved with the use of colored glass jars and vivid elegance. These two elements can be combined to create a stunning visual effect that will add a touch of sophistication to any room.

colored glass jars are a great way to add a splash of color to any room. They come in a variety of shapes and sizes, and can be used to store items such as spices, herbs, and other small items. The vibrant colors of the glass jars will add a unique and stylish look to any room.

Vivid elegance is another way to add a touch of sophistication to any room. This can be achieved by using bold colors and patterns in your decor. For example, you can use bright colors such as red, yellow, and blue to create a vibrant and eye-catching look. You can also use patterns such as stripes, polka dots, and floral designs to add a touch of elegance to any room.

When combining colored glass jars and vivid elegance, it is important to consider the overall look of the room. You should choose colors and patterns that complement each other and create a cohesive look. For example, if you are using a bright red glass jar, you may want to choose a patterned fabric in a similar shade of red to create a unified look.

By combining colored glass jars and vivid elegance, you can create a unique and stylish look in your home. This look will add a touch of sophistication to any room and will be sure to impress your guests.

Conclusion

Vivid Elegance is a unique and creative way to transform any space with colored glass jars. Not only do they provide a beautiful and eye-catching display, but they also offer a practical solution for storage and organization. With a wide variety of colors and sizes to choose from, Vivid Elegance is the perfect way to add a touch of elegance and style to any room.

Benefits of steel garage doors

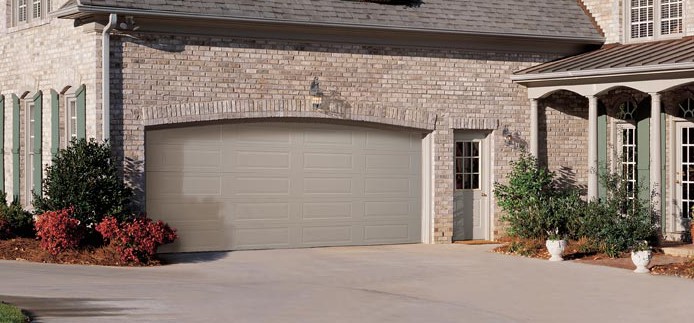
The garage is the most important part of your home – it’s where you keep your car, tools, and other valuables. It needs to be safe and secure. A steel garage door is the best in terms of durability and strength. We’ll tell you why.


A steel garage door is a type of garage door mostly made from steel. Steel is a very strong and durable material used for doors. Most of the time, steel garage doors are also insulated, which means they can help keep unwanted weather out, and unwanted cold air in.


A steel garage door is a great way to protect your garage from the elements. They are durable and secure and are a great investment for your new or old garage. To learn more about steel garage doors and their benefits,


You can install steel garage doors on your home or business by hiring a Miami garage door service. Dimark is a Miami company that can install any type of garage door you need.


Many consumers don’t realize that several different types of doors are available for their homes and buildings. One of the most common types of doors is a steel garage door.


This is a quality material: Over the years, the use of steel products in building construction has been increasing. The main reason for this is that steel is a very durable material that can give you a lot of benefits. For example, if you are looking for a material that can provide you with better security for your home, you will be glad to know that steel doors can provide you with the protection you need. 


Garage doors can be made from various quality materials, but steel is one of the most used by the best companies.


Secure: One of the main reasons steel doors are more secure than doors made of other materials is that they can be extremely thick and strong. Steel can provide you with many benefits when it comes to keeping your home protected. Not only will a steel door be able to protect your home from intruders, but it will also be able to protect it from other elements such as fire and weather. 


Steel garage doors are known for being a way to add more security to any place. F you need to make your home or business more secure, you can install a steel garage door. They can protect you from external damage. They are also very popular in hurricane areas. We always recommend steel garage doors.


They look good: You can find steel doors in different designs. Therefore, if you are looking for a door that will provide you with a beautiful design and a lot of security, you will be glad to know that steel doors can give you that and more. At Dimark, you can find beautiful models. Install a quality garage door that makes your house look amazing. Steel can be a strong material, but it also adds a modern style to any home or business.


Contact us today, and we will arrive at your home with the equipment to install steel garage doors. As a Miami company, they can install garage doors in all areas near Miami. You just need to book an appointment and tell us what model you need.

Paper Majesty: Creating a Construction Paper Wreath with Craft

Supplies

Welcome to Paper Majesty! In this tutorial, we will be creating a beautiful construction paper wreath with craft supplies. This project is perfect for any occasion, from birthdays to holidays. With just a few simple supplies, you can create a stunning wreath that will be the envy of all your friends. We will be using construction paper, scissors, glue, and other craft supplies to make this wreath. So let’s get started!

Step-by-Step Guide to Crafting a Beautiful Construction Paper Wreath with Paper Majesty

Introduction

Are you looking for a fun and creative way to spruce up your home for the holidays? Crafting a beautiful construction paper wreath is a great way to add a festive touch to your home. With a few simple materials and a bit of creativity, you can create a stunning wreath that will be the envy of your friends and family. In this step-by-step guide, we’ll show you how to craft a beautiful construction paper wreath with Paper Majesty.

Step 1: Gather Your Materials

Before you begin crafting your wreath, you’ll need to gather the necessary materials. You’ll need construction paper in a variety of colors, scissors, a glue stick, and a paper plate. You’ll also need a pencil and a ruler to help you measure and draw your wreath.

Step 2: Cut the Construction Paper

Once you have all of your materials, it’s time to start cutting the construction paper. Start by cutting the paper into strips that are 1 inch wide and 12 inches long. You’ll need to cut enough strips to cover the entire circumference of the paper plate.

Step 3: Glue the Strips to the Plate

Once you’ve cut all of the strips, it’s time to start gluing them to the paper plate. Start by gluing one end of the strip to the plate. Then, wrap the strip around the plate, gluing it as you go. Continue until the entire circumference of the plate is covered.

Step 4: Draw the Wreath

Once the plate is covered with strips, it’s time to draw the wreath. Start by drawing a circle in the center of the plate. Then, draw a series of concentric circles around the center circle. Make sure to leave enough space between each circle so that you can cut out the wreath shape.

Step 5: Cut Out the Wreath

Once you’ve drawn the wreath, it’s time to cut it out. Carefully cut along the lines you’ve drawn, making sure to cut through all of the construction paper strips. Once you’ve cut out the wreath, you can remove any excess paper.

Step 6: Add Decorative Elements

Now that you’ve cut out the wreath, it’s time to add some decorative elements. You can use construction paper to create flowers, leaves, and other shapes to add to your wreath. Glue the shapes onto the wreath to create a beautiful and unique design.

Conclusion

Creating a beautiful construction paper wreath with Paper Majesty is a fun and creative way to add a festive touch to your home. With a few simple materials and a bit of creativity, you can create a stunning wreath that will be the envy of your friends and family. Follow the steps outlined in this guide to craft your own beautiful construction paper wreath.

Get Creative with Paper Majesty: How to Make a Unique Construction Paper Wreath for Any Occasion

Creating a unique construction paper wreath is a great way to add a special touch to any occasion. Whether you’re looking to decorate for a holiday, a birthday, or just for fun, this craft is sure to make a statement. With a few simple supplies and a bit of creativity, you can make a beautiful wreath that will be the envy of all your friends.

To begin, you’ll need a few supplies. You’ll need construction paper in a variety of colors, scissors, a glue stick, and a paper plate. You can also use other materials such as ribbon, buttons, or sequins to add extra flair to your wreath.

Once you have all your supplies, it’s time to start crafting. Begin by cutting out several circles from the construction paper. The size of the circles will depend on the size of your wreath, so make sure to cut out enough circles to cover the entire plate.

Next, glue the circles onto the paper plate. Start by gluing the circles around the outer edge of the plate, then work your way inwards. Make sure to overlap the circles slightly to create a full, even wreath.

Once the circles are glued down, it’s time to add the extra details. You can use ribbon, buttons, or sequins to create a unique design. You can also use markers or paint to add extra color and texture.

Finally, cut a small hole in the center of the plate and thread a piece of ribbon through it. This will be used to hang the wreath.

Your construction paper wreath is now complete! Hang it up and enjoy your unique creation. With a few simple supplies and a bit of creativity, you can make a beautiful wreath that will be the perfect addition to any occasion.

Conclusion

Supplies

Paper Majesty: Creating a construction paper wreath with Craft Supplies is a great way to add a unique and creative touch to any home. With the right supplies and a little bit of creativity, anyone can make a beautiful and unique wreath that will be sure to impress. Not only is it a fun and creative activity, but it is also a great way to save money and recycle materials. With a few simple steps, anyone can create a beautiful and unique wreath that will be sure to be admired.

Paving Patterns: Mastering the Herringbone Design for Pavers

Paving patterns are an important part of any outdoor space. From driveways to patios, the right pattern can add a unique touch to your outdoor area. One of the most popular paving patterns is the herringbone design. This classic pattern is timeless and can be used in a variety of ways to create a stunning outdoor space. In this guide, we will explore the herringbone design and how to master it for your pavers. We will discuss the different types of herringbone patterns, the materials needed, and the installation process. With this guide, you will be able to create a beautiful herringbone design for your outdoor space.

How to Create a Beautiful Herringbone Paver Pattern for Your Outdoor Space

Creating a beautiful herringbone paver pattern for your outdoor space is a great way to add a unique and stylish touch to your landscape. This classic pattern is easy to install and can be used to create a stunning focal point in any outdoor area. Here are the steps to create a herringbone paver pattern for your outdoor space.

1. Measure and Mark the Area: Before you begin, measure the area where you want to install the herringbone pattern and mark it off with stakes and string. This will help you determine the size of the pavers you need and the amount of material you will need to complete the project.

2. Prepare the Base: Once you have marked off the area, you will need to prepare the base. This involves removing any existing vegetation, leveling the ground, and compacting the soil. You may also need to add a layer of gravel or sand to ensure the pavers are level and secure.

3. Lay the Pavers: Begin laying the pavers in the herringbone pattern, starting from the center and working your way out. Make sure to use a level to ensure the pavers are even and secure.

4. Fill in the Gaps: Once the pavers are laid, you will need to fill in the gaps between them with sand or gravel. This will help keep the pavers in place and prevent them from shifting.

5. Seal the Pavers: Finally, you will need to seal the pavers to protect them from the elements. This will help keep them looking great for years to come.

Creating a herringbone paver pattern for your outdoor space is a great way to add a unique and stylish touch to your landscape. With a little bit of planning and preparation, you can easily create a beautiful herringbone pattern that will last for years to come.

The Benefits of Installing a Herringbone Paver Pattern in Your Garden or Patio

Installing a herringbone paver pattern in your garden or patio can be a great way to add a unique and stylish touch to your outdoor space. This classic pattern is both aesthetically pleasing and highly functional, making it an ideal choice for any outdoor area. Here are some of the benefits of installing a herringbone paver pattern in your garden or patio.

First, a herringbone paver pattern is incredibly durable and long-lasting. The interlocking design of the pavers ensures that they are securely held in place, making them resistant to shifting and cracking. This makes them ideal for areas that experience heavy foot traffic or are exposed to extreme weather conditions.

Second, a herringbone paver pattern is easy to maintain. The pavers are designed to be resistant to staining and fading, so they will look great for years to come. Additionally, the pavers can be easily cleaned with a garden hose or pressure washer.

Third, a herringbone paver pattern is highly customizable. The pattern can be adjusted to fit any size or shape of outdoor space, and the pavers come in a variety of colors and textures. This allows you to create a unique and personalized look for your outdoor area.

Finally, a herringbone paver pattern is an affordable option. The pavers are relatively inexpensive compared to other types of outdoor flooring, making them a great choice for those on a budget.

Installing a herringbone paver pattern in your garden or patio is a great way to add a stylish and functional touch to your outdoor space. The pavers are durable, easy to maintain, highly customizable, and affordable, making them an ideal choice for any outdoor area.

Conclusion

The herringbone design for pavers is a timeless and classic look that can be used to create a beautiful and unique outdoor space. With the right materials and tools, anyone can master the herringbone design for pavers and create a stunning outdoor area. With a little bit of creativity and patience, you can create a beautiful and unique outdoor space that will last for years to come.

Felt Elegance: Creating Cozy and Chic Felt Pillows

Felt Elegance is a unique home decor company that specializes in creating cozy and chic felt pillows. Our pillows are handmade with the highest quality materials and are designed to bring a touch of elegance and comfort to any home. We believe that our pillows are the perfect way to add a touch of style and personality to any room. Our pillows come in a variety of colors, sizes, and shapes, so you can find the perfect one to fit your home decor. Whether you’re looking for a classic, modern, or vintage look, Felt Elegance has something for everyone. We strive to provide our customers with the highest quality products and the best customer service. We hope you enjoy our pillows as much as we do!

How to Make Your Own Felt Pillows for a Cozy and Chic Home Decor

Adding a few felt pillows to your home decor can be a great way to add a cozy and chic touch to any room. felt pillows are easy to make and can be customized to fit any style. Here is a step-by-step guide to creating your own felt pillows.

Materials Needed:

-Felt fabric

-Scissors

-Needle and thread

-Stuffing

-Ruler

-Pen or marker

Step 1: Measure and Cut the Felt

Measure the desired size of your pillow and cut two pieces of felt fabric to that size. Make sure the pieces are the same size and shape.

Step 2: Sew the Pieces Together

Using a needle and thread, sew the two pieces of felt together. Make sure to leave a small opening at the top of the pillow so you can stuff it.

Step 3: Stuff the Pillow

Stuff the pillow with stuffing until it is full and firm. Make sure to stuff it evenly so the pillow is not lumpy.

Step 4: Sew the Opening Closed

Once the pillow is stuffed, sew the opening closed. Make sure to sew it tightly so the stuffing does not come out.

Step 5: Add Embellishments

If desired, you can add embellishments to your pillow such as buttons, ribbons, or other decorations.

Your felt pillow is now complete! With a few simple steps, you can create a cozy and chic addition to your home decor.

Tips for Choosing the Right Felt Pillow for Your Home: Elegance and Comfort Combined

1. Consider the Size: When selecting a felt pillow for your home, it is important to consider the size of the pillow. Make sure that the pillow is not too large or too small for the space you have available.

2. Choose the Right Color: felt pillows come in a variety of colors, so it is important to choose one that will complement the existing décor in your home. Consider the colors of the furniture, walls, and other accessories in the room.

3. Consider the Quality: When selecting a felt pillow, it is important to consider the quality of the material. Look for a pillow that is made from high-quality felt that is soft and durable.

4. Consider the Design: felt pillows come in a variety of designs, so it is important to choose one that will fit in with the overall aesthetic of your home. Look for a design that is both elegant and comfortable.

5. Consider the Price: felt pillows come in a range of prices, so it is important to consider your budget when selecting one. Look for a pillow that is within your price range but still offers quality and comfort.

Conclusion

Felt Elegance is a great way to add a cozy and chic touch to any home. With a variety of colors and styles to choose from, you can easily find the perfect felt pillow to match your decor. Whether you’re looking for a unique accent piece or a functional piece of furniture, Felt Elegance has something for everyone. With its high-quality materials and craftsmanship, you can be sure that your felt pillow will last for years to come.

Glassy Creations: Unveiling the Magic of the Bindu Bottle Cutter

Glassy Creations is a unique and innovative company that specializes in creating beautiful glass art pieces using the bindu bottle cutter. This revolutionary tool allows users to easily and quickly transform ordinary glass bottles into stunning works of art. With the bindu bottle cutter, users can create intricate designs, shapes, and patterns that can be used to decorate any space. Glassy Creations offers a wide range of products and services, from custom-made glass art pieces to instructional videos and tutorials. With the help of the bindu bottle cutter, anyone can unleash their creativity and create beautiful glass art pieces that will last a lifetime.

How the Bindu Bottle Cutter is Revolutionizing the Art of Glass Blowing

The bindu bottle cutter is revolutionizing the art of glass blowing by providing a safe and efficient way to cut glass bottles. This innovative tool is designed to make the process of cutting glass bottles easier and more precise than ever before.

The bindu bottle cutter is a handheld device that uses a diamond-tipped blade to cut through glass bottles. It is designed to be used with a variety of different bottle sizes and shapes, allowing for a wide range of creative possibilities. The device is easy to use and requires minimal setup. It is also lightweight and portable, making it ideal for use in the studio or on the go.

The bindu bottle cutter is designed to provide a clean, precise cut every time. The diamond-tipped blade is designed to cut through glass quickly and evenly, without leaving any jagged edges or rough spots. This ensures that the glass pieces are ready for use in glass blowing projects without any additional preparation.

The bindu bottle cutter also features a safety guard to protect the user from the sharp edges of the glass. This guard is designed to keep the user’s hands away from the blade while cutting, reducing the risk of injury. The guard also helps to keep the glass pieces in place while cutting, ensuring that the pieces are cut accurately and evenly.

The bindu bottle cutter is an invaluable tool for glass blowers. It provides a safe and efficient way to cut glass bottles, allowing for a wide range of creative possibilities. This innovative device is revolutionizing the art of glass blowing, making it easier and more precise than ever before.

Exploring the Creative Possibilities of the Bindu Bottle Cutter: A Guide for Beginners

Welcome to the world of the bindu bottle cutter! This guide is designed to help beginners explore the creative possibilities of this amazing tool.

The bindu bottle cutter is a revolutionary tool that allows you to easily and safely cut glass bottles into a variety of shapes and sizes. With the bindu bottle cutter, you can create unique and beautiful pieces of art, jewelry, and other decorative items.

To get started, you will need to assemble the bindu bottle cutter. This is a simple process that requires no special tools or skills. Once the cutter is assembled, you will need to select a bottle to cut. The bindu bottle cutter is designed to work with most standard-sized glass bottles.

Once you have selected a bottle, you will need to measure and mark the desired cutting line. The bindu bottle cutter comes with a ruler and a marker to help you do this. Once the cutting line is marked, you will need to place the bottle in the cutter and secure it with the clamp.

Next, you will need to adjust the cutting wheel to the desired depth. The bindu bottle cutter comes with a depth gauge to help you do this. Once the cutting wheel is set, you will need to turn the handle to begin cutting the bottle.

Once the bottle is cut, you can use the bindu bottle cutter to sand and polish the edges. This will give your finished product a professional look.

Finally, you can use the bindu bottle cutter to create a variety of decorative items. You can use the cut pieces to make jewelry, wind chimes, ornaments, and more.

We hope this guide has helped you explore the creative possibilities of the bindu bottle cutter. With a little practice and patience, you can create beautiful and unique pieces of art.

Conclusion

Glassy Creations’ bindu bottle cutter is a revolutionary tool that has revolutionized the way glass bottles are cut and transformed into beautiful works of art. With its easy-to-use design and precision cutting capabilities, the bindu bottle cutter is a must-have for any glass artist looking to create stunning pieces of art. The bindu bottle cutter is a great addition to any glass artist’s toolkit and is sure to help them create beautiful and unique pieces of art.

Fencing Facts: Understanding How Much Fences Cost

Fencing is an important part of any home or business. It provides security, privacy, and can even add to the aesthetic of a property. But before you can decide on the perfect fence for your needs, you need to understand how much fences cost. This article will provide an overview of the factors that affect the cost of fencing, as well as some tips for getting the best deal. With this information, you’ll be able to make an informed decision about the type of fence that’s right for you.

Exploring the Different Factors That Impact the Cost of Fencing: A Comprehensive Guide

Fencing is a popular choice for many homeowners looking to add security and privacy to their property. However, the cost of fencing can vary greatly depending on a variety of factors. In this comprehensive guide, we will explore the different factors that can impact the cost of fencing, so you can make an informed decision when it comes to your fencing project.

Material: The type of material you choose for your fencing will have a major impact on the cost. Wood is typically the most affordable option, while metal and vinyl are more expensive. The cost of the material will also depend on the quality and size of the fencing.

Installation: The cost of installation will depend on the complexity of the project. If you are installing a simple fence, the cost will be lower than if you are installing a more complex fence with multiple gates and other features.

Labor: The cost of labor will depend on the size of the project and the complexity of the installation. If you are hiring a professional to install your fence, the cost of labor will be higher than if you are doing the installation yourself.

Location: The cost of fencing can also vary depending on the location. If you are installing a fence in an area with difficult terrain, the cost will be higher than if you are installing a fence in a flat area.

Permits: Depending on the location, you may need to obtain a permit for your fencing project. The cost of the permit will vary depending on the local regulations.

Maintenance: The cost of maintenance will depend on the type of material you choose for your fencing. Wood fences require more maintenance than metal or vinyl fences, so the cost of maintenance will be higher for wood fences.

By understanding the different factors that can impact the cost of fencing, you can make an informed decision when it comes to your fencing project. With the right information, you can ensure that you get the best value for your money.

Comparing the Costs of Different Types of Fences: What You Need to Know Before Making a Decision

Making the decision to install a fence around your property can be a difficult one. Not only do you need to consider the aesthetic appeal of the fence, but you also need to consider the cost. Different types of fences come with different price tags, so it is important to understand the costs associated with each type before making a decision.

Wooden fences are a popular choice for many homeowners. They are relatively inexpensive and can be customized to fit any budget. The cost of a wooden fence will depend on the type of wood used, the size of the fence, and the complexity of the installation. Generally, a wooden fence will cost between $1,000 and $4,000.

Vinyl fences are another popular option. They are more expensive than wooden fences, but they are also more durable and require less maintenance. The cost of a vinyl fence will depend on the size of the fence, the type of vinyl used, and the complexity of the installation. Generally, a vinyl fence will cost between $2,000 and $8,000.

Chain link fences are a great option for those looking for a low-cost solution. They are relatively easy to install and require minimal maintenance. The cost of a chain link fence will depend on the size of the fence, the type of chain link used, and the complexity of the installation. Generally, a chain link fence will cost between $500 and $2,000.

Aluminum fences are a great choice for those looking for a more decorative option. They are more expensive than chain link fences, but they are also more durable and require less maintenance. The cost of an aluminum fence will depend on the size of the fence, the type of aluminum used, and the complexity of the installation. Generally, an aluminum fence will cost between $2,000 and $6,000.

No matter which type of fence you choose, it is important to understand the costs associated with each type before making a decision. By doing your research and understanding the costs associated with each type of fence, you can make an informed decision that will best suit your needs and budget.

Conclusion

Fencing is an important part of any home or business, and understanding how much fences cost is essential for making an informed decision. Fencing costs vary depending on the type of fence, the size of the area, and the materials used. It is important to consider all of these factors when deciding on a fence for your property. With the right research and planning, you can find the perfect fence for your needs and budget.