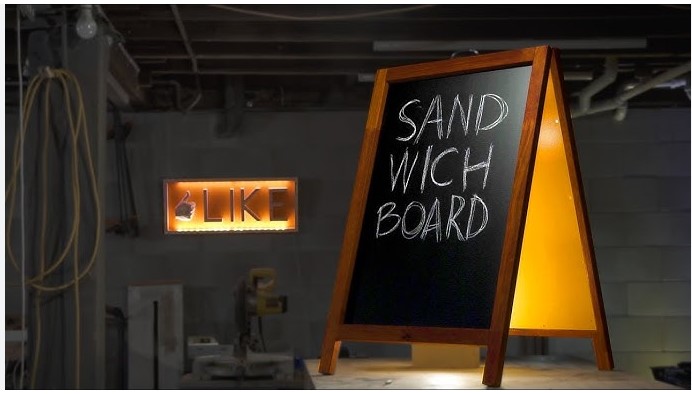
Chalkboard Charm: Crafting Your Own A-Frame Chalkboard Stand is a comprehensive guide to creating a unique and stylish chalkboard stand for your home or business. This guide will provide you with step-by-step instructions on how to build an A-frame chalkboard stand from scratch. You will learn how to select the right materials, assemble the frame, and finish the chalkboard stand with a professional look. With this guide, you will be able to create a beautiful and functional chalkboard stand that will be the perfect addition to any room.
DIY A-Frame Chalkboard Stand: A Step-by-Step Guide to Crafting Your Own Chalkboard Display
Are you looking for a fun and creative way to display your artwork, messages, or announcements? If so, then crafting your own A-Frame Chalkboard Stand is the perfect project for you! This easy-to-follow guide will provide you with all the steps necessary to create your own unique chalkboard display.
Materials Needed:
-Two pieces of wood, each measuring 24” x 36”
-One piece of wood, measuring 24” x 24”
-Four pieces of wood, each measuring 24” x 2”
-One piece of wood, measuring 24” x 4”
-Wood glue
-Screws
-Chalkboard paint
-Paintbrush
-Sandpaper
Step 1: Begin by cutting the two pieces of wood measuring 24” x 36” into two pieces measuring 24” x 18”. These will form the sides of your A-Frame Chalkboard Stand.
Step 2: Cut the 24” x 24” piece of wood into two pieces measuring 12” x 24”. These will form the top and bottom of your A-Frame Chalkboard Stand.
Step 3: Cut the four pieces of wood measuring 24” x 2” into four pieces measuring 12” x 2”. These will form the braces of your A-Frame Chalkboard Stand.
Step 4: Cut the 24” x 4” piece of wood into two pieces measuring 12” x 4”. These will form the legs of your A-Frame Chalkboard Stand.
Step 5: Using wood glue, attach the two 12” x 18” pieces of wood to the two 12” x 24” pieces of wood to form the sides and top/bottom of your A-Frame Chalkboard Stand.
Step 6: Attach the four 12” x 2” pieces of wood to the sides and top/bottom of your A-Frame Chalkboard Stand to form the braces.
Step 7: Attach the two 12” x 4” pieces of wood to the sides of your A-Frame Chalkboard Stand to form the legs.
Step 8: Using screws, secure all the pieces of wood together.
Step 9: Sand down the entire A-Frame Chalkboard Stand to ensure a smooth surface.
Step 10: Paint the entire A-Frame Chalkboard Stand with chalkboard paint. Allow the paint to dry completely before proceeding to the next step.
Step 11: Hang your A-Frame Chalkboard Stand and start displaying your artwork, messages, or announcements!
Congratulations! You have now successfully crafted your own A-Frame Chalkboard Stand. Enjoy your new chalkboard display and have fun creating unique and creative messages!
How to Create a Chalkboard A-Frame Stand for Your Home or Business: Tips and Tricks for Making a Professional-Looking Chalkboard Stand
Creating a professional-looking chalkboard A-frame stand for your home or business is a great way to add a unique and eye-catching element to your space. Whether you’re looking to advertise specials or just want to add a bit of personality to your décor, a chalkboard A-frame stand is a great way to do it. Here are some tips and tricks for making a professional-looking chalkboard A-frame stand for your home or business.
First, you’ll need to decide on the size of your chalkboard A-frame stand. You’ll want to make sure it’s large enough to fit the message you want to display, but not so large that it takes up too much space. Once you’ve decided on the size, you’ll need to purchase the necessary materials. You’ll need two pieces of wood for the frame, a piece of chalkboard material, and some screws and hinges.
Next, you’ll need to assemble the frame. Start by cutting the wood to the desired size and then screwing the pieces together. Once the frame is assembled, you’ll need to attach the chalkboard material to the frame. You can use either screws or nails to do this. Make sure the chalkboard material is securely attached to the frame before moving on to the next step.
Once the chalkboard material is attached, you’ll need to attach the hinges to the frame. This will allow the chalkboard to open and close. Make sure the hinges are securely attached and that the chalkboard can open and close without any difficulty.
Finally, you’ll need to attach the legs to the frame. This will give the chalkboard stand stability and make it easier to move around. Once the legs are attached, you’re ready to start writing on your chalkboard A-frame stand.
Creating a professional-looking chalkboard A-frame stand for your home or business is a great way to add a unique and eye-catching element to your space. With these tips and tricks, you’ll be able to make a professional-looking chalkboard A-frame stand that will last for years to come.
Conclusion
Chalkboard Charm: Crafting Your Own A-Frame Chalkboard Stand is a great way to add a unique and creative touch to any space. With a few simple materials and a bit of creativity, you can create a beautiful and functional chalkboard stand that will be the perfect addition to any home or office. Whether you’re looking for a fun way to display messages or just want to add a bit of charm to your space, this project is sure to be a hit.